
User manual
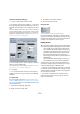
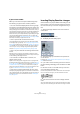
Table Of Contents
- Table of Contents
- Part I: Getting into the details
- About this manual
- VST Connections: Setting up input and output busses
- The Project window
- Playback and the Transport panel
- Recording
- Fades, crossfades and envelopes
- The Arranger track
- The Transpose functions
- The mixer
- Control Room (Cubase only)
- Audio effects
- VST Instruments and Instrument tracks
- Surround sound (Cubase only)
- Automation
- Audio processing and functions
- The Sample Editor
- The Audio Part Editor
- The Pool
- The MediaBay
- Working with Track Presets
- Track Quick Controls
- Remote controlling Cubase
- MIDI realtime parameters and effects
- Using MIDI devices
- MIDI processing and quantizing
- The MIDI editors
- Introduction
- Opening a MIDI editor
- The Key Editor - Overview
- Key Editor operations
- The In-Place Editor
- The Drum Editor - Overview
- Drum Editor operations
- Working with drum maps
- Using drum name lists
- The List Editor - Overview
- List Editor operations
- Working with System Exclusive messages
- Recording System Exclusive parameter changes
- Editing System Exclusive messages
- VST Expression
- The Logical Editor, Transformer and Input Transformer
- The Project Logical Editor
- Editing tempo and signature
- The Project Browser
- Export Audio Mixdown
- Synchronization
- Video
- ReWire
- File handling
- Customizing
- Key commands
- Part II: Score layout and printing
- How the Score Editor works
- The basics
- About this chapter
- Preparations
- Opening the Score Editor
- The project cursor
- Playing back and recording
- Page Mode
- Changing the Zoom factor
- The active staff
- Making page setup settings
- Designing your work space
- About the Score Editor context menus
- About dialogs in the Score Editor
- Setting key, clef and time signature
- Transposing instruments
- Printing from the Score Editor
- Exporting pages as image files
- Working order
- Force update
- Transcribing MIDI recordings
- Entering and editing notes
- About this chapter
- Score settings
- Note values and positions
- Adding and editing notes
- Selecting notes
- Moving notes
- Duplicating notes
- Cut, copy and paste
- Editing pitches of individual notes
- Changing the length of notes
- Splitting a note in two
- Working with the Display Quantize tool
- Split (piano) staves
- Strategies: Multiple staves
- Inserting and editing clefs, keys or time signatures
- Deleting notes
- Staff settings
- Polyphonic voicing
- About this chapter
- Background: Polyphonic voicing
- Setting up the voices
- Strategies: How many voices do I need?
- Entering notes into voices
- Checking which voice a note belongs to
- Moving notes between voices
- Handling rests
- Voices and Display Quantize
- Creating crossed voicings
- Automatic polyphonic voicing - Merge All Staves
- Converting voices to tracks - Extract Voices
- Additional note and rest formatting
- Working with symbols
- Working with chords
- Working with text
- Working with layouts
- Working with MusicXML
- Designing your score: additional techniques
- Scoring for drums
- Creating tablature
- The score and MIDI playback
- Tips and Tricks
- Index

508
Transcribing MIDI recordings
If you run into trouble
Below you can find a few simple troubleshooting steps
that will help you pinpoint other common problems:
• The note I recorded is displayed with the wrong length.
For example, I recorded a sixteenth and got a quarter note.
You probably have the wrong Display Quantize value set. Open the Score
Settings–Staff page. If Auto Quantize is activated, deactivate it, unless you
have mixed triplets and regular notes. Also check the Notes and Rests Dis-
play Quantize values. If the settings are too “coarse”, change them to a
smaller note value. If you for example need the program to display an eighth
note rest, Rests Display Quantize must be set to “8” or a smaller value
(please refer to the chapter “How the Score Editor works” on page 488). If
No Overlap is activated, you might want to turn it off.
• There is a pause after a note that I don’t want.
You probably added a note with the wrong note value. Either lengthen
the note (physically or graphically – see “Changing the length of notes”
on page 520) or delete the one you have (see “Deleting notes” on page
523) and add a new one with the correct note value. If this problem oc-
curs a lot in your score, try selecting a larger Rests Display Quantize
value (see “Using Rests as Display Quantize setting” on page 491).
• There is no pause after the note although there should
be one.
Either the note is too long (use Clean Lengths or change the current
note’s length), or Rests Display Quantize is set to too high a value. Open
the Score Settings–Staff page and lower it.
• The note has an accidental when it shouldn’t, or it
doesn’t when it should.
Maybe the note is simply of the wrong pitch? Click on it (using the Ob-
ject Selection tool) and look at the info line (if this is not shown, see “The
info line” on page 497). Move it to the correct pitch (see “Editing pitches
of individual notes” on page 519). If this is not the reason, maybe you
have the wrong key set? And finally, you can also use enharmonic shift-
ing (see “Accidentals and enharmonic shift” on page 542).
• Notes are not grouped under beams the way I want it.
Normally the program groups eighth notes, sixteenths etc. under beams.
This can be deactivated. There is also detailed control of which notes are
grouped under a beam. This is described in the section “Handling bea-
ming” on page 545.
Inserting Display Quantize changes
Some situations may require different staff settings on dif-
ferent sections of the track. The staff settings are valid for
the entire track, but you can insert changes wherever you
like:
1. Select the Display Quantize tool from the toolbar or
context menu.
The Display Quantize tool on the toolbar
2. The Display Quantize dialog opens.
3. Activate the flags you need and set the quantize val-
ues as desired.
For details, see “Display Quantize and interpretation Options” on page
526. Additional hints below.
4. If you want to restore the settings to the ones used on
the Score Settings–Staff page, click the Restore To Staff
button.
5. Move the mouse over the staff where you want to in-
sert a new Display Quantize value.
Use the mouse position box to find the exact location. The vertical posi-
tion is of no relevance as long as you click somewhere in the staff.
6. Click the mouse button to insert a Display Quantize
event.
The new quantize settings are now inserted into the staff at the position
where you clicked. The settings are valid until a new change is inserted.