
User manual

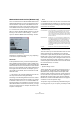

Table Of Contents
- Table of Contents
- Part I: Getting into the details
- About this manual
- VST Connections: Setting up input and output busses
- The Project window
- Playback and the Transport panel
- Recording
- Fades, crossfades and envelopes
- The Arranger track
- The Transpose functions
- The mixer
- Control Room (Cubase only)
- Audio effects
- VST Instruments and Instrument tracks
- Surround sound (Cubase only)
- Automation
- Audio processing and functions
- The Sample Editor
- The Audio Part Editor
- The Pool
- The MediaBay
- Working with Track Presets
- Track Quick Controls
- Remote controlling Cubase
- MIDI realtime parameters and effects
- Using MIDI devices
- MIDI processing and quantizing
- The MIDI editors
- Introduction
- Opening a MIDI editor
- The Key Editor - Overview
- Key Editor operations
- The In-Place Editor
- The Drum Editor - Overview
- Drum Editor operations
- Working with drum maps
- Using drum name lists
- The List Editor - Overview
- List Editor operations
- Working with System Exclusive messages
- Recording System Exclusive parameter changes
- Editing System Exclusive messages
- VST Expression
- The Logical Editor, Transformer and Input Transformer
- The Project Logical Editor
- Editing tempo and signature
- The Project Browser
- Export Audio Mixdown
- Synchronization
- Video
- ReWire
- File handling
- Customizing
- Key commands
- Part II: Score layout and printing
- How the Score Editor works
- The basics
- About this chapter
- Preparations
- Opening the Score Editor
- The project cursor
- Playing back and recording
- Page Mode
- Changing the Zoom factor
- The active staff
- Making page setup settings
- Designing your work space
- About the Score Editor context menus
- About dialogs in the Score Editor
- Setting key, clef and time signature
- Transposing instruments
- Printing from the Score Editor
- Exporting pages as image files
- Working order
- Force update
- Transcribing MIDI recordings
- Entering and editing notes
- About this chapter
- Score settings
- Note values and positions
- Adding and editing notes
- Selecting notes
- Moving notes
- Duplicating notes
- Cut, copy and paste
- Editing pitches of individual notes
- Changing the length of notes
- Splitting a note in two
- Working with the Display Quantize tool
- Split (piano) staves
- Strategies: Multiple staves
- Inserting and editing clefs, keys or time signatures
- Deleting notes
- Staff settings
- Polyphonic voicing
- About this chapter
- Background: Polyphonic voicing
- Setting up the voices
- Strategies: How many voices do I need?
- Entering notes into voices
- Checking which voice a note belongs to
- Moving notes between voices
- Handling rests
- Voices and Display Quantize
- Creating crossed voicings
- Automatic polyphonic voicing - Merge All Staves
- Converting voices to tracks - Extract Voices
- Additional note and rest formatting
- Working with symbols
- Working with chords
- Working with text
- Working with layouts
- Working with MusicXML
- Designing your score: additional techniques
- Scoring for drums
- Creating tablature
- The score and MIDI playback
- Tips and Tricks
- Index

424
Export Audio Mixdown
Wave files
Wave files have the extension “.wav” and are the most
common file format on the PC platform.
Wave files support the same options as AIFF files.
Wave 64 files (Cubase only)
Wave 64 is a proprietary format developed by Sonic
Foundry Inc. In terms of audio quality, Wave 64 files are
identical to standard wave files, but in the file headers
Wave 64 files use 64-bit values for addressing where wave
files use 32-bit values. The consequence of this is that
Wave 64 files can be considerably larger than standard
Wave files. Wave 64 is therefore a good file format choice
for really long recordings (file sizes over 2GB), e.g. live sur-
round recordings. Wave 64 files have the extension “.w64”.
Wave 64 files support the same options as AIFF files.
Broadcast Wave files
Concerning audio, Broadcast Wave files are the same as
regular Wave or Wave 64 files, but without compression.
To create a Broadcast Wave file, select either Wave or
Wave 64 as the file format and activate the Insert Broad-
cast Wave Chunk option. Click Edit if you wish to edit the
chunk information, otherwise the defaults as specified in the
Preferences (Record–Audio–Broadcast Wave page) will
be used. Broadcast Wave files have the extension “.wav”.
Broadcast Wave files support the same options as AIFF
files.
MPEG 1 Layer 3 files (Cubase only)
MPEG 1 Layer 3 files have the extension “.mp3”. By use of
advanced audio compression algorithms, mp3 files can be
made very small, yet maintaining good audio quality.
Apart from the Sample Rate and Bit Depth options, MPEG
1 Layer 3 files support the same settings as AIFF files in the
sections File Location, Audio Engine Output and Import into
project. The File Format settings are different, though.
For MPEG 1 Layer 3 files the following options are avail-
able in the File Format section:
Ogg Vorbis files
Ogg Vorbis is an open source, patent-free audio encoding
and streaming technology, offering compressed audio files
(extension “.ogg”) of small size, but with comparatively high
audio quality.
Apart from the Sample Rate and Bit Depth options, Ogg
Vorbis files support the same settings as AIFF files in the
sections File Location, Audio Engine Output and Import
into project.
In the File Format section you will find only one setting: the
Quality fader. The Ogg Vorbis encoder uses variable bit
rate encoding, and the Quality setting determines between
which limits the bit rate will vary. Generally speaking, the
higher the Quality setting, the higher the sound quality but
also the larger the files.
Other file formats
Steinberg also offers optional Dolby Digital (AC3) and
DTS encoders for export directly to AC3 or DTS format
(Cubase only). Please go to www.steinberg.net for more
information.
Option Description
Bit Rate fader By moving this fader, you can select a bit rate for the
mp3 file. As a rule, the higher the bit rate, the better the
audio quality and the larger the file. For stereo audio,
128kBit/s is often considered to result in “good” audio
quality.
Sample Rate
pop-up
On this pop-up menu you can select a Sample Rate for
the mp3 file.
High Quality
Mode option
When this is activated, the encoder will use a different
resampling mode, which can give better results de-
pending on your settings. In this mode, you cannot
specify the Sample Rate, but only the Bit Rate for the
mp3 file.
Insert ID3 Tag
option
This allows you to include ID3 Tag information in the
exported file.
Edit ID3 Tag
button
When you click this, the ID3 Tag dialog opens, in which
you can enter information about the file. This additional
information will be embedded as text strings in the file,
and can be displayed by most mp3 playback applica-
tions.