
User manual


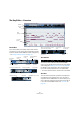
Table Of Contents
- Table of Contents
- Part I: Getting into the details
- About this manual
- VST Connections: Setting up input and output busses
- The Project window
- Playback and the Transport panel
- Recording
- Fades, crossfades and envelopes
- The Arranger track
- The Transpose functions
- The mixer
- Control Room (Cubase only)
- Audio effects
- VST Instruments and Instrument tracks
- Surround sound (Cubase only)
- Automation
- Audio processing and functions
- The Sample Editor
- The Audio Part Editor
- The Pool
- The MediaBay
- Working with Track Presets
- Track Quick Controls
- Remote controlling Cubase
- MIDI realtime parameters and effects
- Using MIDI devices
- MIDI processing and quantizing
- The MIDI editors
- Introduction
- Opening a MIDI editor
- The Key Editor - Overview
- Key Editor operations
- The In-Place Editor
- The Drum Editor - Overview
- Drum Editor operations
- Working with drum maps
- Using drum name lists
- The List Editor - Overview
- List Editor operations
- Working with System Exclusive messages
- Recording System Exclusive parameter changes
- Editing System Exclusive messages
- VST Expression
- The Logical Editor, Transformer and Input Transformer
- The Project Logical Editor
- Editing tempo and signature
- The Project Browser
- Export Audio Mixdown
- Synchronization
- Video
- ReWire
- File handling
- Customizing
- Key commands
- Part II: Score layout and printing
- How the Score Editor works
- The basics
- About this chapter
- Preparations
- Opening the Score Editor
- The project cursor
- Playing back and recording
- Page Mode
- Changing the Zoom factor
- The active staff
- Making page setup settings
- Designing your work space
- About the Score Editor context menus
- About dialogs in the Score Editor
- Setting key, clef and time signature
- Transposing instruments
- Printing from the Score Editor
- Exporting pages as image files
- Working order
- Force update
- Transcribing MIDI recordings
- Entering and editing notes
- About this chapter
- Score settings
- Note values and positions
- Adding and editing notes
- Selecting notes
- Moving notes
- Duplicating notes
- Cut, copy and paste
- Editing pitches of individual notes
- Changing the length of notes
- Splitting a note in two
- Working with the Display Quantize tool
- Split (piano) staves
- Strategies: Multiple staves
- Inserting and editing clefs, keys or time signatures
- Deleting notes
- Staff settings
- Polyphonic voicing
- About this chapter
- Background: Polyphonic voicing
- Setting up the voices
- Strategies: How many voices do I need?
- Entering notes into voices
- Checking which voice a note belongs to
- Moving notes between voices
- Handling rests
- Voices and Display Quantize
- Creating crossed voicings
- Automatic polyphonic voicing - Merge All Staves
- Converting voices to tracks - Extract Voices
- Additional note and rest formatting
- Working with symbols
- Working with chords
- Working with text
- Working with layouts
- Working with MusicXML
- Designing your score: additional techniques
- Scoring for drums
- Creating tablature
- The score and MIDI playback
- Tips and Tricks
- Index

338
The MIDI editors
Introduction
There are several ways to edit MIDI in Cubase. You can
use the tools and functions in the Project window for
large-scale editing, or the functions on the MIDI menu to
process MIDI parts in various ways (see “What is affected
by the MIDI functions?” on page 326). For hands-on
graphical editing of the contents of MIDI parts, you use the
MIDI editors:
• The Key Editor is the default MIDI editor, presenting
notes graphically in an intuitive piano roll-style grid.
The Key Editor also allows for detailed editing of non-note events such
as MIDI controllers. For more information, see “The Key Editor – Over-
view” on page 340.
• The Score Editor shows MIDI notes as a musical score
and comes with advanced tools and functions for notation,
layout and printing.
The Score Editor is described in detail in “Part II: Score layout and prin-
ting” on page 487.
• The Drum Editor is similar to the Key Editor, but takes
advantage of the fact that with drum parts, each key corre-
sponds to a separate drum sound.
This is the editor to use when you’re editing drum or percussion parts.
For more information, see “The Drum Editor – Overview” on page 358.
• The List Editor shows all events in the selected MIDI
parts as a list, allowing you to view and edit their properties
numerically. It also allows you to edit SysEx messages.
For more information, see “The List Editor – Overview” on page 365 and
“Working with System Exclusive messages” on page 368.
• The Edit In-Place function allows you to edit MIDI parts
directly in the Project window.
This is similar to working in the Key Editor, but makes it easier to edit MIDI
in context with other track types. See “The In-Place Editor” on page 356.
• You can also edit MIDI in the Project Browser.
Like the List Editor, the Project browser shows the events in a list and al-
lows you to perform numerical editing. However, you will probably find the
List Editor better suited for MIDI editing, since it has various dedicated fea-
tures and functions for this. The Project Browser is described in the chap-
ter “The Project Browser” on page 413.
Ö You can define each of the editors mentioned above
as your default MIDI editor, see below.
This chapter describes how to use all editors except the
Score Editor (which is described in detail in “Part II: Score
layout and printing” on page 487).
Please note that features that are identical in these editors
(especially in the Key and Drum Editors) will be described
in the Key Editor section. The sections about the Drum Ed-
itor (see “The Drum Editor – Overview” on page 358), the
In-Place Editor (see “The In-Place Editor” on page 356)
and the List Editor (see “The List Editor – Overview” on
page 365) describe the specific features of these editors
only.
Opening a MIDI editor
There are two ways to open a MIDI editor:
• Select one or several parts (or a MIDI track, with no parts
selected), pull down the MIDI menu and select Open Key
Editor, Open Score Editor, Open Drum Editor, Open List
Editor or Open In-Place Editor (or use the corresponding
key command).
The selected parts (or all parts on the track, if no part was selected) will
open in the chosen editor.
• Double-click a part to open it in the default editor.
Which editor opens depends on the Default Edit Action setting in the
Preferences (Event Display–MIDI page).
If the option “Edit as Drums when Drum Map is assigned”
is activated and a drum map is selected for the edited
track (see “Selecting a drum map for a track” on page
363), the Drum Editor will open. This way you can double-
click to open the Key Editor (or the Score Editor, List or In-
Place Editor, depending on your preferences) but drum
tracks will automatically open in the Drum Editor.
Ö If the part you open for editing is a shared copy, any ed-
iting you perform will affect all shared copies of this part.
Shared copies are created by pressing [Alt]/[Option]-[Shift] and drag-
ging, or by using the Repeat function with the “Shared copies” option
activated. In the Project window, shared copies are indicated by the part
name in italics and an icon in the bottom right corner of the part.