
User manual
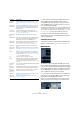

Table Of Contents
- Table of Contents
- Part I: Getting into the details
- About this manual
- VST Connections: Setting up input and output busses
- The Project window
- Playback and the Transport panel
- Recording
- Fades, crossfades and envelopes
- The Arranger track
- The Transpose functions
- The mixer
- Control Room (Cubase only)
- Audio effects
- VST Instruments and Instrument tracks
- Surround sound (Cubase only)
- Automation
- Audio processing and functions
- The Sample Editor
- The Audio Part Editor
- The Pool
- The MediaBay
- Working with Track Presets
- Track Quick Controls
- Remote controlling Cubase
- MIDI realtime parameters and effects
- Using MIDI devices
- MIDI processing and quantizing
- The MIDI editors
- Introduction
- Opening a MIDI editor
- The Key Editor - Overview
- Key Editor operations
- The In-Place Editor
- The Drum Editor - Overview
- Drum Editor operations
- Working with drum maps
- Using drum name lists
- The List Editor - Overview
- List Editor operations
- Working with System Exclusive messages
- Recording System Exclusive parameter changes
- Editing System Exclusive messages
- VST Expression
- The Logical Editor, Transformer and Input Transformer
- The Project Logical Editor
- Editing tempo and signature
- The Project Browser
- Export Audio Mixdown
- Synchronization
- Video
- ReWire
- File handling
- Customizing
- Key commands
- Part II: Score layout and printing
- How the Score Editor works
- The basics
- About this chapter
- Preparations
- Opening the Score Editor
- The project cursor
- Playing back and recording
- Page Mode
- Changing the Zoom factor
- The active staff
- Making page setup settings
- Designing your work space
- About the Score Editor context menus
- About dialogs in the Score Editor
- Setting key, clef and time signature
- Transposing instruments
- Printing from the Score Editor
- Exporting pages as image files
- Working order
- Force update
- Transcribing MIDI recordings
- Entering and editing notes
- About this chapter
- Score settings
- Note values and positions
- Adding and editing notes
- Selecting notes
- Moving notes
- Duplicating notes
- Cut, copy and paste
- Editing pitches of individual notes
- Changing the length of notes
- Splitting a note in two
- Working with the Display Quantize tool
- Split (piano) staves
- Strategies: Multiple staves
- Inserting and editing clefs, keys or time signatures
- Deleting notes
- Staff settings
- Polyphonic voicing
- About this chapter
- Background: Polyphonic voicing
- Setting up the voices
- Strategies: How many voices do I need?
- Entering notes into voices
- Checking which voice a note belongs to
- Moving notes between voices
- Handling rests
- Voices and Display Quantize
- Creating crossed voicings
- Automatic polyphonic voicing - Merge All Staves
- Converting voices to tracks - Extract Voices
- Additional note and rest formatting
- Working with symbols
- Working with chords
- Working with text
- Working with layouts
- Working with MusicXML
- Designing your score: additional techniques
- Scoring for drums
- Creating tablature
- The score and MIDI playback
- Tips and Tricks
- Index

307
MIDI realtime parameters and effects
Ö Note that the functionality of the Bank and Patch se-
lector settings (used for selecting sounds in the con-
nected MIDI instrument) depends on the instrument to
which the MIDI output is routed, and how you have set it
up in the MIDI Device Manager.
The MIDI Device Manager allows you to specify which MIDI instruments
and other devices are connected to the various MIDI outputs, thus mak-
ing it possible to select patches by name. See the chapter “Using MIDI
devices” on page 314 for details about the MIDI Device Manager.
Ö Many of the basic track settings are duplicated in
“mixer channel strip form” in the MIDI Fader section of the
Inspector (see below).
VST Expression section
This section is used when working with the VST Expression
features, see the chapter “VST Expression” on page 372.
MIDI Modifiers
The settings on this tab will affect the MIDI events on the
track in realtime during playback. They will also be in effect
if you play “live” with the track selected and record enabled
(provided that “MIDI Thru Active” is activated on the Prefe-
rences–MIDI page). This makes it possible to e.g. trans-
pose or adjust the velocity of your live playing.
Ö If you want to compare the result of your modifier set-
tings with the “unprocessed” MIDI, you can use the By-
pass button in the MIDI Modifiers section.
When this is activated, the MIDI Modifiers settings will be temporarily
disabled. A bypassed section is indicated by a yellow Bypass button.
Read/Write
buttons
Used for automating the track settings – see “Enabling
and disabling the writing of automation data” on page
189.
Open Device
Panels button
Cubase only: If the MIDI track is routed to a device with a
panel, clicking this button opens the respective panel.
For more information, see the separate PDF document
“MIDI Devices”.
Input trans-
former button
Opens the Input Transformer dialog, allowing you to
transform incoming MIDI events in realtime, see “The In-
put Transformer” on page 389.
Record enable
button
Activate this to make the track ready for recording.
Monitor button When this is activated (and the option “MIDI Thru Active”
is activated in the Preferences–MIDI page), incoming
MIDI will be routed to the selected MIDI output.
Toggle Time-
base button
Switches between musical (tempo related) and linear
(time related) time base for the track. See “Switching
between musical and linear time base” on page 40.
Lock button Activate this to disable all editing of all events on the
track.
Lane Display
Type button
Allows you to divide the tracks in lanes. For more about
lanes, see “Recording audio in Stacked mode” on page
77.
Volume Use this to adjust the level for the track. Changing this
setting will move the track’s fader in the mixer window,
and vice versa. See “Setting volume in the mixer” on page
117 for more about setting levels.
Pan Use this to adjust the panning of the track.
Delay This adjusts the playback timing of the MIDI track. Posi-
tive values delay the playback while negative values
cause the track to play earlier. The values are set in milli-
seconds.
In/Out/Chn
pop-ups
This is where you select MIDI input, MIDI output and MIDI
channel for the track.
Edit Instru-
ment button
If the MIDI track is routed to a VST instrument, clicking this
button opens the control panel for the VST instrument.
Bank and
Patch Selec-
tor pop-up
Allows you to select a sound, see below. (If no bank is
available, only the Patch selector is shown.)
Map pop-up Allows you to select a drum map for the track – see “Ma-
naging drum maps” on page 363.
Apply Track
Preset button
Allows you to apply a track preset, see “Applying track
presets” on page 290.
Parameter Description