
Quick Start
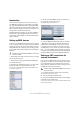
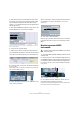
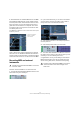


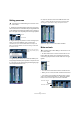
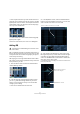
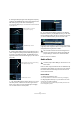


Table Of Contents
- English
- Table of Contents
- Introduction
- System requirements and installation
- Setting up your system
- Tutorial 1: Recording audio
- Tutorial 2: Editing audio
- Tutorial 3: Recording and editing MIDI
- Tutorial 4: Working with loops
- Tutorial 5: External MIDI instruments (Cubase only)
- Tutorial 6: Mixing and effects
- Tutorial 7: Surround production (Cubase only)
- Tutorial 8: Editing audio II - tempo and groove
- Tutorial 9: Media management
- Index
- Español
- Tabla de Contenidos
- Introducción
- Requisitos del sistema e instalación
- Configuración del sistema
- Tutorial 1: Grabación de audio
- Tutorial 2: Editar audio
- Tutorial 3: Grabar y editar MIDI
- Tutorial 4: Trabajar con loops
- Tutorial 5: Instrumentos MIDI externos (sólo Cubase)
- Tutorial 6: Mezclar y efectos
- Tutorial 7: Producción surround (sólo Cubase)
- Tutorial 8: Editar audio II - tempo y groove
- Tutorial 9: Gestión de medios
- Índice alfabético

55
Tutorial 6: Mixing and effects
Introduction
In this section we’ll draw from the last 5 tutorials and finally
get a mix ready with proper levels, EQs and effects. Auto-
mation will be added and then we’ll export the audio.
Setting levels
The first thing we want to do is to set the levels for our
project. This helps us get a preliminary balance of the mix
so we can add EQ and effects later.
1. Select the Mixer from the Devices menu.
The default key command for this is [F3].
2. Cubase only: Hide the input channels from view (we
won’t be using them anymore), by clicking the “Hide Input
Channels” button in the common panel to the left of the
Mixer.
3. Click the Play button on the Transport panel and listen
to your mix.
4. Move the faders for each track so that you can hear all
of the mix the way you like it.
5. If for any reason you need to get the fader back to 0dB
(the default setting), you can [Ctrl]/[Command]-click di-
rectly in the fader area.
6. You can also change the fader setting by double-
clicking in the “Channel Level” area and entering the level
manually.
7. Be careful when it comes to how loud you raise the
faders. Make sure you keep levels at a good volume so
that they are as loud as possible without clipping. You will
always know when you are clipping: when the “CLIP” indi-
cator lights up on the output channel. If it does, lower your
levels and click on “CLIP”. This will reset the warning light.
• That’s it for setting the levels. Let’s look at the panorama
next.
!
Load the project called “Mixing 1” found in the “Tuto-
rial 6” folder.
Channel meters
Channel fader
Channel Level
Peak Meter Value