
Plug-in Reference

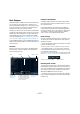
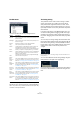

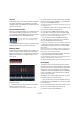
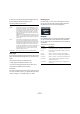
Table Of Contents
- Table of Contents
- The included effect plug-ins
- Introduction
- Delay plug-ins
- ModMachine (Cubase only)
- MonoDelay
- PingPongDelay
- StereoDelay
- Distortion plug-ins
- AmpSimulator
- DaTube
- Distortion
- SoftClipper (Cubase only)
- Dynamics plug-ins
- Compressor
- DeEsser (Cubase only)
- EnvelopeShaper (Cubase only)
- Expander (Cubase only)
- Gate
- Limiter
- Maximizer
- MIDI Gate
- MultibandCompressor (Cubase only)
- VintageCompressor (Cubase only)
- VSTDynamics
- EQ plug-ins
- GEQ-10/GEQ-30 (Cubase only)
- StudioEQ (Cubase only)
- Filter plug-ins
- DualFilter
- StepFilter
- ToneBooster
- Tonic - Analog Modeling Filter (Cubase only)
- WahWah
- Mastering - UV 22 HR
- Modulation plug-ins
- AutoPan
- Chorus
- Cloner (Cubase only)
- Flanger
- Metalizer
- Phaser
- Ringmodulator
- Rotary
- StudioChorus
- Tranceformer
- Tremolo
- Vibrato
- Other plug-ins
- Bitcrusher
- Chopper
- Octaver
- Tuner
- PitchShift - Pitch Correct
- Restoration plug-ins - Grungelizer
- Reverb plug-ins
- REVerence (Cubase only)
- RoomWorks
- RoomWorks SE
- Spatial plug-ins
- MonoToStereo
- StereoEnhancer
- Surround plug-ins (Cubase only)
- Mix6To2 (Cubase only)
- SurroundPan (Cubase only)
- Tools plug-ins
- MultiScope (Cubase only)
- SMPTEGenerator (Cubase only)
- TestGenerator (Cubase only)
- The included VST Instruments
- Introduction
- Prologue
- Sound parameters
- Modulation and controllers
- Spector (Cubase only)
- Sound parameters
- Modulation and controllers
- Mystic (Cubase only)
- Sound parameters
- Modulation and controllers
- HALionOne
- Groove Agent ONE
- LoopMash (Cubase only)
- Embracer - Surround Pad Synthesizer (Cubase only)
- Monologue - Monophonic Analog Modeling Synthesizer (Cubase only)
- Diagrams
- MIDI effects
- Index

95
MIDI effects
The Edit menu
This menu contains the following editing functions:
• You can set up key commands for the Insert options
and the Fill Loop command in the Key Commands dialog.
How to set up and use key commands is described in the chapter “Key
Commands” in the Operation Manual.
The Swing setting
This parameter can be used to create a swing or shuffle
rhythm, which allows you to add a more human feel to
drum patterns that might otherwise be too static. This is
done by offsetting every second drum step for a lane. If a
triplet step resolution is used, every third drum step will be
offset instead.
In the lower right section of the Beat Designer panel, you
can find two Swing sliders. Dragging a slider to the right
will delay every second (or third, see above) drum step in
the pattern. Dragging to the left will make them play a little
earlier.
You can set up two swing settings with these sliders and
then quickly switch between these during playback. By de-
fault, the first swing setting is used (activated) in all lanes,
but the slider is set to zero (middle position). Change the
setting for this slider to hear how the pattern’s feel
changes.
Drag the upper fader to set swing setting I and the lower fader to set
swing setting II.
You can switch between the two swing settings using the
Swing buttons to the right of the step display.
Click on the buttons to select the respective swing setting
or click on a selected button to deactivate swing for this
lane.
Option Description
Shift Left This moves all steps of the current pattern (all steps on all
lanes) to the left.
Shift Right This moves all steps of the current pattern (all steps on all
lanes) to the right.
Reverse Reverses the pattern, so that it plays backwards.
Copy
Pattern
This copies the pattern to the clipboard.
Copied patterns can be pasted into another pattern sub-
bank (see below), and even directly into the project.
The default key command for this is [Ctrl]/[Command]+[C].
Paste
Pattern
Allows you to paste a complete pattern, e.g. into another
pattern subbank, even into another instance of the Beat De-
signer. This is handy when you want to create variations
based on existing patterns.
The default key command for this is [Ctrl]/[Command]+[V].
Clear
Pattern
This resets the current pattern.
Insert
Pattern at
Cursor
This creates a MIDI part for the current pattern and inserts it
in the Project window, at the position of the project cursor.
See also “Converting patterns into MIDI parts” on page 97.
Insert
Subbank at
Cursor
This creates a number of MIDI parts (one for each used pat-
tern in the subbank) and inserts them one after the other,
starting at the project cursor. See also “Converting patterns
into MIDI parts” on page 97.
Insert Pat-
tern at Left
Locator
This creates a MIDI part for the current pattern and inserts it
in the Project window, at the left locator. See also “Convert-
ing patterns into MIDI parts” on page 97.
Insert
Subbank at
Left Locator
This creates a number of MIDI parts (one for each used pat-
tern in the subbank) and inserts them one after the other,
starting at the left locator. See also “Converting patterns
into MIDI parts” on page 97.
Fill Loop with
Pattern
This creates a MIDI part for the current pattern and inserts it
in the Project window as often as needed to fill the current
loop area (the space between the left and right locators).
See also “Converting patterns into MIDI parts” on page 97.