
Plug-in Reference
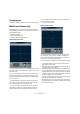
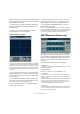


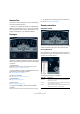
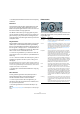
Table Of Contents
- Table of Contents
- The included effect plug-ins
- Introduction
- Delay plug-ins
- ModMachine (Cubase only)
- MonoDelay
- PingPongDelay
- StereoDelay
- Distortion plug-ins
- AmpSimulator
- DaTube
- Distortion
- SoftClipper (Cubase only)
- Dynamics plug-ins
- Compressor
- DeEsser (Cubase only)
- EnvelopeShaper (Cubase only)
- Expander (Cubase only)
- Gate
- Limiter
- Maximizer
- MIDI Gate
- MultibandCompressor (Cubase only)
- VintageCompressor (Cubase only)
- VSTDynamics
- EQ plug-ins
- GEQ-10/GEQ-30 (Cubase only)
- StudioEQ (Cubase only)
- Filter plug-ins
- DualFilter
- StepFilter
- ToneBooster
- Tonic - Analog Modeling Filter (Cubase only)
- WahWah
- Mastering - UV 22 HR
- Modulation plug-ins
- AutoPan
- Chorus
- Cloner (Cubase only)
- Flanger
- Metalizer
- Phaser
- Ringmodulator
- Rotary
- StudioChorus
- Tranceformer
- Tremolo
- Vibrato
- Other plug-ins
- Bitcrusher
- Chopper
- Octaver
- Tuner
- PitchShift - Pitch Correct
- Restoration plug-ins - Grungelizer
- Reverb plug-ins
- REVerence (Cubase only)
- RoomWorks
- RoomWorks SE
- Spatial plug-ins
- MonoToStereo
- StereoEnhancer
- Surround plug-ins (Cubase only)
- Mix6To2 (Cubase only)
- SurroundPan (Cubase only)
- Tools plug-ins
- MultiScope (Cubase only)
- SMPTEGenerator (Cubase only)
- TestGenerator (Cubase only)
- The included VST Instruments
- Introduction
- Prologue
- Sound parameters
- Modulation and controllers
- Spector (Cubase only)
- Sound parameters
- Modulation and controllers
- Mystic (Cubase only)
- Sound parameters
- Modulation and controllers
- HALionOne
- Groove Agent ONE
- LoopMash (Cubase only)
- Embracer - Surround Pad Synthesizer (Cubase only)
- Monologue - Monophonic Analog Modeling Synthesizer (Cubase only)
- Diagrams
- MIDI effects
- Index

45
The included effect plug-ins
• Current Time
When Link is on this shows the current position in Cubase. If Link is off it
shows the current time of the SMPTE Generator in “free run” mode. This
cannot be set manually.
• Framerate
This defaults to the frame rate set in the Project Setup dialog. If you wish
to generate time code in another frame rate than the Project is currently
set to (for example to stripe a tape), you can select another format on the
Framerate pop-up (provided that “Link” is off).
Note, however, that for the other device to synchronize correctly with
Cubase, the framerate has to be the same in the Project Setup dialog,
the SMPTE Generator and in the receiving device.
Example – Synchronizing a device to Cubase
Proceed as follows:
1. Connect the SMPTE Generator as an insert effect on
an audio channel, and route the output of that channel to a
separate output.
Make sure that no other insert or send effects are used on the time code
channel. You should also disable EQ, if this is active.
2. Connect the corresponding output on the audio hard-
ware to the time code input on the device you wish to syn-
chronize to Cubase.
Make all necessary settings in the other device, so that it is set to syn-
chronize to incoming timecode.
3. Adjust the level of the time code if needed, either in
Cubase or in the receiving device.
Activate Generate button (make the device send the SMPTE time code
in “free run” mode) to test the level.
4. Make sure that the frame rate in the receiving device
matches the frame rate set in the SMPTE Generator.
5. Activate the Link button.
The SMPTE Generator will now output time code that matches the posi-
tion of the Cubase Transport panel.
• Press Play on the Cubase Transport panel.
The other device is now synchronized and will follow any position
changes set with the Cubase transport controls.
Drag offset for display
If you want to enter an offset, click with the mouse into the
display and drag upwards or downwards to change the val-
ues. This enters a display offset – the current cursor posi-
tion will not be affected. In Generate mode this offsets the
Start Time, in Link mode it offsets the generated Timecode.
TestGenerator (Cubase only)
This utility allows you to generate an audio signal, which
can be recorded as an audio file. The resulting file can
then be used for a number of purposes:
• For testing the specifications of audio equipment.
• For measurements of various kinds, including calibrating tape
recorders.
• For testing signal processing methods.
• For educational purposes.
The TestGenerator is based on a waveform generator
which can generate a number of basic waveforms such as
sine and saw and various types of noise. In addition, you
can also set the frequency and amplitude of the generated
signal.
As soon as you add the TestGenerator as an effect to an
audio track and activate it, a signal is generated. You can
then activate recording as usual to record an audio file ac-
cording to the signal specifications:
Parameter Description
Waveforms By clicking these buttons, you select the basis for the
signal generated by the waveform generator. You can se-
lect between four basic waveforms: Sine, Square, Saw-
tooth and Triangle, or three types of noise (white, brown
and pink noise – from left to right).
Frequency This controls the frequency of the generated signal, from
1Hz to 20000Hz.
Gain This controls the amplitude of the signal. The higher the
value (up to 0dB) the stronger the signal.