
Plug-in Reference
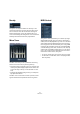

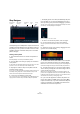
Table Of Contents
- Table of Contents
- The included effect plug-ins
- Introduction
- Delay plug-ins
- ModMachine (Cubase only)
- MonoDelay
- PingPongDelay
- StereoDelay
- Distortion plug-ins
- AmpSimulator
- DaTube
- Distortion
- SoftClipper (Cubase only)
- Dynamics plug-ins
- Compressor
- DeEsser (Cubase only)
- EnvelopeShaper (Cubase only)
- Expander (Cubase only)
- Gate
- Limiter
- Maximizer
- MIDI Gate
- MultibandCompressor (Cubase only)
- VintageCompressor (Cubase only)
- VSTDynamics
- EQ plug-ins
- GEQ-10/GEQ-30 (Cubase only)
- StudioEQ (Cubase only)
- Filter plug-ins
- DualFilter
- StepFilter
- ToneBooster
- Tonic - Analog Modeling Filter (Cubase only)
- WahWah
- Mastering - UV 22 HR
- Modulation plug-ins
- AutoPan
- Chorus
- Cloner (Cubase only)
- Flanger
- Metalizer
- Phaser
- Ringmodulator
- Rotary
- StudioChorus
- Tranceformer
- Tremolo
- Vibrato
- Other plug-ins
- Bitcrusher
- Chopper
- Octaver
- Tuner
- PitchShift - Pitch Correct
- Restoration plug-ins - Grungelizer
- Reverb plug-ins
- REVerence (Cubase only)
- RoomWorks
- RoomWorks SE
- Spatial plug-ins
- MonoToStereo
- StereoEnhancer
- Surround plug-ins (Cubase only)
- Mix6To2 (Cubase only)
- SurroundPan (Cubase only)
- Tools plug-ins
- MultiScope (Cubase only)
- SMPTEGenerator (Cubase only)
- TestGenerator (Cubase only)
- The included VST Instruments
- Introduction
- Prologue
- Sound parameters
- Modulation and controllers
- Spector (Cubase only)
- Sound parameters
- Modulation and controllers
- Mystic (Cubase only)
- Sound parameters
- Modulation and controllers
- HALionOne
- Groove Agent ONE
- LoopMash (Cubase only)
- Embracer - Surround Pad Synthesizer (Cubase only)
- Monologue - Monophonic Analog Modeling Synthesizer (Cubase only)
- Diagrams
- MIDI effects
- Index

109
MIDI effects
Adding controller curves
The Controller pop-up menu has two more items: two
controller types.
• You can select which two controller types (filter cutoff,
resonance, volume, etc.) should be available on the pop-
up menu by clicking the Setup button and selecting con-
trollers from the lists that appears.
This selection is global, i.e. it applies to all patterns.
• To insert controller information in a pattern, select the
desired controller from the pop-up menu and click in the
controller display to draw events.
The MIDI controller events will be sent out during playback along with the
notes.
Ö If you drag a controller event bar all the way down, no
controller value is sent out on that step.
Other pattern functions
The following functions make it easier to edit, manipulate
and manage patterns:
Automating pattern changes
You can create up to 200 different patterns in each Step
Designer – just select a new pattern and add notes and
controllers as described above.
Typically, you want the pattern selection to change during
the project. You can accomplish this by automating the
Pattern selector, either in real time by activating the Write
automation and switching patterns during playback or by
drawing in the automation subtrack for the Step Designer’s
MIDI track. Note that you can also press a key on your MIDI
keyboard to change patterns. For this, you have to set up
the Step Designer as an insert effect for a record enabled
MIDI track. Press C1 to select pattern 1, C#1 to select pat-
tern 2, D1 to select pattern 3, D#1 to select pattern 4 and
so on. If you want, you can record these pattern changes as
note events on a MIDI track. Proceed as follows:
1. Select the desired MIDI track or create a new one and
activate the Step Designer as an insert effect.
2. Set up several patterns as described above.
3. Press the Record button and press the desired keys
on your keyboard to select the corresponding patterns.
The pattern changes will be recorded on the MIDI track.
4. Stop recording and play back the MIDI track.
You will now hear the recorded pattern changes.
Ö This will only work for the first 92 patterns.
Function Description
Shift Octave
up/down
These buttons allow you to shift the entire pattern up or
down in octave steps.
Shift Steps
left/right
Moves the pattern one step to the left or right.
Reverse Reverses the pattern, so that it plays backwards.
Copy/Paste Allows you to copy the current pattern and paste it in an-
other pattern location (in the same Step Designer in-
stance or another).
Reset Clears the pattern, removing all notes and setting con-
troller values to default.
Randomize Generates a completely random pattern – useful for ex-
perimenting.
Swing The Swing parameter allows you to offset every second
step, creating a swing or shuffle feel. The value is a per-
centage – the higher you set this, the farther to the right
every even step is moved.
Presets Handling of Presets is described in the chapter “MIDI re-
altime settings” in the Operation manual. Note that a
stored Preset contains all 200 patterns in the Step De-
signer.