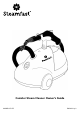
Canister Steam Cleaner Owner’s Guide MODEL SF-275 ENGLISH p.
IMPORTANT SAFETY INSTRUCTIONS This owner's guide and any additional inserts are considered part of the product. They contain important information about safety, use, and disposal. Before using the product, please familiarize yourself with all operating and safety instructions. Please keep all documents for future reference and pass these documents on, together with the product, to any future owner. See our website for the most current version of this owner’s guide.
15. To avoid burns from escaping steam when removing Boiler cap to refill unit: • Always allow unit to cool for 5-10 minutes. • Press and hold Steam Button to release all remaining steam pressure. 16. To reduce risk of contact with hot water emitting from Main Nozzle, check appliance before each use by positioning it away from body and turning it on. Do not operate unit if Main Nozzle is blocked. 17. Burns can occur from touching hot metal parts, hot water, or steam.
Product Information The following features and accessories are included with your Canister Steam Cleaner. Carefully inspect the packing material for all parts listed below. To obtain possible missing parts, refer to Product Support on Page 12 of this manual.
• The Lighted On/Off Switch (1) activates and deactivates the unit, and illuminates to provide a clear visual indication of whether the unit is powered on. • The Steam Ready Light (2) illuminates while the Boiler is heating, then turns off when the unit is ready to begin steaming. • The Storage Compartment (3) provides a convenient place to store small accessories; it also houses the Boiler cap. • The Boiler (4) is the internal reservoir in which water is stored and heated.
Assembling Your Canister Steam Cleaner STEAM MOPPING ACCESSORIES WARNING: Do not try to connect accessories while unit is emitting steam. EXTENSION WANDS 1. Select one of the Extension Wands, and align rear end of wand with Main Nozzle. Rectangular hole in wand should align with gray lock/release button on nozzle. 2. Press down on gray lock/release button. While continuing to hold button down, slide Extension Wand onto Main Nozzle (FIGURE 1-A).
MICROFIBER PADS 1. Lay one Microfiber Pad on flat surface, with two fastener strips facing upward. 2. Align Mop Head above Microfiber Pad. Make sure Mop Head is oriented with pad as shown, and centered as best as possible (FIGURE 3-A). 3. Press Mop Head firmly down onto Microfiber Pad. Fastener strips will adhere to pad grips on underside of Mop Head. Microfiber Pad should now be attached and ready for use (FIGURE 3-B). CAUTION: Use care when handling a recently used Microfiber Pad, as it may still be hot.
Assembling Your Canister Steam Cleaner STEAM CLEANING ACCESSORIES WARNING: Do not try to connect accessories while unit is emitting steam. STEAM JET NOZZLE / SQUEEGEE / TRIANGLE BRUSH 1. Select one of the three accessories (Steam Jet Nozzle, Squeegee or Triangle Brush – Steam Jet Nozzle shown as example), and align rear end of accessory with Main Nozzle. Rectangular hole in accessory should align with gray lock/release button on Main Nozzle. 2. Press down on gray lock/release button (FIGURE 4-A).
SCRUB PAD NOTE: Scrub Pad connects to the Steam Jet Nozzle, not the Main Nozzle. 1. Place Scrub Pad over tip of Steam Jet Nozzle, and firmly press it on to Steam Jet Nozzle as far as possible (FIGURE 6). This will help to prevent steam leakage. 2. To remove Scrub Pad, simply grip it firmly and pull it off of Steam Jet Nozzle. FIGURE 6 CARRY HANDLE 1. Insert Carry Handle into hole on top of unit. Align handle so that grip bracket faces towards front of unit (FIGURE 7). 2.
Using Your Canister Steam Cleaner FILLING BOILER 1. Place Canister Steam Cleaner on a flat, level surface. 2. Make sure Lighted On/Off Switch is set to “OFF” position and grounded power cord is unplugged from electrical outlet. 3. Flip Storage Compartment lid open, and cautiously unscrew and remove Boiler cap. 4. Drain any water remaining inside Boiler into a sink or tub. NOTE: Boiler should be emptied after each use – this will help minimize mineral build-up and prevent over-filling. 5.
GENERAL OPERATION NOTE: Be sure that Boiler has been filled and that all desired accessories are connected before following these steps. 1. For first time use, remove protective plastic cover from electrical plug. Plug power cord into a convenient electrical outlet. 2. Switch Lighted On/Off Switch to “ON” position. Steam Ready Light will immediately illuminate, indicating that unit is heating. 3.
Storage, Care & Product Support PROPER STORAGE Preparing your Canister Steam Cleaner for storage is quick and simple. When you have finished your steaming tasks, follow the steps listed below. 1. Set Lighted On/Off Switch to “OFF” position and unplug power cord from electrical outlet. 2. Allow unit to cool (at least 30 minutes for complete cooling). 3. Press and hold Steam Button to release all remaining steam pressure. 4. Remove all accessories from unit. 5.
Troubleshooting PROBLEM Unit fails to heat up. Lighted On/ Off Switch DOES NOT illuminate when set to “ON” position. Unit fails to heat up. Lighted On/ Off Switch DOES illuminate when set to “ON” position. Steam output is weak or intermittent. Excessive amount of water in steam. NOTE: Unit produces moist steam – it is normal for steam to contain some amount of water. POSSIBLE CAUSE SOLUTION Unit is not plugged in. Plug power cord into electrical outlet.
Warranty Information 1-YEAR LIMITED WARRANTY What is covered Steamfast, a division of Vornado Air, LLC (“Steamfast”).
or mail a completed application to Steamfast. Failure to register this Warranty within sixty (60) days following date of purchase will render this Warranty null and void. Warranty service For warranty service, call 1-800-711-6617 or email consumerservice@steamfast.com to obtain a Return Authorization (“RA”) form. Include the Product model number and serial number, as well as Buyer’s name, address, city, state, zip code and phone number when contacting Steamfast for warranty service.
review this product online www.steamfast.com/reviews Steamfast 1-800-711-6617 415 East 13th, Andover, KS 67002 www.steamfast.com consumerservice@steamfast.