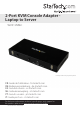
2-Port KVM Console Adapter Laptop to Server SV231USBLC *actual product may vary from photos FR: Guide de l’utilisateur - fr.startech.com DE: Bedienungsanleitung - de.startech.com ES: Guía del usuario - es.startech.com NL: Gebruiksaanwijzing - nl.startech.com PT: Guia do usuário - pt.startech.com IT: Guida per l’uso - it.startech.com For the latest information, technical specifications, and support for this product, please visit www.startech.com/SV231USBLC.
FCC Compliance Statement This equipment has been tested and found to comply with the limits for a Class B digital device, pursuant to part 15 of the FCC Rules. These limits are designed to provide reasonable protection against harmful interference in a residential installation. This equipment generates, uses and can radiate radio frequency energy and, if not installed and used in accordance with the instructions, may cause harmful interference to radio communications.
Table of Contents Introduction.............................................................................................1 Product diagram......................................................................................................................................... 1 Packaging contents................................................................................................................................... 2 System requirements.............................................................
Adjust the noise filters.............................................................................................................................. 10 Adjust the color brightness of the image.......................................................................................... 11 Adjust the color offset of the image.................................................................................................... 11 Take a screen shot..................................................................
Introduction This two-port USB KVM console adapter provides you with KVM control of your servers directly from your laptop computer, and provides a convenient way to run diagnostics, maintenance, and updates for small-scale server applications. The console adapter allows you to access servers located in small spaces or congested server racks, and is ideal in environments where a fixed-installation console server isn’t feasible.
Packaging contents • 1 x 2-port laptop-to-KVM console adapter • 2 x mounting brackets (mounting screws included) • 2 x 2-1 USB and VGA cables - 6 feet • 1 x USB A to Mini-B cable • 1 x USB software key • 1 x universal power adapter (NA/EU/UK/AU) • 1 x quick-start guide System requirements Laptop requirements • USB 2.0-enabled laptop • 20 MB of available storage drive space • 24-bit capable display • One of the following operating systems: • Windows® 7 (32-bit and 64-bit) • Windows 8.
About the KVM console adapter You must install the provided software on the laptop to be able to use the KVM console adapter. You don’t need to make any changes to the server(s) being controlled, and the adapter can be connected or disconnected at any time. You don’t need to start or shut down the software before you unplug the adapter. Install the software Windows Note: Complete the following steps before you connect the adapter. 1. Insert the provided USB software key into your laptop and run the setup.
Connect the adapter After you install the drivers and software for the adapter onto your laptop, you can plug the adapter into the server. • Connect the VGA cable and the USB cable to the desired server. For DVI-I (analog) computer systems, use a DVI to VGA adapter, for example, the StarTech.com DVIVGAMF (sold separately). About the LED indicators The adapter includes five LEDs: Two port activity LEDs, a server keyboard/mouse LED, a server VGA LED, and a console LED.
Mounting the adapter The adapter comes with mounting brackets and hardware that you can use to install the adapter in a server rack or mount the adapter to a wall. You can also place the adapter on a shelf in a server rack. Attach the mounting brackets 1. Line up one of the mounting brackets with the mounting holes on the side of the adapter so that the four holes in the mounting bracket are facing downward. 2. Use a screw and a screwdriver to attach the mounting bracket to the adapter. 3.
About the software toolbar A toolbar is displayed along the top edge of the main screen of the software. You can hide, detach, or drag the toolbar onto the other three edges of the screen. This toolbar includes a number of shortcuts and displays some status information. Most of the functions included in the toolbar are also available in the drop-down menus located across the top of the screen.
Toolbar shortcuts The following shortcuts are available in the toolbar: Icon Task Click to change the orientation of the toolbar to vertical or horizontal. Click to exit the pocket console application. Click to fine-tune the video picture. Click to open the video settings screen. Click to take a screen shot and save it as a .png, .jpg, or .bmp file. Click to record. Click to loop record. Click to play previously recorded videos. Click to pause the playback. Click to make a movie (.
Icon Task Click to open the special keys screen. If there’s an issue with the keyboard, a red X will appear on the icon. Indicates whether the USB or PS/2 keyboard emulation is active. Click to simulate pressing the Caps Lock button. If caps lock is turned on, the icon will be green. Click to simulate pressing the Num Lock button. If num lock is turned on, the icon will be green. Click to simulate pressing the Scroll Lock button. If scroll lock is turned on, the icon will be green.
The following are some things to note when using some of the options available in the Zoom menu: • This program doesn’t enlarge video, it only shrinks it. As such, text mode (720 x 480 or similar dimensions) won’t be enlarged to fill your screen. • The toolbar is automatically disabled when you select a zoom percentage below 50%. When you zoom out and return to a larger screen size, you need to manually enable the toolbar in the Toolbar menu. • Unusable parts of the window are displayed in grey.
Automatically fine tune the picture This option makes the picture sharper and reduces USB traffic. The picture will freeze for about one second while the calibration is performed. • On the Video menu, click Auto fine-tune picture. Adjust the position of the image 1. On the Video menu, click Settings. 2. In the Picture Positioning section, do one of the following: • Click the up, down, left, and right arrow buttons to move the picture.
By default, both filters are enabled and set to 1, but you can change these settings. 1. On the Video menu, click Settings. 2. In the Noise Filters section, do one of the following: • To adjust the noise level, move the Noise slider. • To adjust the flatness of the image, move the Flatness slider. • To save your changes, click Save. • To apply the default settings, click Defaults. Adjust the color brightness of the image 1. On the Video menu, click Settings. 2.
Record the current display You can select to capture the current display until you stop the recording or until the user-defined period is reached (functions only when the SV231USBLC is connected). You can also specify a destination folder where the recorded files are stored. 1. To start recording, on the Video menu, click Record. 2. Select a destination folder that the video will be saved to.
Note: 30 is the recommended playback frame rate for Windows and 60 is recommended for Mac and Linux systems. 4. To pause the video, on the Video menu, click Pause. The Playback, Pause, Make Movie, and File Transfer menu options are disabled while you’re recording. Make a movie with previously recorded videos You can create an .avi file from previously recorded or loop-recorded files. This option is available regardless of whether the SV231USBLC is connected or not. 1. To create an .
Set virtual keys You can view and select virtual keys and special key sequences on the Keyboard menu. 1. On the Keyboard menu, click More special keys. 2. On the Virtual Keys screen, do one of the following: • Select the check boxes for the keys that you want to set. • To reset to the default settings, click Reset. Use the hotkey feature Hot plugging simulates unplugging the USB cable and immediately reconnecting it, and completely resets the USB keyboard and mouse emulation.
Swap buttons on the emulated mouse You can swap the order of the buttons so that the left and right buttons are reversed. This setting is useful for people who control the mouse with their left hand. It’s not always clear how many swaps are needed and which layer is doing the swapping. As such, you should experiment with this option to achieve the settings that you want. • On the Mouse menu, click Swap buttons (for lefties). Select a captured mouse setting 1.
About the File Transfer menu File transfer works like a removable USB drive, but instead of a real drive, it creates a disk image on the host computer that stores the files. Only one computer at a time may access the image. Similar to what happens when you plug in a USB drive, when the disk image is created, the target computer can read and write to the disk image but the host computer can’t. The virtual USB drive can be used by any program or operating system without requiring special drivers.
Select a Help menu option • On the Help menu, do one of the following: • Click Online manual. • Click Get latest version. • Click License. • Click About. Troubleshooting None of the lights on the SV231USBLC are illuminated One of the possible causes of this issue is that the adapter isn’t receiving power from either of the USB connections. Try the following action: • Connect the device to other USB ports that you know are receiving power.
A red X appeared over the keyboard icon in the toolbar One of the possible causes of this issue is that the attached computer isn’t handling the emulated USB keyboard and/or mouse. The attached computer may be disconnected or powered down, or the operating system may be halted. If any of those things are occurring, the keyboard and mouse won’t work, as indicated by the red X.
Technical support StarTech.com’s lifetime technical support is an integral part of our commitment to provide industry-leading solutions. If you ever need help with your product, visit www.startech.com/support and access our comprehensive selection of online tools, documentation, and downloads. For the latest drivers/software, please visit www.startech.com/downloads Warranty information This product is backed by a two-year warranty. StarTech.
Hard-to-find made easy. At StarTech.com, that isn’t a slogan. It’s a promise. StarTech.com is your one-stop source for every connectivity part you need. From the latest technology to legacy products — and all the parts that bridge the old and new — we can help you find the parts that connect your solutions. We make it easy to locate the parts, and we quickly deliver them wherever they need to go. Just talk to one of our tech advisors or visit our website.