
Instruction manual

Instruction Manual
3
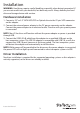
Installation
WARNING: Hard drives require careful handling, especially when being transported. If
you are not careful with your hard disk, lost data may result. Always handle your hard
drive and storage device with caution.
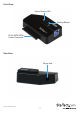
Hardware Installation
1. Connect a 2.5” or 3.5” SATA HDD/SSD or Optical drive to the 22-pin SATA connector
on the adapter.
2. Connect the external power adapter to the DC power connector on the adapter.
Connect the power adapter to an electrical outlet. The drive will spin up once power
is connected.
NOTE: Most 2.5in drives will function without the power adapter as power is provided
through USB.
3. Connect the USB 3.0 A-B cable from the adapter to an available USB port on the
host computer system. This USB 3.0 adapter is compatible with USB 2.0, so will also
connect to a USB 2.0 port, however at the lower speed. The host computer system
will detect the adapter and automatically install the driver.
NOTE: While power will be provided to the drive once the power adapter is connected,
the power LED will not light up until connected to a host computer system via USB.
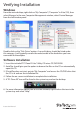
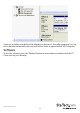
Driver Installation
No driver installation is required for the supported operating systems as this adapter is
natively supported, so the drivers are already installed.