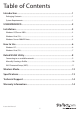
USB 802.11n Dual Band WiFi Adapter USB300WN2X2D *actual product may vary from photos DE: Bedienungsanleitung - de.startech.com FR: Guide de l'utilisateur - fr.startech.com ES: Guía del usuario - es.startech.com IT: Guida per l'uso - it.startech.com NL: Gebruiksaanwijzing - nl.startech.com PT: Guia do usuário - pt.startech.com For the most up-to-date information, please visit: www.startech.
FCC Compliance Statement This equipment has been tested and found to comply with the limits for a Class B digital device, pursuant to part 15 of the FCC Rules. These limits are designed to provide reasonable protection against harmful interference in a residential installation. This equipment generates, uses and can radiate radio frequency energy and, if not installed and used in accordance with the instructions, may cause harmful interference to radio communications.
Table of Contents Introduction.............................................................................................1 Packaging Contents.................................................................................................................................. 1 System Requirements............................................................................................................................... 1 USB300WN2X2D..........................................................................
Introduction The USB300WN2X2D dual-band Wireless-N USB Network Adapter allows a USBenabled computer to connect to a WiFi network on the 2.4GHz or 5GHz frequency. The adapter can be used for connecting to Wireless-A, B, G or N networks, and features dual 5dBi high gain antennas, as well as powered amplifiers to ensure optimized reception capable of supporting up to 300Mbps of data bandwidth over distances up to 3 times greater than a standard WiFi adapter.
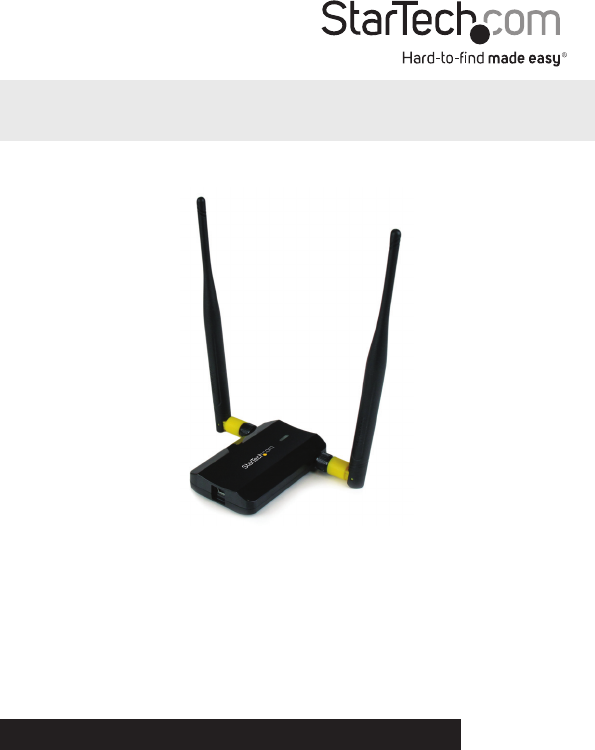
USB300WN2X2D 5dBi Dual Band antennas Link/Activity LED USB Mini-B Port (Host) Instruction Manual 2
Installation Windows XP/Server 2003 1. Upon starting Windows, before connecting the USB adapter, insert the included Driver CD into the computer’s CD/DVD drive. 2. AutoPlay should automatically launch the Driver/Software installation splash screen. If not, open “My Computer” then open the CD/DVD drive the Driver CD is inserted into and double-click the file Setup.exe. 3. Select the option to install the Drivers. This will launch the Driver Installation wizard. 4.
Windows Vista/7/8 1. Upon starting Windows, before connecting the USB adapter, insert the included Driver CD into the computer’s CD/DVD drive. 2. AutoPlay should automatically launch the Driver/ Software installation splash screen or prompt you to run Setup.exe. If not, open “Computer” then open the CD/ DVD drive the Driver CD is inserted into and double-click the file Setup.exe. 3. Select the option to install the Drivers. This will launch the Driver Installation wizard. 4.
Windows Server 2008 R2 Note: By default, the Microsoft “Wireless LAN Service” Feature is not installed. Before any wireless networking can be enabled, this feature must be installed through the Windows Server Manager window. Refer to Windows’ documentation for details.
How to Use Connecting to a wireless network can be done through the Windows wireless configuration utilities or the Ralink WLAN Utility (if installed). You must know the name of the wireless network (SSID), the type of security it is using (if any) and its associated password to connect to a wireless network. Consult the documentation for your wireless router/access point (AP) or contact your network administrator or the wireless router/AP manufacturer for details.
Windows Vista/7/8 The wireless network adapter will appear as a small icon in the System Tray (next to the clock). Left-clicking on this icon will bring up a list of detected wireless networks. Select the wireless network you wish to connect to and click the “Connect” button. If the network has security enabled, you will be prompted for a password.
Ralink WLAN Utility Instead of using the built-in Windows wireless utility, a 3rd party utility, Ralink WLAN Utility, can be used. This utility provides access to additional features of the wireless card, such as Wi-Fi Protected Setup (WPS). If the Ralink WLAN utility is installed, then a small icon will appear in the system tray area near the clock. Double-click the icon to open the utility window, or right-click on it to bring up the menu and select the ‘launch’ option.
Connecting to an available network: 1. To connect to a wireless network, bring up “Available Networks” from the main window. This will list all of the detected wireless networks in the area. 2. Once you locate the network you wish to connect to, select it from the list by click on the entry, then click the ‘Connect’ button. If this is a network that you will be connecting to often, then you may wish to create a persistent profile by clicking the “Add to Profile” button and following the prompts.
3. If the network uses encryption, a window will popup where you will need to enter the proper authentication information (i.e. password/passphrase). 4. Once successfully connected to the network, information about the wireless router/ access point will be listed in the main window and the “AP Information” section of the Available Networks window.
4. Select the type of Authentication/Encryption used by the network (if any). Click the ‘Next’ arrow button when ready. 5. If an Authentication type was specified, enter in the password/passphrase used to access the network. Click the ‘Next’ arrow button when ready. 6. Once the profile has been created, you must activate it for it to become the default profile. Select the profile and click the “Activate Profile” button.
Wireless Mode In the Advanced Settings window, accessible from the main interface window, you can select which wireless frequency range the dual band wireless adapter should use. You can select between 2.4GHz only, 5GHz only or 2.4 + 5 GHz.
Specifications Host Interface USB 2.0 Chipset ID Ralink RT3572L 1 x USB mini-B female Connectors 2 x RP-SMA female LEDs 1 x Link/Activity Antenna Configuration 2x2:2 (TxR:S) Wireless Frequency 2.4/5 GHz Supported Standards IEEE 802.11b, IEEE 802.11g, IEEE 802.11n Supported Security Schemes WEP, WPA, WPA2, TKIP/AES Operating Temperature 0°C ~ 60°C (32°F ~ 140°F) Storage Temperature -20°C ~ 70°C (-4°F ~ 158°F) Humidity 10% ~ 90% RH Dimensions 88.0mm x 56.0mm x 18.
Technical Support StarTech.com’s lifetime technical support is an integral part of our commitment to provide industry-leading solutions. If you ever need help with your product, visit www.startech.com/support and access our comprehensive selection of online tools, documentation, and downloads. For the latest drivers/software, please visit www.startech.com/downloads Warranty Information This product is backed by a two year warranty. In addition, StarTech.
Hard-to-find made easy. At StarTech.com, that isn’t a slogan. It’s a promise. StarTech.com is your one-stop source for every connectivity part you need. From the latest technology to legacy products — and all the parts that bridge the old and new — we can help you find the parts that connect your solutions. We make it easy to locate the parts, and we quickly deliver them wherever they need to go. Just talk to one of our tech advisors or visit our website.