
Instruction manual
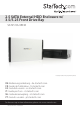


Instruction Manual
5
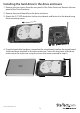
8. Connect one end of the SATA cable provided to the SATA port located on the rear
panel of the Drive Bay. Connect the remaining end of the SATA cable to an available
SATA connector as provided by the computer motherboard.
9. Once the Drive Bay has been installed in the computer, replace the side panels of
the computer casing (removed in step 3).
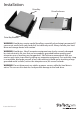
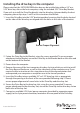
Connecting the Drive Enclosure - Removable storage
Once the Drive Bay has been installed in the computer, you can use the Drive Enclosure
as ejectable (removable) storage. Please note that when inserting or removing the
Drive Enclosure, the computer must be powered down in order to avoid data loss or
damage to the drive.
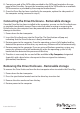
1. Power down the host computer
2. Insert the Drive Enclosure into the Drive Bay. The Eject button will pop out,
indicating that the Drive Enclosure is rmly connected.
3. Restore power to the computer. Once the operating system is fully loaded and has
detected the presence of the drive, any necessary software will install automatically,
4. Restore power to the computer. If you are using a Windows operating system, any
necessary software will install automatically, once the operating system is fully
loaded and has detected the presence of the drive,
5. The drive is now ready for use and will be available in My Computer, designated
(typically) with a drive letter subsequent to those assigned to stationary
(permanent) hard drives.
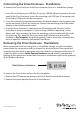
Removing the Drive Enclosure - Removable storage
To remove the Drive Enclosure from the host computer when inserted in the Drive Bay:
1. Power down the host computer
2. Press the eject button located next to the drive bay insertion slot
3. Remove the drive enclosure from the bay
4. Restore power to the computer