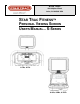
STAR TRAC 14410 Myford Road Irvine, CA 926060 USA STAR TRAC FITNESS™ PERSONAL VIEWING SCREEN USER'S MANUAL— S-SERIES S-TRx, S-TRc S-UBx, S-RBx, S-TBTx 620-7992 Rev 001
620-7992 Rev 001
TABLE OF CONTENTS Introduction .............................................................................................................................................. 4 Before You Get Started ............................................................................................................................ 5 Warnings and Cautions ........................................................................................................................... 6 Important Safety Precautions .........
INTRODUCTION Thank you for adding the STAR TRAC PERSONAL VIEWING SCREEN (PVS) to your Star Trac Purchase. The Personal Viewing Screen has been designed to provide the user with the most rewarding experience based upon the carefully planned features it possesses. The design elements of this Personal Viewing Screen will provide you with a comfortable, intuitive, safe and reliable experience, guiding you to a habit-forming lifestyle.
BEFORE YOU GET STARTED CHECK FACILITIES PREPAREDNESS For a proper installation, please read this guide thoroughly and follow the instructions. Star Trac’s goal is to help you have a successful and reliable installation, for this reason we have come up with some helpful tips and check list to accomplish this goal. EQUIPMENT LAYOUT Check to see that the equipment you will be adding the PVS to are placed where they will be used.
WARNINGS AND CAUTIONS This lighting flash with arrowhead symbol, within an equilateral triangle, is intended to alert the user to the presence of un-insulated “dangerous voltage” within the product’s enclosure that may be of sufficient magnitude to constitute a risk of electric shock to persons. This exclamation point within an equilateral triangle is intended to alert the user to the presence of important operating and maintenance (servicing) instruction in the literature accompanying the appliance.
IMPORTANT SAFETY PRECAUTIONS Electrical energy can perform many useful functions, but it can also cause personal injuries and property damage if improperly handled. This product has been engineered and manufactured with the highest priority on safety. But IMPROPER USE CAN RESULT IN POTENTIAL ELECTRICAL SHOCK OR FIRE HAZARD. In order to prevent potential danger, please read the following instructions when installing, operating and cleaning the product.
UNPACKING YOUR PERSONAL VIEWING SCREEN Inspect the shipping box for any parts that may be missing BEFORE discarding the box. Items can shift during transportation, and may be accidentally discarded with the box. If any parts are missing, please contact Star Trac Product Support at 800-503-1221. Have the serial number of the PVS, and a list of the missing parts ready so they may be shipped to you. The Personal Viewing Screen is shipped in one box separate from your exercise equipment.
PAL/SECAM Kit (Europe, Middle East) • PVS assembly with mounting bracket, cables, and display cap with grommet (There are 5 cables in the neck) • Center console keypad assembly Entertainment headphone jack and mount Hardware tool kit, including: • (3) M8 buttonhead screws • (3) 5/16 lock washer • (2) 5” tie straps • F-type to PAL/SECAM coaxial adapter • 5MM hex Allen key.
INSTALLING YOUR PVS ON THE S-UBx, S-RBx AND S-TBTx The Star Trac Personal Viewing Screen is different for each of your Star Trac S-Series Cardio products. Make sure you have the proper kit for the S-Series product you are installing. The S-UBx, S-RBx and S-TBTx will follow the same basic steps for installation. For the S-TR turn to appropriate section of this manual. STEP 1. Using a flat head screwdriver, remove the TV HOLE CAP, from the back of the display.
STEP 4. Replace the TV control pad: Polar Receiver TV Keypad Cable •Using a #2 Phillip screwdriver, fasten the TV con- trol pad with the (3) screws and install the wireless HR receiver back to the same location. •Plug in the TV keypad connector into JP5 •Plug in the interface control connector into JP4 •Plug in the power-in connector into JP7 •Plug in the power-out connector into JP6 Power-in Power-out Interface Control (5-Contacts) Headphone Plug Headphone Adaptor STEP 5.
STEP 7. Unpack the TV kit from the PVS package and pull out the (4) cables from the square hole on the neck bracket. (4) Cables STEP 8. Connect the (4) cables on the TV Kit with the (4) cables on the unit as shown: •Antenna cable (coaxial) •Power cable (2-Contacts) •Interface cable (5-Contacts) •Headphone cable (3-Contacts) Insert the connecters and wires through the neck hole into the tube. Tab STEP 9. Insert the TV bracket tab into the cable hole on the neck, and push in and upwards to align hole.
INSTALLING YOUR PVS ON THE S-TRc AND S-TRx STEP 1. Using a #2 Phillips screwdriver, remove the (19) screws that hold the back cover of the display. Next, remove the back cover and the upper cap cover with “Star Trac Logo” on it (You will no longer need this cap cover and, if desired, you can store it away for any possible future use). Retain all the screws for later use. Cap Back Cover Screws STEP 2. Take the PVS from its package and remove the bubble wrap.
Keypad cable STEP 4. Insert the keypad cable into the oblong hole of the console, and plug it into the board (as shown on the right figure). Plug in the Interface remote control cable (5contacts), power-in cable (2-contacts), and power -out cable (2-contacts) to each header as shown on the right figure. Power-in and power-out cables (2-contacts) Interface control cable (5-contacts) STEP 5.
INSTALLING THE POWER SUPPLY ON The S-TRx For the S-TRx Personal Viewing Screen kits (both PAL and NTSC), a power supply has to be installed on the treadmill. The following procedures will guide you through the power supply installation: Front Neck Shroud STEP 1. Using a #2 Phillips screwdriver, loosen the (2) screws that hold the front neck shroud in place (but, don’t take them off) and pull the neck shroud up as shown. (2) Screws Motor Shroud STEP 2.
STEP 4. Install the (2) T-Tap connectors (female) to the (2) AC-MCB blue and brown wires: • Locate one T-Tap connector on the blue wire about 100mm from the side of quickdisconnect connector as shown, and flip over to close the T-Tap connector. • Use a pair of pliers to crimp the T-Tap connector. (When fully connected you will hear a click). • Pliers T-Tap Connector Do the same thing for the brown wire. Female Connectors From PVS Neck STEP 5.
SETTING UP YOUR PERSONAL VIEWING SCREEN (NTSC / ATSC) Basic Operations Turning On / Off the Power Turning On Press the button on the control module, the unit will be turned on and you will be ready to use its features. Turning Off With the power on, press the button on the control module to turn off the unit. Note: • When selecting AV mode, the mode first. button can not work.
Adjusting Picture Menu Options Adjusting the Picture 1. Press VOL+, CH+ and number button [3] at the same time to display the main menu. 2. Press VOL+/- to select Picture menu, press CH- to access the menu. 3. Within the menu, press CH+/-, VOL- to navigate through the options or adjust an option. If the selected item has submenu, press VOL+ to access. 4. Press VOL+, CH+ and number button [3] at the same time to return to previous menu. Option Description Picture Mode Select a desired picture mode.
Adjusting Audio Menu Options Option Description Advanced Video Making use of Advanced Video sub-menu to adjust Noise Reduction, Adaptive Contrast and DCR. Noise Reduction: Select from Low/Middle/High to reduce noise in the picture, commonly called snow. Select Off to turn off this function. Adaptive Contrast: Select from Low/Middle/High to reduce noise in the picture detail and brightness. DCR: Select On to enhance the contrast ratio between light and dark areas of the picture.
Adjusting Audio Menu Options (Continued) Option Description Audio Mode Select a desired audio mode. You can select from Custom, Standard, Movie and News. Custom: Select for a customized sound mode. Standard: Select for normal program. Movie: Select for movie program. News: Select for news program. Bass Treble Balance Audio Source (Only for analog Programs) Adjusts Bass (low sounds). Adjusts Treble (high sounds). Adjust volume balance (left and right volume) Select a desired audio source.
Adjusting Setup Menu Options System Setup 1. Press VOL+, CH+ and number button [3] at the same time to display the main menu. 2. Press VOL+/- to select Picture menu, press CH- to access the menu. 3. Within the menu, press CH+/-, VOL- to navigate through the options or adjust an option. If the selected item has submenu, press VOL+ to access. 4. Press VOL+, CH+ and number button [3] at the same time to return to previous menu.
Adjusting Setup Menu Options (Continued) Option Description Transparency Select a desired menu transparency. Password Setting Used to set a new system password or to change an existing 4-digit system password. (default password is 0000). If you forget the password the unit provides a super password “2580”. Please DO NOT let your children know the super password. Parental Control Parental Control enables parents to prevent their children from watching inappropriate material on TV.
Adjusting Setup Menu Options (Continued) Option Description Parental Control (Continued) U.S. movie (MPAA) ratings U.S. TV ratings (age-based) None Movie is not rated. None TV is not rated. G General audiences. TV-Y All children PG Parental guidance suggested. TV-Y7 Suitable to children age 7 and older. TV-G General audience. PG-13 Suitable for children 13 and older. R Parental guidance is suggested for children under 17. NC-17 No suitable for children under 17.
Adjusting Setup Menu Options (Continued) Option Description Closed Caption Allows you to select feature On or Off On: Turns on the Closed Caption. Off: Turns off the Closed Caption. Analog Caption Allows you to select closed caption options. CC1, CC2, CC3, CC4: Displays a printed version of the dialog or sound effects of a program. (Should be set to CC1 for most programs.) TX1/TX2/TX3/TX4: Displays network/station information presented using either half or the whole screen (if available).
Adjusting Channel Menu Options Accessing the Channel Settings 1. Press VOL+, CH+ and number button [3] at the same time to display the main menu. 2. Press VOL+/- to select Picture menu, press CH- to access the menu. 3. Within the menu, press CH+/-, VOL- to navigate through a the options or adjust an option. If the selected item has submenu, press VOL+ to access. 4. Press VOL+, CH+ and number button [3] at the same time to return to previous menu.
Adjusting Channel Menu Options (Continued) Option Description Add On CH Search Select to manually search for channels that can not be memorized. 1. In Channel menu, select Add On CH Search item, press VOL+ to access. 2. During Add On CH search, your unit searches for digital channels first. When the digital channel search is complete, a confirmation box appears asking if you want to scan analog channels. Press OK or wait for some seconds to continue searching for analog channels.
SETTING UP YOUR PERSONAL VIEWING SCREEN (PAL) Basic Operations Turning On / Off the Power Turning On Press the button on the control module, the unit will be turned on and you will be ready to use its features. Turning Off With the power on, press the button on the control module to turn off the unit. Note: • When selecting AV mode, the ATV mode first. button can not work.
Adjusting Picture Menu Options Customizing the Picture 1. Press VOL+, CH+ and number button [3] at the same time and the main menu screen displays. 2. Press VOL+/- to select Picture menu, press CH- to access the menu. 3. Within the menu, press CH+/- to scroll through the page upward or downward, and press CH+/-, VOL+/to navigate through the options or adjust an option. 4. Press VOL+, CH+ and number button [3] at the same time to return to previous menu.
Adjusting Sound Menu Options Adjusting the Volume Using the volume buttons (VOL+ and VOL-) Press the VOL + or VOL- to increase or decrease the volume. Note: Once the unit switches to other input sources or loses the power, the unit will clear your customized volume setting and restore to default value(20). Adjusting Sound Mode 1. Press VOL+, CH+ and number button [3] at the same time and the main menu screen displays. 2. Press VOL+/- to select Sound menu, press CH- to access the menu. 3.
Adjusting Time Menu Options Time Zone Selection To obtain local time, you should first set the local time zone. Obtaining local time depends on whether your local station has broadcast time zone information. 1. Press VOL+, CH+ and number button [3] at the same time and the maintenance screen displays. 2. Press VOL+/- to select Time menu, press CH- to access. 3. Press CH+/- to select Time Zone item, and then press VOL+/- to select the appropriate one.
Adjusting Time Menu Options (Continued) Option Description Mode Select one source to be viewed through On timer. Program Number Select a broadcasting program for On timer. 6. When finished, use CH+/- to select Close item and press OK to confirm the setting 7. Press to switch the unit to standby mode. At the preset time, the unit will auto turn on and broadcast the preset program. Off Timer Setup With the Off Timer function On, the unit will automatically turn off at the preset time. 1.
Adjusting System Options Menu System Setup You may change system settings such as Language, Hearing impaired, Audio Preference etc. by making use of the Option menu. 1. Press VOL+, CH+ and number button [3] at the same time and the main menu screen displays. 2. Press VOL+/- to select Option menu, press CH- to access the menu. 3. Within the menu, press CH +/- to navigate through options, press VOL+/- to adjust an option. 4. Press VOL+, CH+ and number button [3] at the same time to return to previous menu.
Adjusting Lock Menu Options Password Setup The set Password sub-menu is used to set a new system password or to change an existing system password. By default, the system password is 0000 and you may change it. To access Parental Guidance, etc., the system password is required. To create a new password: 1. Press VOL+, CH+ and number button [3] at the same time and the main menu screen displays. Press VOL+/- to select Lock menu, press CH- to access the menu. 2. Now a password is required to input.
Adjusting Lock Menu Options (Continued) Lock Tuning Setup By making use of Lock Tuning you can protect some TV settings from being accidentally changed. 1. Navigate to the Lock menu and input the correct password to access. 2. Now the Lock Tuning item will be highlighted automatically. 3. Use VOL+/- to turn on or turn off the Lock Tuning. Once you turn on Lock Tuning, all items in Channel Menu can not be accessed by the user without the correct password.
Adjusting Channel Menu Options When you turn on the unit for the first time, you should perform an auto channel search to set up stations on your unit. Auto Channel Search You should perform an auto channel search to search for all channels available and stores them in memory, before you start Auto Tuning, it is necessary to select a country firstly. 1. Press VOL+, CH+ and the number [3] at the same time, the main menu screen should be displayed. 2.
Adjusting Channel Menu Options (Continued) Manual Searching for ATV programs If desired analog programs cannot be searched by Auto Tuning, you can make use of ATV Manual Tuning to search programs manually. 1. In Channel menu, press CH+/- to select ATV Manual Tuning item, then press VOL+ or OK to access. 2. Highlight Storage To item, press VOL+/- button to select a channel position in which you want to store. 3. Use CH+/- to select Search item, press VOL+/- to begin the manual ATV channel search.
Adjusting Channel Menu Options (Continued) Programme Edit If desired, you can use the Programme Edit feature to delete, name, move or skip a channel. In Channel menu, press CH+/- to select Programme Edit submenu. Once in the Programme Edit submenu, press VOL+ or OK to access. Next, press CH+/- to select item. Once the item is selected the following options are available: 1. DEL: • Press 1 to ”mark” selected item for deletion. • Press 1 again to delete the “marked” item.
FAQ’s AND TROUBLESHOOTING Your Star Trac Personal Viewing Screen is designed with little maintenance in mind and rarely should you experience a problem once it is installed. However, you may find the cleaning and troubleshooting information in this section useful. We will also explain how to replace the headphone jack when it no longer provides good audio quality. Cleaning the Personal Viewing Screen • • • Periodically dust the Personal Viewing Screen with a clean soft cloth.
Troubleshooting (Continued) Problem Possible Solution Poor TV reception • • • • Ghost in the picture • • • Missing TV Channels • • • Lost Password • Center console key• pad seems unresponsive • • “No Signal” displayed on screen. • • • Check the input signal cable, make sure it is in good shape and is connected snug to the RF input. Try a new channel; it may be the station is having difficulties. Check for local interference. Try adjusting the Sharpness in the PVS video setup.
Headphone Jack Replacement. When you are experiencing poor audio output from your PVS, you should check the entertainment headphone jack to see if it needs replacement. The headphone jack was designed for an easy and quick replacement. Before you begin, make sure your have the proper replacement part available. For the S-TR use part number 740-6014. For the S-TBTx, S-RBx, and S-UBx use part number 740-0012. For the S-TR Model: 1.
REGULATORY INFORMATION Radio Frequency Interference (RFI) Federal Communications Commission, Part 15 Warning: To prevent fire or electrical shock, do not expose this equipment to rain, moisture or excessive heat. The unit has been tested and found to comply with the limits for Part 15 of the FCC Rules. These limits are designed to provide reasonable protection against harmful interference when the equipment is operated in a commercial environment.
620-7992 Rev 001
620-7992 Rev 001
STAR TRAC 14410 Myford Road Irvine, California 92606 Telephone: (800) 228-6635, (714) 669-1660 Fax: (714) 508-3303 http://www.startrac.