D6-IN Pentium Pro PCI/ISA System Board Manual Document Number: 06-00286-01, Rev. 2A September 1996 221 Warren Ave.
Copyright Notices Copyright 1996 Micronics Computers, Inc. The information contained 2 D6-IN PCI/ISA system board manual has been carefully checked in the and is believed to be accurate. Micronics assumes no responsibility for any inaccuracies that may be contained in this document. Micronics makes no commitments to update or to keep the information in this manual at a current level when changes are made to the product.
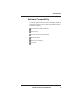
Table of Contents Introduction 5 Features Software Compatibility Before You Begin Chapter 1 - Quick Installation Installing the D6-IN Chapter 2 - Configuring the D6-IN Static Electricity Office Environment D6-IN System Board Jumper Settings Chapter 3 - Installing the D6-IN Introduction System Memory Support Installing the D6-IN Tools Required Equipment Required System Memory SIMMs Supported Upgrading Rules Mixing EDO and FPM Memory Memory Configurations Installing the SIMMs Removing SIMMs Installing a
Chapter 4 - The BIOS Setup Utility Configuration Initial Bootup Setup Running the Setup Procedure Setting the Main Screen Setting the Advanced Screen Security Screen Power Screen Boot Screen Exit Screen Appendix A - Technical Information 25 25 25 25 27 27 32 35 38 41 42 43 Specifications Environmental Specifications Temperature Range Relative Humidity Battery Disposal Technical Support Online Services 43 44 44 44 45 46 47 Appendix B - Post Messages 49 Appendix C - Beep and POST Codes 51 Appendix D
Appendix F - Warranties and Notices Limited Warranty FCC Statement Declaration of Conformity 59 59 61 62 Glossary 63 Index 67 D6-IN System Board Manual 3
List of Figures Figure 1.1: Power-Up Screen Figure 2.1: D6-IN System Board 10 12 Figure 3.1: Installing a 72-Pin SIMM Figure 3.2: Installing a PCI Card 21 23 Figure 3.3: Installing an ISA Peripheral Card Figure 4.1: Power-Up Screen 24 26 Figure 4.2: CMOS Main Screen Figure 4.3: IDE Device Submenu 27 30 Figure 4.4: Advanced Screen Figure 4.5: Security Setup Screen 32 35 Figure 4.6: Supervisor Password Submenu Figure 4.7: Power Screen 36 38 Figure 4.8: Boot Screen Figure 4.
Introduction Introduction Thank you for choosing the D6-IN system board. The high-performance D6-IN supports the most advanced Pentium Pro microprocessor technology for demanding workstation needs. Based on the Intel 440FX PCIset, the D6-IN provides the speed and performance necessary to address the most intensive computational applications. Enhanced PCI throughput, Mode 4 IDE and optional support of Universal Serial Bus (USB), make this board state-of-the-art.
Introduction Features The D6-IN includes the following features: Single ZIF socket 8 Intel Pentium Pro 150-200MHz Integrated Voltage Regulator Auto-detection of CPU voltage Intel 440FX PCI chipset Intel PIIX 3 SMC FDC37C93X Ultra I/O chip Four 32-bit PCI slots Three 16-bit ISA slots One is a shared PCI/ISA slot 16K Level 1 Write Back on the CPU chip 256K or 512K Level 2 cache in CPU Six 32/36-bit 72-pin SIMM sockets Support for up to 384MB of onboard system memory Supports FPM and EDO memory ECC support vi
Introduction Software Compatibility The D6-IN system board has been thoroughly tested for compatibility with a variety of operating systems and environments, including: Windows 95 and Windows NT OS/2 Warp SCO UNIX and Open Desktop Novell Netware MS-DOS 5.0 and 6.
Introduction Before You Begin This manual will familiarize you with the features, installation and use of your D6-IN. There are several symbols and conventions used throughout this manual to help draw your attention to a feature or to focus on important information: When you see the Magnifying Glass, it refers to something you should take a closer look at before proceeding further. When you see the Exclamation Mark, it gives important information on avoiding damage.
Chapter 1: Quick Installation Chapter 1 Quick Installation We know that many experienced people prefer to read as little of the documentation as possible. If this sounds like you, here’s the short form to get up and running quickly. Installing the D6-IN STATIC! Before handling the D6-IN, be properly grounded by using a special wrist or ankle strap, or touch a safely grounded object. 1. Make backup copies of your installation and configuration diskettes. 2.
Chapter 1: Quick Installation Figure 1.1: Power-Up Screen 9. Set the time and date. Adjust the BIOS settings to match your configuration. If installing an IDE drive, select the IDE device you wish to configure. Press ENTER with Autotype Fixed Disk selected and the BIOS will automatically configure the drive for you (refer to Chapter 4). 10. After you have configured the Main Setup menu, make any desired setting configurations in the Advanced and Security menu.
Chapter 2: Configuring the D6-IN Chapter 2 Configuring the D6-IN Although the D6-IN system board is packaged in protective materials, it is important to use care while unpacking and setting up. Static Electricity The D6-IN is shipped from the factory in an antistatic bag. To reduce the possibility of damage, it is important to neutralize any accumulated static charges on your body before handling the board. The best way to do this is to ground yourself using a special wrist or ankle strap.
Chapter 2: Configuring the D6-IN D6-IN System Board Figure 2.
Chapter 2: Configuring the D6-IN Jumper Settings This section gives you the jumper settings used for the D6-IN system board. Table 2-1: Jumper settings to select the speed of the CPU. CPU Speed W1 W2 W3 W4 W5 W6 150 MHz 60 x 2.5 Open Close Close Close Close Open 166 MHz 66 x 2.5 Open Close Close Close Open Close 180 MHz 60 x 3.0 Close Open Close Close Close Open 200 MHz 66 x 3.
Chapter 2: Configuring the D6-IN Table 2-3: Case and peripheral connections.
Chapter 3: Installing the D6-IN Chapter 3 Installing the D6-IN Introduction This chapter explains how to install the D6-IN system board, memory, CPU and peripherals. WARNING: Before installing or removing any peripherals or components, make sure you have a clear work space and that you adhere to all anti-static precautions described in Chapter 1. Micronics recommends only trained technicians install and configure the system board.
Chapter 3: Installing the D6-IN Installing the D6-IN Installation of the D6-IN system board depends on the type of case you use. The D6-IN is a Baby AT size system board and may be installed into most cases. NOTE: If you are unfamiliar with installing a system board, Micronics highly recommends that you read the computer user’s manual or contact your dealer’s technical support department.
Chapter 3: Installing the D6-IN System Memory System memory devices, commonly known as SIMMs, are necessary to operate the D6-IN system board. The D6-IN has six 32/36-bit SIMM sockets for a maximum of 384 Megabytes of RAM. In addition, support is provided for Extended Data Out (EDO) DRAM memory and Fast Page Mode (FPM) DRAM memory.
Chapter 3: Installing the D6-IN Mixing EDO and FPM Memory The D6-IN can handle a combination of EDO and FPM memory. The memory will default to the speed of the slowest RAM installed. Follow the rules below: Install the two types of memory in separate banks. (For example, install EDO memory in Bank 0 and FPM memory in Bank 1.) When installing SIMMs, fill Bank 0, then Bank 1, then Bank 2.
Chapter 3: Installing the D6-IN Memory Configurations There is no need to set any jumpers. When you reboot, the size and type of memory are automatically detected. The following tables list the most common memory configurations. The memory available depends on the number of SIMMs installed.
Chapter 3: Installing the D6-IN Memory Bank 0 Bank 1 Bank 2 80MB (2) 4MBx32/36 (2) 4MBx32/36 (2) 1MBx32/36 80MB (2) 8MBx32/36 (2) 1MBx32/36 (2) 1MBx32/36 80MB (2) 8MBx32/36 (2) 2MBx32/36 96MB (2) 8MBx32/36 (2) 2MBx32/36 (2) 2MBx32/36 96MB (2) 4MBx32/36 (2) 4MBx32/36 (2) 4MBx32/36 96MB (2) 8MBx32/36 (2) 4MBx32/36 128MB (2) 8MBx32/36 (2) 4MBx32/36 128MB (2) 8MBx32/36 (2) 8MBx32/36 128MB (2) 16MBx32/36 160MB (2) 8MBx32/36 (2) 8MBx32/36 (2) 4MBx32/36 160MB (2) 16MBx32/36
Chapter 3: Installing the D6-IN Installing the SIMMs To install the SIMMs, locate the memory banks on the system board and perform the following steps: 1. Hold the SIMM so that the notched edge is aligned with the notch on the SIMM socket (Figure 3-1). 2. Insert the SIMM at a 45 degree angle. 3. Gently push the SIMM into an upright position until it locks into place (past the release tabs). Figure 3-1: Installing a 72-Pin SIMM Removing SIMMs To remove SIMMs, follow the steps below: 1.
Chapter 3: Installing the D6-IN Installing a CPU The D6-IN is designed to support a variety of Pentium Pro processors. Follow the steps below to install a processor: 1. Turn off the computer and remove its cover. 2. Locate the ZIF socket illustrated in Figure 2-1. 3. Lift the lever of the socket. 4. Locate pin 1 on the processor and pin 1 on the socket (refer to Figure 2-1). Gently place the processor into the socket, making sure pin 1 on the processor and pin 1 on the socket are aligned. 5.
Chapter 3: Installing the D6-IN Installing a PCI Peripheral Card Micronics PCI slots accommodate all PCI peripherals that meet the PCI 2.1 specifications. Follow the steps below to install a PCI card: 1. Turn the computer system off and remove its cover. 2. Choose an unused PCI slot and remove the slot cover. 3. Insert the card with the bottom edge level to the slot. Never insert the card at an angle. 4. Carefully push the card straight down, making sure the card is fully inserted. 5.
Chapter 3: Installing the D6-IN Installing an ISA Peripheral Card Micronics ISA slots accommodate all standard ISA peripherals. Follow the steps below to install a PCI card: 1. Turn the computer system off and remove its cover. 2. Choose an unused ISA slot and remove the slot cover. 3. Insert the card with the bottom edge level to the slot. Never insert the card at an angle. 4. Carefully push the card straight down, making sure the card is inserted fully. 5.
Chapter 4: The BIOS Setup Utility Chapter 4 The BIOS Setup Utility Configuration After the D6-IN system board and all hardware is installed, the system is ready for configuration. Before turning on the computer, make sure all cables are correctly connected and all jumpers are correctly set. It is recommended you keep the computer cover off the first time you boot the system. This will make it easier to correct any difficulties that might arise. Initial Boot Up Power up the D6-IN.
Chapter 4: The BIOS Setup Utility After the system is turned on and goes through a memory test, the Power-Up screen (Figure 4-1) will appear on your monitor: Figure 4-1: Power-Up Screen When “Press to enter SETUP” appears at the bottom of the screen, press the key to begin the Setup procedure. The CMOS Main Screen (Figure 4-2) should appear and the prompt should be on the time line. The Setup procedure can only be activated during the boot sequence.
Chapter 4: The BIOS Setup Utility Running the Setup Procedure The D6-IN system board has six primary CMOS configuration screens: Main Screen, Advanced Screen, Security Screen, Power Screen, Boot Screen and Exit Screen. To toggle between the screens, press the right arrow <→> and the left arrow < ←> keys. Setting the Main Screen The CMOS Main screen (Figure 4-2) is used to set the time and date, to set the floppy drive types, to configure the hard disks and to configure the video.
Chapter 4: The BIOS Setup Utility System Time and Date To set the time, use the <-> key to decrease the number and the <+> key to increase the number. To move the prompt forward, use the key; to move the prompt backward, use the key. To set the date, use the up and down arrows<↑/↓> to highlight the System Date and follow the same procedure used to set the time.
Chapter 4: The BIOS Setup Utility execution. Choosing Shadowed & Cached caches the shadowed video BIOS for even higher performance. To disable the Video BIOS category, select Disabled. System BIOS This option allows you to shadow or shadow & cache the system BIOS. External Cache This selection allows you to enable or disable the external memory cache. For optimal performance, select Enable (default). System Memory The System Memory category identifies the size of the base memory. It cannot be changed.
Chapter 4: The BIOS Setup Utility Figure 4-3: IDE Device Submenu Autotype Fixed Disk The easiest way to set your IDE devices is to let the BIOS do it for you. When the IDE Device submenu first appears, the Autotype Fixed Disk selection is highlighted. Simply press ENTER and the remaining information is entered automatically. Do not adjust the rest of the settings unless absolutely necessary. The BIOS automatically enters the optimal settings.
Chapter 4: The BIOS Setup Utility came with your system. If not, contact your dealer or the hard drive manufacturer to fill in this category. If you are using a SCSI hard drive, select None and refer to the documentation which came with the SCSI adapter. Multiple-Sector Transfers This category determines the number of sectors per block for multiple sector transfers. The options are Disabled (default), 2 Sectors, 4 Sectors, 8 Sectors and 16 Sectors.
Chapter 4: The BIOS Setup Utility Setting the Advanced Screen To move to the Advanced screen, use the left and right arrow keys <←/→> keys until you see the screen below. Figure 4-4: Advanced Screen Serial Port A Serial Port A may be set for Auto (default), COM1, COM2, COM3, COM4 or Disabled. Serial Port B Serial Port B may be set for Auto (default), COM1, COM2, COM3, COM4 or Disabled. Serial Port B Mode Serial Port B Mode may be set for COM Port (default), IrDA or ASK-IR.
Chapter 4: The BIOS Setup Utility Parallel Port The parallel port may be set for Auto (default), LPT1, LPT2 or may be disabled. Parallel Port Mode The parallel port may be set for output mode (AT) (default), bidirectional mode (PS/2) and Extended Capabilities Port (ECP). Diskette Controller The floppy disk controller may be enabled or disabled. Integrated PCI IDE Enables the integrated Local Bus IDE adapter.
Chapter 4: The BIOS Setup Utility Large Disk Access Mode If you are using a DOS operating system (MS-DOS, DRDOS, or PC-DOS), set to DOS (default). If you are using anything else, set to OTHER. DRAM Type The DRAM type can be set for Non-Parity (default), Parity or ECC. Selecting ECC will detect the parity error and allow the system to correct the error.
Chapter 4: The BIOS Setup Utility Security Screen The Security screen (Figure 4-5) controls access to the computer. The security screen allows for settings of two passwords. The Supervisor Password allows access to the system and Setup. The User Password allows access to the system, but not to all Setup features. Figure 4-5: Security Setup Screen Supervisor Password If a Supervisor Password is set up for the system, it reads Enabled. If the password is not set up, it reads Disabled (default).
Chapter 4: The BIOS Setup Utility Set Supervisor Password Press the ENTER key to enter the Supervisor Password submenu. Figure 4-6: Supervisor Password Submenu Type the password and press the ENTER key. Retype the password and press the ENTER key again. Write down the password somewhere safe so it will not be forgotten. The password may be disabled by setting the new password to nothing (pressing the ENTER key without first typing a password).
Chapter 4: The BIOS Setup Utility Password on Boot When enabled, the system requires a password upon power-up. Either the Supervisor or User Password may be entered. The default setting is Disabled. Diskette Access This selection allows floppy disk access with an option of the supervisor or user. Selecting Supervisor gives floppy disk access to the supervisor only. Selecting User (default) gives floppy disk access to both the user and the supervisor.
Chapter 4: The BIOS Setup Utility Power Screen The Power Screen controls the power management functions of the system. To move to the Power Screen, use the left and right arrow <←/→> keys until it appears (Figure 4-7). To move between the categories, use the up and down arrow keys <↑/↓>. Figure 4-7: Power Screen APM When enabled the power management features are active. The default setting is Disabled. If you enable this selection, you must also set the other power management options.
Chapter 4: The BIOS Setup Utility Maximum, Medium or Minimum power savings, you do not need to make any more adjustments. If you select Customized, you must set the following five categories. Standby Timeout The Standby Timeout category sets the amount of time that elapses for the system to enter the power saving mode. The options are Disabled (default), 2 min., 15 min., 30 min., 60 min., 2 hr., 3 hr. or 4 hr. Before making changes, "Customized" must be selected in the Power Management Mode category.
Chapter 4: The BIOS Setup Utility NOTE: Do not enable this category unless your IDE drive supports spin-down mode. CRT Selecting ON (default) powers down the display while the system is in power saving mode. Before making changes, “Customized” must be selected in the Power Management Mode category. Mouse Wakeup Event This selection causes the system to "wakeup" from a power savings mode if the mouse is moved or a button is pressed. The selections are PS/2 (IRQ12), COM1 (IRQ4), COM2 (IRQ3) or Disabled.
Chapter 4: The BIOS Setup Utility Boot Screen The Boot screen allows you to configure the power-up system configuration settings. Figure 4-8: Boot Screen Boot Sequence This selection will read the diskette drive (default) and the hard drive in sequence on boot. Setup Prompt If this selection is enabled, the message "Press F2 to enter Setup" is displayed on boot. The default setting is Enabled.
Chapter 4: The BIOS Setup Utility Floppy Check This selection checks for the existence of a floppy drive. The default setting is Enabled. Numlock This selection activates Numlock upon boot. Setting this to Auto (default) activates Numlock if the BIOS detects a numeric keyboard. It may also be turned ON or OFF. Exit Screen After you complete configuring the BIOS, select the Exit screen. Figure 4-9: Exit Screen Choose “Save Changes and Exit” and reboot the computer. Your computer is ready for use.
Appendix A: Technical Information Appendix A Specifications Part Number: 09-00286-01 Processor: Single ZIF socket 8 for Intel Pentium Pro 150, 166, 180 and 200MHz processors. Integrated Voltage Regulator Auto-detection of CPU voltage. Chipset: Intel 440FX PCI chipset. Intel PIIX 3. SMC FDC37C93X Ultra I/O chip. CPU Clock Select: Frequency synthesizer chip. Support for 60 and 66MHz CPU bus. Form Factor: Baby AT footprint. Expansion: Four 32-bit PCI slots. Three 16-bit ISA slots.
Appendix A: Technical Information Internal Cache: 16K Level 1 Write Back on CPU chip 256K or 512K Level 2 cache in CPU I/O Ports: Two high speed serial ports (16550 compatible). Enhanced Parallel Port with ECP and EPP support. Infrared support for IrDA Two USB ports (optional) Floppy Port: Supports two floppy drives (2.88MB, 1.44MB, 1.2MB, 720K, 360K). PCI IDE Ports: Two 40-pin IDE connectors Mode 4 Enhanced IDE Bus Mastering controller. Multiple sector transfer support.
Appendix A: Technical Information Battery Disposal WARNING: Please do not open battery, dispose of in fire, recharge, put in backwards or mix with used or other battery types. The battery may explode or leak and cause personal injury.
Appendix A: Technical Information Technical Support If you need technical assistance, our Technical Support staff will be glad to assist you. You can contact us via telephone, fax or Bulletin Board System (BBS). Before calling please have the following information ready: ❏ The model name and 09 part number of your Micronics product. ❏ Your computer information such as CPU type, operating system, amount of installed memory and other peripherals installed in your computer.
Appendix A: Technical Information Online Services Bulletin Board (BBS) In the United States: Technical Support BBS (510) 651-6837 14400 baud rate, Parity=N, Data Bits=8, Stop Bits=1, YMODEM and ZMODEM (recommended file transfer protocols) In Europe: UK Technical Support BBS +44 (0) 1256 63373 Germany Technical Support BBS +49 (0) 89 68 81 686 France Technical Support BBS +33 (1) 48 10 75 95 World Wide Web Micronics is on the Internet with a WWW (World Wide Web) site.
Appendix A: Technical Information 48 D6-IN System Board Manual
Appendix B: POST Messages Appendix B POST Messages The following table lists the Power On Self Test (POST) messages, possible causes and solutions. Message DISKETTE DRIVE A FAILURE Possible Cause Solution Drive A failed or is missing. Check Setup and cable connections. DISKETTE DRIVE B FAILURE Drive B failed or is missing. Check Setup and cable connections. EXTENDED RAM FAILED AT OFFSET: nnnn Extended memory not working or configured properly. Replace defective memory.
Appendix B: POST Messages Message Possible Cause Solution MONITOR TYPE DOES NOT MATCH CMOS Monitor type not correctly identified in Setup. Run Setup and enter correct monitor type. OPERATING SYSTEM NOT FOUND Operating system cannot be located on Drive C: or Drive A: Check Setup to see if Drive A: and C: are properly configured, or put a bootable disk in Drive A: PARITY CHECK 1 nnnn Parity error found in the system bus. Check Setup. Board repair may be required.
Appendix C: Beep and POST Codes Appendix C Beep and POST Codes Beep codes are a series of beeps sent through the speaker which indicate a problem during the Power On Self Test (POST). If text appears on the video screen, the D6-IN has completed POST; any other tone from the speaker indicates something other than a POST error. These tones are not described in the tables on the following pages. The beep error codes are a series of beeps.
Appendix C: Beep and POST Codes Code 02 04 06 08 09 0A 0C OE OF 10 11 12 14 16 18 1A 1C 20 22 24 28 2A 2C 2E 32 34 35 37 38 39 3A 3C 3D 40 42 44 46 47 48 49 52 Beeps 2-2-3 3-1-1 3-1-3 3-4-1 3-4-3 2-1-2-3 POST Routine Description Verify Real Mode. Get CPU type. Initialize system hardware. Initialize chipset registers with initial POST values. Get in POST Reg. Initialize CPU registers. Initialize cache initial POST values. Initialize I/O. Initialize the localbus IDE. Initialize Power Management.
Appendix C: Beep and POST Codes Code 4A 4C 4E 50 51 52 54 56 58 5A 5C 60 62 64 66 68 6A 6C 6E 70 72 74 76 7C 7E 80 82 84 86 88 8A 8C 90 91 92 93 94 96 98 9A Beeps 2-2-3-1 POST Routine Description Initialize all video adapters in system. Shadow video BIOS ROM. Display copyright notice. Display CPU type and speed. Initialize EISA board. Test keyboard. Set key click if enabled. Enable keyboard. Test for unexpected interrupts. Display prompt “Press F2 to enter SETUP”. Test RAM between 512 and 640k.
Appendix C: Beep and POST Codes Code 9C 9E A0 A2 A4 A8 AA AC AE B0 B2 B4 B6 B8 BC BE BF C0 D0 D2 D4 D6 D8 DA DC E2 E3 E4 E5 E6 E7 E8 E9 EA EB EC ED EE 54 Beeps POST Routine Description Set up Power Management. Enable hardware interrupts. Set time of day. Check key lock. Initialize typematic rate. Erase F2 prompt. Scan for F2 keystroke. Enter SETUP. Clear in-POST flag. Check for errors. POST done - prepare to boot operating system. One beep. Check password (optional). Clear global descriptor table.
Appendix D: Hard Disk Drive Types Appendix D Hard Disk Drive Types The following table lists the hard disk types supported by the D6-IN.
Appendix D: Hard Disk Drive Types Type 31 32 33 34 35 36 37 38 39 56 Cylinders Heads 823 809 830 830 1024 1024 615 1024 925 10 6 7 10 5 8 8 8 9 Write Precomp 512 128 none none none none 128 none none Sectors Size 17 17 17 17 17 17 17 26 17 71 42 50 72 44 71 42 109 72 D6-IN System Board Manual
Appendix E: Updating the System BIOS Appendix E Updating the System BIOS The Micronics system boards are designed so that the BIOS can be reprogrammed using a BIOS file. You can easily FLASH a BIOS by following the steps below: 1) After downloading the appropriate BIOS file from our BBS or Website, extract it to a bootable MSDOS 6.X diskette. 2) Reboot your system with the MS-DOS 6.X diskette in the A: drive.
Appendix E: Updating the System BIOS back to you. Also, a preprogrammed FLASH EPROM chip can be purchased from Technical Support for $50.00. Overnight shipping costs an additional $10.00. (Price and availability subject to change.) If you prefer to send your system board in for the upgrade, the RMA department offers this service free of charge if your system board is under warranty.
Appendix F: Warranties and Notices Appendix F Limited Warranty Except as described below, Micronics warrants the products to be free from defects in material and workmanship in normal use for a period of one (1) year from date of purchase. Should any product fail to perform according to this warranty at any time during the warranty period, except as provided below, Micronics or its authorized service centers will, at Micronics’ option, repair or replace the product at no additional charge.
Appendix F: Warranties and Notices but if for any reason that remedy should fail of its essential purpose, the exclusive remedy of the purchaser shall then be actual damages up to amounts paid for the defective product by the purchaser. This limited warranty shall be deemed to “fail of its essential purpose” if, after repeated efforts, Micronics is unable to make the product operate as warranted.
Appendix F: Warranties and Notices FCC Statement This equipment has been tested and found to comply within the limits for a Class B digital device, pursuant to Part 15 of the FCC Rules. These limits are designed to provide reasonable protection against harmful interference in a residential installation. This equipment generates, uses and can radiate radio frequency energy and, if not used in accordance with the instructions, may cause harmful interference to radio communications.
Appendix F: Warranties and Notices Declaration of Conformity Application of Council Directives 89/336/EEC. Standards to which the conformity is declared: EN55022 EN50082-1 Manufacturer's Name: Micronics Computers, Inc.
Glossary Glossary 16550 UART - A high speed chip for controlling serial ports. Although unnecessary for a mouse, it is required for modems that are 14,400 baud or faster. Asynchronous - Operations that do not require the clocks of communicating devices to be coordinated. See Synchronous. Baby AT - A standard system board size measuring approximately 13.25" x 8.5". Bidirectional Parallel Port - A type of parallel port that can send and receive information. BIOS - An Acronym for Basic Input/ Output System.
Glossary functions by spinning at high speed while moving a device called the read/ write head across the disk’s surface in order to read or write data in magnetic code. DRAM - An acronym for Dynamic Random Access Memory. A type of memory chip that only keeps its memory if supplied with regular clock pulses and a chance to regularly refresh its data. It is slower and more cost effective than SRAM. See SRAM. ECC - An acronym for Error Checking and Correction.
Glossary Parallel Port - A connection for a printer or similar peripheral. Generally, parallel ports are output only. See Bidirectional Parallel Port and ECP. PCI - An acronym for Peripheral Component Interconnect. A high performance 32-bit or 64-bit bus developed by Intel Corporation. PCI is designed to be independent of the hardware architecture to ensure compatibility with future computer systems. See EISA, VESA Local Bus and ISA.
Glossary Terabyte - A measurement for very large storage capacity. One Terabyte is equivalent one-thousand gigabytes, one -million megabytes, or 1,099,511,627,766 bytes. VESA - An acronym for Video Electronics and Standards Association. VESA Local Bus (VL-Bus) - A high performance bus designed by VESA. A 32-bit version of the ISA bus which operates at the speed of the computer’s CPU. See PCI, EISA and ISA. VGA - An acronym for Video Graphics Array. A standard for monitor displays.
Index Index B Battery Disposal - 45 Beep and POST Codes - 51 BIOS Configuration - 25 Setup - 25 Bulletin Board System (BBS) - 47 C Chassis - 16 Configuring the D6-IN - 11 D Diagram (D6-IN) - 12 E Extended Data Out (EDO) Memory - 15, 17 Environmental Specifications - 44 Error Checking (ECC) - 15 F Fast Page Mode (FPM) Memory - 15, 17 D6-IN System Board Manual 67
Index H Hard Disk Drive Types - 55 Help Bulletin Board System (BBS) - 47 Telephone Numbers - 46, 47 Troubleshooting - 49, 51 I Installation CPU - 22 Installing your D6-IN - 16 ISA Peripheral Card - 24 PCI Peripheral Card - 23 Quick Installation - 9 J Jumper Settings - 13 M D6-IN System Board Diagram - 12 Memory Configurations - 19 Installing - 21 Mixing - 18 Removing - 21 Supported - 17 O Online Services - 47 68 D6-IN System Board Manual
Index P POST Messages - 49 Power Supply - 16 S Specifications - 43 System BIOS - 57 T Technical Specifications - 43 Technical Support - 46 Troubleshooting - 49, 51 U Updating the System BIOS - 57 Utility Programs Advanced Screen - 32 BIOS Setup - 25 Boot Screen - 41 Exit Screen - 42 IDE Device Submenu - 36 Main Screen - 27 Power Screen - 38 Security Screen - 35 W World Wide Web - 47 D6-IN System Board Manual 69