
Operation Manual

4
77-132 / 77-133
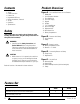
Contents
• Safety
• Product Overview
• Feature Set
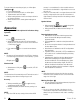
• Keypad and LCD Icons
• Battery Installation / Removal
• Set Up
• Operation
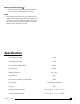
• Specifi cations
Safety
(This product does not contain a laser. However, when
working with laser tools, obey the safety instructions for
that particular instrument)
WARNING:
• Carefully read the Safety Instructions and
Product Manual before using this product.
The person responsible for the instrument must
ensure that all users understand and adhere to
these instructions.
CAUTION:
• While a laser tool is in operation, be careful not
to expose your eyes to the emitting laser beam
(red light source). Exposure to a laser beam for
an extended time may be hazardous to your eyes.
Retain all sections of the manual for future reference.
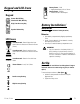
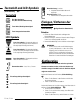
Product Overview
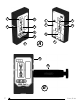
Figure A - Front and Back Views of Laser Detector
1. Bubble Vial
2. Laser Reception Window
3. Front Datum Line
4. Front LCD Display
5. Keypad
6. Speaker
7. 1/4” Thread Mount
8. Rear LCD Display
9. Alignment Hole
10. Rear Datum Line
11. Battery Compartment
Figure B - Detector with Clamp
12. Laser Detector
13. Clamp
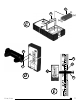
Figure C - Battery Location
14. Battery Compartment Cover
15. Batteries - 2 x “AAA”
Figure D - Connecting Detector to Clamp
16. Fixing Screw
17. Alignment Pin
Figure E - Use with Rod
18. Measuring Rod
19. Datum Edge
20. Datum Marking Location (both left and right)
21. Clamp
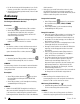
LD200 RLD400
Used with Line Laser Tools with Pulse Mode Option X
Used with Rotary Laser Tools X
Feature Set