
User's Guide


86
Wireless System
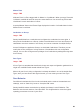
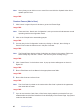
Choose a Door Behavior
We recommend “Always Locked” as the default behavior.
Image-TBD
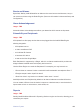
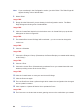
Selecting two Zones which Border the Doors
1 The upper two combo boxes tell the system which two Zones the Door borders. The
lower two combo boxes tell the system which Zones have card reader access.
2 Choose “Outside” and “Inside” for the top two combo boxes.
3 Choose “Inside” for Card Reader One (to grant access to the “Inside” Zone).
4 Choose the proper Zone for Card Reader Two.
Note If you have no second reader, it doesn’t matter which Zone you choose. If you have
two readers and both on the outside, choose “Inside” for Card Reader Two.
Image-TBD
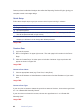
Choose a Time Zone
1 Choose the time zone in which the controller is physically located. (For most installations
this is the currently selected time zone.)
2 Press ‘Create’ and wait a few seconds.
3 The Door will appear in the main Doors viewing area.
4 Three status icons will appear next – the left-most icon will be a yellow triangle.
5 In the icon legend (lower left part of the window) a yellow triangle means the Door’s
conguration has changed and needs to be updated. (This is normal for the rst-time
creation of the Door.)
6 If the icon is a red circle, the system could not communicate with the Door using the
information you provided. If this occurs, please refer to the Troubleshooting section at the
end of this document.
Note If you create or update a Door and you see a red wavy line in a eld, hover the
cursor over that eld and a message will appear explaining the problem. Correct the
problem and try again.
7 Repeat these steps to create additional Doors.
8 When nished, click ‘Update All Doors’ in the Actions menu on the left side of the
window.