
User manual: SW V1.0
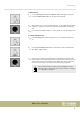
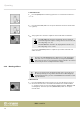

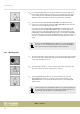

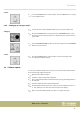


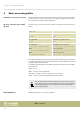
Table Of Contents
- Table of contents
- 1 General information
- 2 Safety instructions
- 3 Features
- 4 Installation
- 5 Connections and operating elements
- 6 Operating
- 6.1 ‘Setting’ menu
- 6.1.1 Create a new fixture profile
- 6.1.2 Modify a fixture profile
- 6.1.3 Delete a fixture profile
- 6.1.4 Patch a fixture
- 6.1.5 Reverse channel setup
- 6.1.6 Fade mode select
- 6.1.7 Blackout mode select
- 6.1.8 Midi channel select
- 6.1.9 Chase run by inside / outside time
- 6.1.10 Auto remote address
- 6.1.11 Reading from a USB drive
- 6.1.12 Writing to a USB drive
- 6.1.13 Modify password
- 6.1.14 Enable / disable the password
- 6.1.15 Erase all memory
- 6.1.16 Adjust audio input range
- 6.1.17 Channel value display mode
- 6.2 Programming mode
- 6.2.1 Programming a scene
- 6.2.2 Programming a scene with movement
- 6.2.3 Editing a scene
- 6.2.4 Copying a scene
- 6.2.5 Deleting a scene
- 6.2.6 Copying a bank
- 6.2.7 Programming a chase
- 6.2.8 Chase programming from all scenes of a bank
- 6.2.9 Replacing scenes of a chase
- 6.2.10 Adding scenes to a chase
- 6.2.11 Deleting scenes from a chase
- 6.2.12 Deleting a chase
- 6.2.13 Preset programming
- 6.2.14 Preset editing
- 6.2.15 Programming a fixture group
- 6.2.16 Fixture group editing
- 6.2.17 Deleting a fixture group
- 6.2.18 Center programming
- 6.2.19 Center editing
- 6.2.20 Deleting a Center
- 6.2.21 Override programming
- 6.2.22 Override editing
- 6.2.23 CUE programming
- 6.2.24 CUE editing
- 6.2.25 Deleting a Cue
- 6.2.26 Blackout scene programming
- 6.3 Function mode
- 6.4 Fogger operation
- 6.5 Strobe operation
- 6.6 Software update
- 6.1 ‘Setting’ menu
- 7 MIDI functions list
- 8 Notes on creating profiles
- 9 Technical specifications
- 10 Protecting the environment

5. Press the [STROBE] button to let the Invader control the DMX strobe according
to the adjusted values.
6.5.2 Setting up an analogue strobe
1. Connect the strobe to the STROBE output (3) on the rear panel of the unit.
2. Keep the [STROBE] button pressed and press the [PROGRAM] button to open
the settings menu. Rotate jog wheel # 2 to adjust the strobe speed for the ana‐
logue strobe.
3. Press the [ENTER/MAIN MENU] button to save the settings. Press the [PROGRAM]
button to leave the menu.
4. Press the [STROBE] button to let the Invader control the analogue strobe
according to the adjusted values.
6.6 Software update
To carry out a software update of the invader, you can download the latest software
from our homepage (www.thomann.de).
1. Download the software update.
2. Unzip the compressed le with an unzipper.
3. Have a USB stick formatted in FAT format ready and copy the unzipped les to
the USB stick.
4. Insert the USB stick into the switched-o invader.
5. Keep the buttons [Fixture], [Override], and [15] pressed and turn the device on.
ð
The update process starts. The status is shown in the display.
6. After a successful software update, the device is ready for use again.
Control
Setting up
Control
Operating
DMX Invader 2420 MK II
57