
User manual: SW V1.0
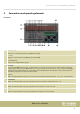
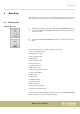
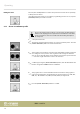
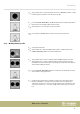
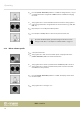
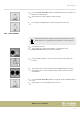
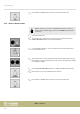
Table Of Contents
- Table of contents
- 1 General information
- 2 Safety instructions
- 3 Features
- 4 Installation
- 5 Connections and operating elements
- 6 Operating
- 6.1 ‘Setting’ menu
- 6.1.1 Create a new fixture profile
- 6.1.2 Modify a fixture profile
- 6.1.3 Delete a fixture profile
- 6.1.4 Patch a fixture
- 6.1.5 Reverse channel setup
- 6.1.6 Fade mode select
- 6.1.7 Blackout mode select
- 6.1.8 Midi channel select
- 6.1.9 Chase run by inside / outside time
- 6.1.10 Auto remote address
- 6.1.11 Reading from a USB drive
- 6.1.12 Writing to a USB drive
- 6.1.13 Modify password
- 6.1.14 Enable / disable the password
- 6.1.15 Erase all memory
- 6.1.16 Adjust audio input range
- 6.1.17 Channel value display mode
- 6.2 Programming mode
- 6.2.1 Programming a scene
- 6.2.2 Programming a scene with movement
- 6.2.3 Editing a scene
- 6.2.4 Copying a scene
- 6.2.5 Deleting a scene
- 6.2.6 Copying a bank
- 6.2.7 Programming a chase
- 6.2.8 Chase programming from all scenes of a bank
- 6.2.9 Replacing scenes of a chase
- 6.2.10 Adding scenes to a chase
- 6.2.11 Deleting scenes from a chase
- 6.2.12 Deleting a chase
- 6.2.13 Preset programming
- 6.2.14 Preset editing
- 6.2.15 Programming a fixture group
- 6.2.16 Fixture group editing
- 6.2.17 Deleting a fixture group
- 6.2.18 Center programming
- 6.2.19 Center editing
- 6.2.20 Deleting a Center
- 6.2.21 Override programming
- 6.2.22 Override editing
- 6.2.23 CUE programming
- 6.2.24 CUE editing
- 6.2.25 Deleting a Cue
- 6.2.26 Blackout scene programming
- 6.3 Function mode
- 6.4 Fogger operation
- 6.5 Strobe operation
- 6.6 Software update
- 6.1 ‘Setting’ menu
- 7 MIDI functions list
- 8 Notes on creating profiles
- 9 Technical specifications
- 10 Protecting the environment

Press the [ESC / CLEAR] button to return to the previous menu level. Press repeatedly
to nally leave the menu.
Only after leaving the menu you can exit the programming mode. To do so, keep the
[PROGRAM] button pressed for 2 seconds.
6.1.1 Create a new xture prole
If you create proles for the used device, you can replace the fader channel
number in the display by the description for the actual function of the fader
on the selected device. This does not aect the functionality, but improves
the clarity a lot.
1. Call up the main menu.
2. The display shows the rst menu item ‘01. Create a new xture prole’ . Press the
[ENTER / MAIN MENU] button to activate this function.
3. Turn jog wheels # 2 and # 4 to enter the name of the xture. Rotate jog wheel #
2 to change the cursor position. Turn Jog wheel # 4 to change the character.
You can choose from 26 letters and 10 numbers as well as the special character
‘—’. The max. length of the device name is 16 characters.
4. Conrm by pressing the [ENTER / MAIN MENU] button, then the rst eld for the
function assignment of DMX channels 1-24 ashes.
5. Turn jog wheel # 2 to select the eld for the desired channel. Turn jog wheel
# 4 to change the function assignment for the current channel (e.g., PAN, TILT,
DIM, etc.). The attributes ‘A’ (amber) and ‘W’ (white) are supported.
6. Press the [ENTER / MAIN MENU] button to conrm.
Exiting the menu
Operating
DMX controller
16