
Guide


www.SquishyCircuits.com Page 7
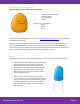
Reminder –
LEDs have polarity, which means they only operate if
inserted correctly in the right direction. The longer leg
should go into the dough with the red wire. You can just try
switching the LED around if it’s not working.
Lesson1:SculptingYourFirstCircuit
Summary and Background Knowledge
In this lesson, students will create a functioning electrical circuit using a battery pack, LEDs, and
conductive and insulating play dough. By completing student-led experiments, groups of two to three
students will work together to attempt to light their LED up using the materials listed above.
At the most basic level, electricity is a stream of small bits of electrical charge, called electrons. These
electrons flow through components and cause them to do work. For example, when they flow through a
light bulb, they produce light. These electrons move through conductors. When building a Squishy
Circuit, the play dough replaces the wires typically used in the circuit, making them more user-friendly
and familiar to students.
Let’s investigate a simple circuit using Squishy Circuits. With the
conductive dough, create two pieces of dough (they can be any size or
shape). Insert one wire from each side of the battery terminal into each
piece of dough.
Now, create a bridge across the two pieces of dough with an LED (separate
the legs if necessary) so that the electrons can flow through the LED to the
other side and back to the battery pack. Way to go! You have created your
first Squishy Circuit!
The LED is lighting because the electrons are flowing from the battery pack,
through the wire and into one piece of conductive dough, through the LED
into the other piece of conductive dough, and finally back to the battery
pack. It can be helpful to visualize the circuit as a circle of electrons. Since
the electrons can flow in the circuit, it’s called a closed circuit.