
User guide


44
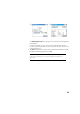
Point: Point name
N: Point coordinate Y
E: Point coordinate X
Elev.: Point coordinate Z
Description: Point description
Angle Right: Azimuth angle measured from the occupy point to the foresight
point (measured in a horizontal plane)
Zenith: Zenith angle measured from the occupy point to the foresight point
(Zenith is measured in the vertical plane, relative to gravity, where 0 is
pointing straight up, parallel to gravity, and 90 is pointing straight ahead,
orthogonal to gravity.)
Slope Dist: Slope distance measured from the occupy point to the target
Horz Dist: Horizontal distance calculated from the occupy point to the target
Vert Dist: Vertical distance measured from the occupy point to the target.
• Repeat the above two steps until all your points have been measured.
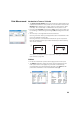
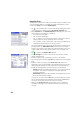
Traverse
• Be sure the instrument is pointed at the target placed over the point.
• Tap Traverse. The screen prompts you to measure a new point, or to pick a
point that was previously measured from the current station setup (Survey
Pro will display a list of appropriate points), and then move the instrument
to that point. If you create a new point to traverse to, you will then be asked
to enter the description of the point before measuring it.
• After the measurement is done or the point selected, Survey Pro provides a
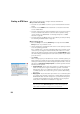
summary of what the new station setup will be (see [1] below).
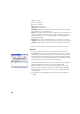
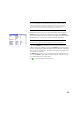
• Move the instrument to the new station point and level it on its tripod.
• Measure the new instrument height and enter the measured value (HI).
• Aim the instrument in the direction of the point you came from (now the
backsight point).
• Enter the type and height (HR) of the target used on the backsight point
(see [1]).