
Manual


32
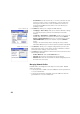
2. If you choose BS Point:
• Enter the name of the backsight point. It can also be picked from the
map or the list of points.
• Specify the type of target used at the backsight point (Fixed Target or
Roving Target).
A “roving target” is when you measure to the backsight with the same
rod and prism you will be using for your subsequent data collection.
A “fixed target” is when you have a tripod and prism that will remain at
the backsight and that will be different from the rod and prism you will
be using for subsequent data collection. See also Managing Smart
Targets on page 75 for more information on the Survey Pro target
database and the fixed backsight target.
• Using , select the name of this target. As a result, the HR (height of
rod) field is updated to provide the height of this target.
• Aim the instrument at the known backsight point.
• Enter the desired value of backsight circle in the direction given by the
backsight point (typically “0” or the true azimuth). If the Survey with True
Azimuths setting is enabled, then the circle value will automatically be
set by Survey Pro.
•Tap Set Circle.
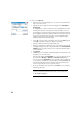
•Tap Next. The screen provides a summary of what you have just done and
prompts you to check the setup.
As previously explained for BS Azimuth, you can in the same way check
the setup either By Angle or By Point (see Check the Setup above).
You can also use the By Distance option. Just make sure the instrument
is still aimed in the direction of the backsight point and tap Check. The
measured horizontal and vertical distance errors are reported on the
screen. They should be as close a possible to zero.
• If you are satisfied with the read values, tap Finish. You can now start
measuring new points.
NOTE: Checking the backsight is an optional step that is enabled by default. If
you wish to skip backsight checks after station setup, you can turn this off in
the Job > Settings > Surveying tab.