
Manual


31
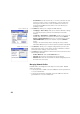
Start the station setup as follows:
• Go to the Main Menu, then tap Survey > Station Setup.
• Choose Setup Type= Known Point.
• Enter the name of the station setup point in the Occupy Point field. The
point name can be entered directly, or, picked from the map or point list
using the button.
• If you wish to ignore elevations in your job, check the 2D Survey box. You
will otherwise enter the HI (height of instrument) field.
•Tap Next.
Then, of the three possible options, choose the one that is suitable for your job:
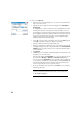
1. If you choose BS Azimuth:
• Aim the instrument in the direction of a known or assumed azimuth.
• Enter the known or assumed value of azimuth.
• Enter the desired value of circle in this direction (typically “0” or the
true azimuth). If the Survey with True Azimuths setting is enabled, then
the circle value will automatically be set by Survey Pro.
•Tap Set Circle.
•Tap Next. The screen provides a summary of what you have just done and
prompts you to check the setup.
Check the Setup:
a. If you choose the By Angle option, just make sure the instrument is
still aimed in the direction of known azimuth, then tap Check. You
should read the previously set backsight circle.
b. If you choose the By Point option, enter the name of the point used
for checking, specify the target used on that point, correct the target
height if necessary and tap Check. A measurement is then made. Check
the delta values reported on the screen, which should be as close as
possible to zero.
c. You cannot use the By Distance option in this case.
• If you are satisfied with the read values, tap Finish. You can now start
measuring new points.
NOTE: Checking the backsight is an optional step that is enabled by default. If
you wish to skip backsight checks after station setup, you can turn this off in
the Job > Settings > Surveying tab.