
User guide
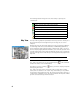
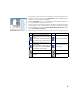

Table Of Contents
- Software End User License Agreement
- Data Collector Warranty Program
- Table of Contents
- 1. Welcome to Survey Pro
- 2. Introduction to the Survey Pro User Interface
- 3. Creating a Job
- 4. Connecting Survey Pro to an Instrument
- 5. Optical Surveying
- 6. GNSS Surveying
- 7. Stakeout Routines
- 8. Survey Pro’s On-Board Version
- Appendix
- Index
11
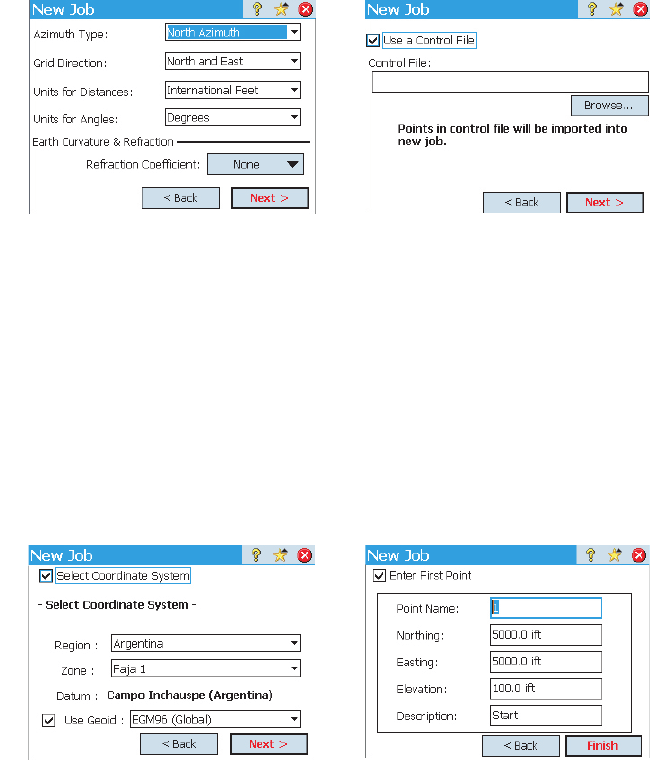
Job Settings The settings and values entered for a new job become the default values for any
subsequent new jobs. A short description of the jobs settings is given below.
• Units [1]: When creating a new job, set all the desired units for the job. You can
also enable the setting for Earth Curvature and Refraction correction for optical
measurements.
• Control File [2]: Control points can optionally be imported from another existing
job by checking the Use a Control File check box. After tapping Finish to create the
job, a message will indicate the number of imported points. If you are using a
control file, by default the coordinate system of this control file will be used for the
new job. You can override this default setting on the coordinate system page. A
control file can be imported from either a .Job or .Survey file.
• Select Coordinate System [3]: When you are using a control file, you can start the
job with the control file’s coordinate system, or you can pick a different coordinate
system from the database. If you don’t have a control file, you need to choose the
coordinate system for the job. To select the coordinate system for the new job:
[1] [2]
[3] [4]