
User guide
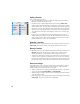
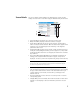
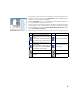

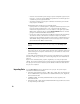
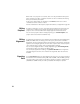
Table Of Contents
- Software End User License Agreement
- Data Collector Warranty Program
- Table of Contents
- 1. Welcome to Survey Pro
- 2. Introduction to the Survey Pro User Interface
- 3. Creating a Job
- 4. Connecting Survey Pro to an Instrument
- 5. Optical Surveying
- 6. GNSS Surveying
- 7. Stakeout Routines
- 8. Survey Pro’s On-Board Version
- Appendix
- Index
10
3. Creating a Job
Survey Pro cannot start without a job being open. Upon launching Survey Pro, the
Welcome to Survey Pro screen will guide you through the process of creating a new job
or opening an existing job.
NOTE: Upon launching the onboard version of Survey Pro, the initial screen allows you take
measurements without having to open a job. Refer to 8. Survey Pro’s On-Board Version on
page 58.
•Tap the New button. The New Job screen opens, which prompts you for a job name
where the current date is the default name.
• Either type in a new job name or accept the default name.
• You can create the job in two different ways:
1. Tap the Create Job Now button. The new job will be created with the current
default settings (as listed at the bottom of the screen) and will be stored in the
default directory (\Survey Pro Jobs\).
2. Tap the Settings button to access the different job settings (see below). After
you have gone through the different settings, tap the Finish button. This will
create and store the new job.
NOTE: The job names listed in the upper portion of the screen are those of the most recent jobs
you opened in Survey Pro. This list does not necessarily reflect the list of jobs stored in your data
collector. If you are looking for a job stored in your data collector, use the Browse button.
12