
Reference Manual


Table Of Contents
- Table of Contents
- Welcome
- Main Menu
- File Menu
- Job Menu
- Job Menu – GPS
- Job Menu – Basic GPS
- Survey Menu
- Backsight Setup
- Traverse / Sideshot
- Repetition Shots
- Multiple Sideshots
- Radial Sideshots
- Distance Offset Shot
- Horizontal Angle Offset
- Vertical Angle Offset
- Auto Collect
- Corner & 2 Lines
- Corner & Angle
- Corner & Offset
- Corner & Plane
- Surface Scan
- Video Scan
- Shoot From Two Ends
- Record Mode
- Resection
- Remote Elevation
- Check Point
- Solar Observation
- Remote Control
- Survey Menu – GPS
- Survey Menu – Basic GPS
- Leveling Menu
- Stakeout Menu
- Stakeout Menu – GPS and Basic GPS
- Inverse Menu
- Cogo Menu
- Curve Menu
- Roads Menu
- Adjust Menu
- Miscelaneous Screens
- Appendix A
- Index
Survey Pro Reference Manual
R-254
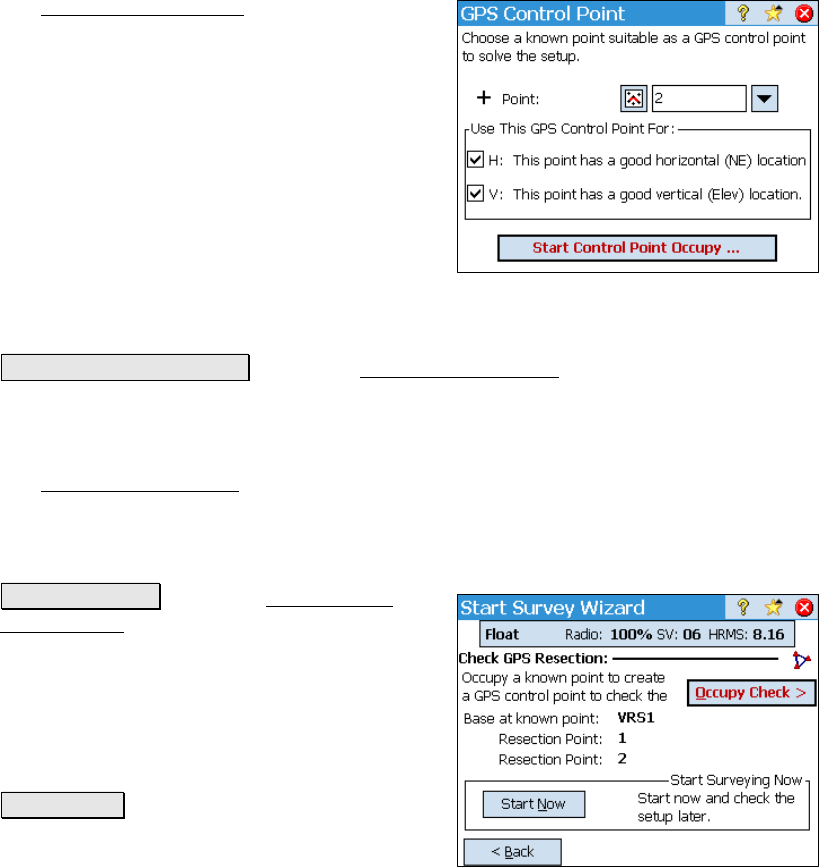
Occupy Control Setup
The Occupy Control Setup screen is used to
specify which job point with accurate NEE
coordinates you are occupying and if you want
to use the point for horizontal and/or vertical
control when localizing (this can be changed
later).
Point: is the existing job point you are
occupying.
H: Check this if the point has good horizontal
coordinates to use for horizontal control when
localizing.
V: Check this if the point has a good elevation to use for vertical
control when localizing.
Start Control Point Occupy : Opens the Occupy Control Point screen,
described on Page R-259.
Occupy Control Point
The Occupy Control Point screen is used to add geodetic coordinates
to an existing project point and is described on Page R-259.
Resection for New Base Point
Occupy Check > : opens the Collect Check
Point Prompt screen to select an existing job
file point and initiate an occupation to check
the localization solved with the minimum
amount, and then create an extra GPS control
point, which will be used to re-solve the
localization and run the blunder detection
routine.
Start Now > : starts surveying without
checking the localization. In this case, the
localization solved with the minimum control