
Reference Manual


Table Of Contents
- Table of Contents
- Welcome
- Main Menu
- File Menu
- Job Menu
- Job Menu – GPS
- Job Menu – Basic GPS
- Survey Menu
- Backsight Setup
- Traverse / Sideshot
- Repetition Shots
- Multiple Sideshots
- Radial Sideshots
- Distance Offset Shot
- Horizontal Angle Offset
- Vertical Angle Offset
- Auto Collect
- Corner & 2 Lines
- Corner & Angle
- Corner & Offset
- Corner & Plane
- Surface Scan
- Video Scan
- Shoot From Two Ends
- Record Mode
- Resection
- Remote Elevation
- Check Point
- Solar Observation
- Remote Control
- Survey Menu – GPS
- Survey Menu – Basic GPS
- Leveling Menu
- Stakeout Menu
- Stakeout Menu – GPS and Basic GPS
- Inverse Menu
- Cogo Menu
- Curve Menu
- Roads Menu
- Adjust Menu
- Miscelaneous Screens
- Appendix A
- Index
Survey Menu – Conventional Mode
R-147
Note: After all shots are done, the computed elevation is displayed
for the new point. You can either enter a different elevation or tap
to accept the computed elevation.
Backsight : opens the Backsight Setup screen (Page R-122) where the
current backsight can be modified.
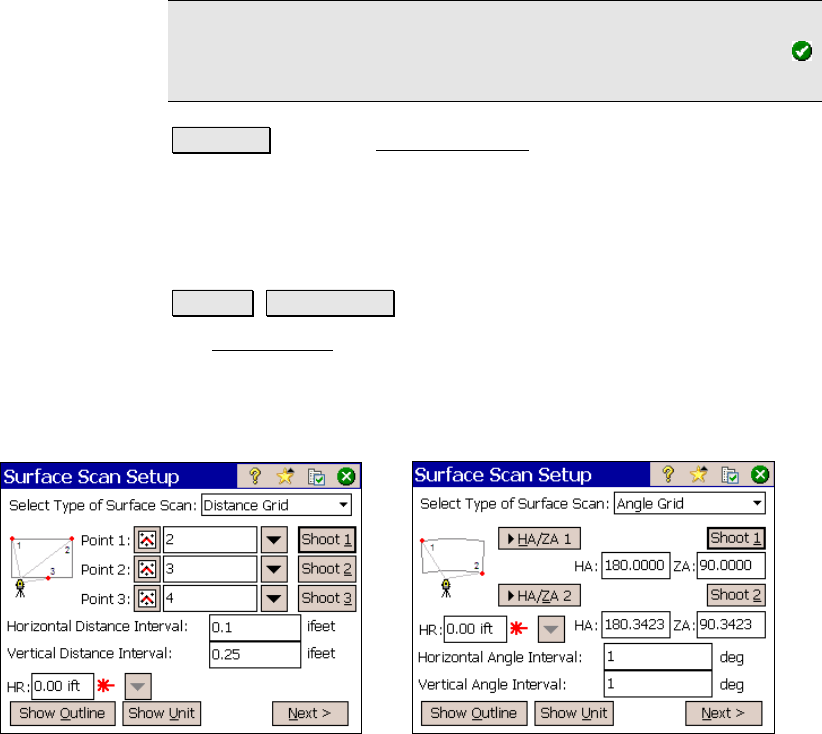
Surface Scan
Survey Surface Scan.
The Surface Scan screen takes advantage of a robotic, reflectorless
total station to automatically take a sequence of shots of a surface.
PC software can then use the data to generate a 3-D raster image of
the surface or a DTM surface to compute volume information. Consult
the User’s Manual for more information on performing a surface scan.
Distance Grid Surface Scan Angle Grid Surface Scan
Select Type of Surface Scan: Select the type of surface scan to
perform here. The option selected will determine how you will define
your perimeter and distance intervals.
Distance Grid
Point 1, Point 2, Point 3: Are the point names that will be
used when storing the upper-left, upper-right and lower
points that define the surface perimeter.