
Reference Manual


Table Of Contents
- Table of Contents
- Welcome
- Main Menu
- File Menu
- Job Menu
- Job Menu – GPS
- Job Menu – Basic GPS
- Survey Menu
- Backsight Setup
- Traverse / Sideshot
- Repetition Shots
- Multiple Sideshots
- Radial Sideshots
- Distance Offset Shot
- Horizontal Angle Offset
- Vertical Angle Offset
- Auto Collect
- Corner & 2 Lines
- Corner & Angle
- Corner & Offset
- Corner & Plane
- Surface Scan
- Video Scan
- Shoot From Two Ends
- Record Mode
- Resection
- Remote Elevation
- Check Point
- Solar Observation
- Remote Control
- Survey Menu – GPS
- Survey Menu – Basic GPS
- Leveling Menu
- Stakeout Menu
- Stakeout Menu – GPS and Basic GPS
- Inverse Menu
- Cogo Menu
- Curve Menu
- Roads Menu
- Adjust Menu
- Miscelaneous Screens
- Appendix A
- Index
Survey Pro Reference Manual
R-122
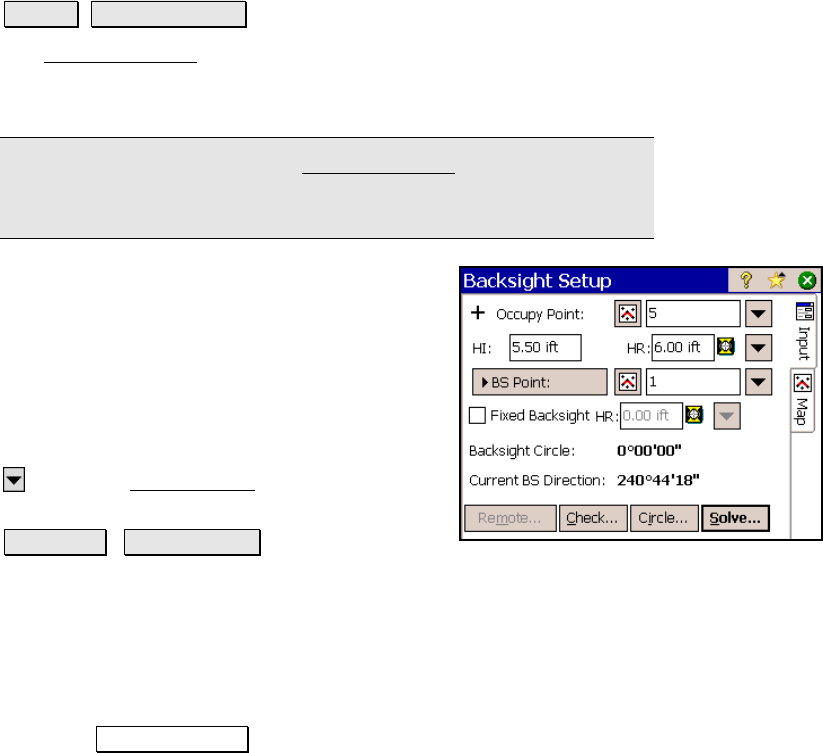
Backsight Setup
Survey Backsight Setup.
The Backsight Setup screen allows you to define your backsight prior
to performing data collection or stakeout. The screen is also
accessible from any screen that requires a backsight.
Note: all the information in the Backsight Setup screen is saved and
will automatically be recalled if the job is reopened at a later time,
but the screen must still be re-solved before you can begin surveying.
Occupy Point: is the name of the point from
the current job that the total station is
occupying.
HI: is the height that the total station is above
the ground.
HR: is the distance that the backsight prism is
above the ground.
: opens the Smart Target options (Page R-
456).
BS Point / BS Direction : is the point or
direction of the backsight where the total station is facing.
Fixed HR at Backsight: is selected when a second prism is set up
over the backsight. The rod height entered here is then used
independently of the other rod height when checking the backsight by
distance and when shooting the backsight during repetition shots.
Backsight Circle: displays the backsight circle value, which is set
using the Backsight Circle button, described below.