
Reference Manual Owner manual

Stakeout Menu
R-283
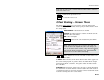
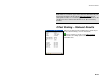
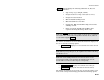
Note: The specified curb or ditch height and offset will be applied to
both sides of the road.
< Back : returns to the previous screen.
Next > : accesses the next screen.
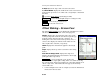
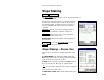
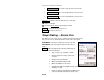
Offset Staking – Screen Three
The third Offset Staking screen is used to select the station and
section of the road to be staked and to specify an offset distance from
the design point.
Stake Station: is the station to be staked.
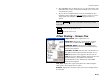
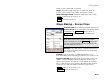
Interval: specifies how far to advance from the current
station to the next station.
HR: is the rod height.
Next Sta : advances the current station by the Station
Interval.
Note: When advancing, if you want to also stake the
locations where the alignment of the road changes, be
sure to check the Stake “Corners”, Not Just Even Intervals
option in the Stakeout Settings card. Tapping the
button will access the Stakeout Settings.
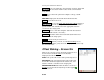
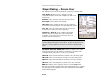
<< / >> : These buttons are used to select the section of the road
that you want to stake.
; Offset: When checked, is the offset distance that will be applied to
the selected design point. A positive offset extends from the design
point away from the centerline. A negative offset extends towards
the centerline.
Subgrade: When checked, allows you to specify a vertical offset from
the actual node locations. Positive values result in the stake location
occurring below the selected node. Negative values result in the stake
location occurring above the selected node.