SURVEY PRO GPS Quick Start Guide
ii Table of Contents Before You Leave the Office.................................................................1 Survey Method: RTK or Post Processing ............................................2 Receiver Setup..................................................................................2 Receiver Settings ...........................................................................3 RTK Data Collection and Stake Out ....................................................4 Start GPS Survey ..............
Survey Pro GPS Quick Start Guide 1 Before You Leave the Office • Make sure your software is registered. Go to Register Modules on the Files menu. Check to see that at least the Standard and GPS modules are registered. • If you are using a geoid model, make sure the correct *.GGF data file is on the data collector. • If you are using a grid datum transformation, make sure the correct pair of *.DGF files are on the data collector. Note: Geodetic data files must be in the proper geodata folder.
2 Survey Method: RTK or Post Processing This section describes: ¾ ¾ The two different types of GPS data collection supported in Survey Pro. How to make a GPS receiver profile for an RTK base, RTK rover, Ntrip rover, and post processing receiver. Using GPS for precise surveying requires data from two receivers collected at the same time. Survey Pro supports two different methods of GPS data collection: Real Time Kinematic (RTK) data collection and post processing data collection.
Survey Pro GPS Quick Start Guide 3 you can use Autodetect to determine what the current settings are in the receiver. To change the receiver communication settings, select the new parameters and tap Set Rx Comms. Bluetooth Note: You can use Bluetooth to connect to a Bluetooth enabled receiver. In some cases, you can also use Bluetooth to connect to a cellular phone to use as a data modem.
4 Data Modem For RTK base, RTK rover, and Ntrip rover receivers, you must choose a data modem type and configure the communication settings between the receiver and the modem hardware. The choices of data modem will be different for base and rover, and will vary between brands. If your specific modem hardware is not listed in the interface, you can choose Generic Serial and set the baud rate and parity for the receiver to send data to the modem device.
Survey Pro GPS Quick Start Guide 5 Start GPS Survey This function is your starting point for any RTK survey. The Start GPS Survey wizard will guide you through all the steps to pick a coordinate system, set up GPS equipment, solve any required coordinate system adjustment, and begin collecting data. Start GPS Survey is located on the Survey menu when in GPS mode.
6 Start GPS Survey - Choose Projection Mode If you are not starting a new job with one point setup, you need to choose one of two projection modes: Ground TDS Localization, or Mapping Plane. Choose to Use Ground TDS Localization> if your local coordinate system is a ground level survey, with no projection and no datum to define the relationship between geodetic and local positions.
Survey Pro GPS Quick Start Guide 7 Start GPS Survey - Choose Base Setup You have three choices for base setup: Use Current Base This choice is only available when you have already set a base in this Survey Pro job. Choose to Use Current Base> to skip the Base Setup screen and proceed to the next required step in the process (Rover Setup, Solve Localization, or Data Collection).
8 Base Setup Use the Base Setup routine to set an RTK base receiver to begin broadcasting GPS measurements over the modem data link, and to configure the base reference position in Survey Pro. At the Base Setup screen, measure the base antenna and choose a point for the base station. You can enter a new point name to start the base from an autonomous position, or you can enter a point with known coordinates and start the base on a known location. Tap Next> to set the base.
Survey Pro GPS Quick Start Guide 9 rover receiver, you will proceed directly to the Set Rover screen. If you choose an Ntrip rover, you are prompted to select an Ntrip service, then you proceed to the to the Set Rover screen. Select Ntrip Service When using an Ntrip rover, Survey Pro opens the internet connection, queries the GPS base server for the available Ntrip services, and displays these services in a list. Pick a service and tap Connect > to proceed to the Set Rover screen.
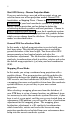
10 Collecting Control Tap Collect Control> to launch the GPS Control Collection screen. Choose existing points from your job to use as GPS control points, and occupy those points with the rover receiver. You need a minimum of two horizontal control points to solve a Ground – TDS Localization mode horizontal adjustment. You need a minimum of one horizontal control point to solve a Mapping Plane mode horizontal adjustment.
Survey Pro GPS Quick Start Guide 11 Mapping Plane Zones and Ground Scale If your horizontal projection mode is Ground – TDS Localization, you do not need to worry at all about map projections, datums, or scale for ground distances. The default projection and localization adjustment take care of that for you. If you are using Mapping Plane mode, you need to select a map projection from the database, and if you going to measure distances on the ground with an EDM, you need to apply a scale factor.
12 Receiver Dynamics: ¾ Static on Occupy: will set the receiver to ‘static’ mode for point occupations. When in static mode, the receiver assumes no antenna movement and uses advanced averaging techniques to compute the most precise position possible. ¾ Dynamic Always will leave the receiver in ‘dynamic’ mode for point occupations. Store GPS Raw Data: ¾ Lat, Lng, Ht will store an EP record in the .RAW file for each point accepted.
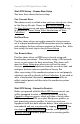
Survey Pro GPS Quick Start Guide 13 Data Collection Functions There are different methods to collect data: Point: Use this function to take the most precise measurement to a point. Depending on your settings, this function will put the receiver into static mode, mark the event in the post processing logging file, and open the Occupy Data Points screen where you can remain in static mode for the desired length of time and store the point.
14 on the different staking procedures. Below is a description of the two special features of stakeout with GPS. o >Roving / >Occupying ¾ ¾ When you first open any GPS staking screen, the GPS receiver is in dynamic (moving) mode. This is necessary as you navigate to the design point, and is indicated on the screen with the toggle button in the >Roving position.
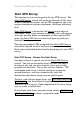
Survey Pro GPS Quick Start Guide 15 Post Processing Data Collection Data collection for post processing involves storing GPS raw data to a file on disk. The file is usually stored on the receiver’s internal memory, but for certain brands and models, you can also store the data to a file on the data collector. Raw data from multiple receivers is combined and then PC software is used to process the base line measurements.
16 where you enter the site ID and description. You can remain connected to this receiver to monitor the entire session, or you can leave it to log the data file unattended. If you start a stop and go file, the Static Receiver Session screen is opened where you control the receiver when you stop over a data point. Note: The Post Processing screen will first check if the connected receiver is the RTK base or rover.
Survey Pro GPS Quick Start Guide 17 Session Duration: ¾ Enter 0 or check Log Until Stop to have this session run until you tap Stop. ¾ Enter the session time if you want Survey Pro to mark the end of the session automatically after the timed interval has elapsed. Note: If you choose to do a timed session, you should not exit from the Static Receiver Session screen until the timed session is stopped. Tap Start to mark the beginning of this site occupation in the receiver’s raw data.
TRIPOD DATA SYSTEMS, INC. P.O. Box 947, Corvallis, Oregon, 97339-0947 Technical Support: 541-757-7254 or visit www.tdsway.