
Reference Manual Instruction Manual


53
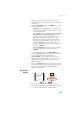
Using the Web Server
Now that the radio is on, proceed with the last settings
required on the radio side.
• Click on the Connections menu and then on the Radio sub-
menu.
•In the Internal Radio pane, set the following parameters:
– Power: (it is now necessarily “On” as you have turned
on the radio in a previous step to make its
configuration possible.)
Choose whether the radio should be turned on
automatically or manually:
Automatic: The radio will be switched on or off
automatically when the rover is respectively turned on
or off.
Manual: The radio will be powered up only by going
through the Rover Setup page, setting the internal radio
to “Power On” and clicking on the Configure button (or
using the $PASHS,RDP,ON command).
– Channel: Select the channel on which you know that
the base is transmitting its RTK corrections.
– Protocol: Select the data protocol used in the data
transmission:
“Transparent”, “Trimtalk450S”, “SATEL”,
“TrimMark II/IIe”, “TT450S”, “TRIMMARK3”,
“Transparent FST” or “U-Link”.
This choice should be the same as the one made at the
base.
– Airlink Speed: Choose the data transmission speed
(should be the same as the one used at the base).
–(Type is just a read-only field recalling the type of radio
used.)
– Sensitivity: Set the radio sensitivity level (“High”,
“Medium” or “Low”)
– Scrambler: On or Off
– FEC: On or Off
– Current Power: 0.1, 0.5 or 1.0 W.
•
Ignore the External Radio pane (Type should be set to
“None”).
• Click on the Configure button to let the Web Server load the
parameters to the radio via the receiver. You just have now
to define the output messages (see Defining Output
Messages on page 64).