
Home Security System User Manual


2-47
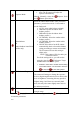
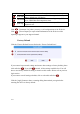
Exposure Mode
Select exposure mode to auto or manual.
1. Auto: The IP camera will adjust the
exposure automatically.
Manual: Manually select the
Exposure Gain
and Shutter Speed below..
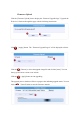
White Balance
(In
Indoor/Outdoor/Auto/Hold
profiles only)
Select the white balance mode. After you set the
parameter, you need to wait for 5~10seconds to
see the final result.
1. AUTO : Auto white balance (default)
2. INDOOR1: Select the indoor white
balance profile 1.
3. INDOOR2: Select the indoor white
balance profile 2.
4. OUTDOOR1: Select the outdoor white
balance profile 1.
5. OUTDOOR2: Select the outdoor white
balance profile 2
6. HOLD: Select this to let the IP camera
automatically obtain a best white balance
setting according to current environment.
The IP camera will use this setting to
adjust color.
NOTE: This setting will be lost after you
reboot the camera.
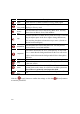
For all the settings above, you will need to
setup the value for
AE Reference Target
and Maximum auto shutter speed.
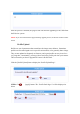
7. MANUAL: Select this to enable manual setting
of the white balance. You will need to enter the
R Gain and B Gain setting below.
AE Reference Target This is the desired image brightness output level.
The camera will attempt to change the exposure
levels or digital amplification levels to achieve this
level of brightness. Increasing this may provide a
brighter image, but if there are extremely dark
areas, this may also create slightly more noise in
the underexposed areas.
Maximum auto shutter
speed
The maximum allowed time for the camera to take
a single image.
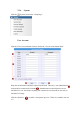
Click the [Apply] button to confirm the settings or click the [Reset] button to
re-enter the parameters.