
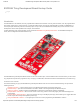
ESP8266 Thing Developpment Board w/ Headers Introduction

1/23/2018 ESP8266 Thing Development Board Hookup Guide - learn.sparkfun.com
https://learn.sparkfun.com/tutorials/esp8266-thing-development-board-hookup-guide/all 2/24
Required Materials
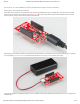
Beyond the ESP8266 Thing Development Board itself, all you should need to get started is a micro-B USB Cable, which will deliver
power the board and set up our USB programming interface.
Depending on how you want to use the board, you may also want to add male headers, female headers, or hedge your bets with 10-
pin stackable headers.
Suggested Reading
Before continuing on with this tutorial,
you may want to familiarize yourself
with some of these topics if they’re
unfamiliar to you:
How to Power a Project
Logic Levels
Serial Communication
How to Solder
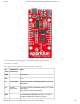
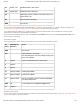
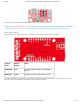
Hardware Overview
The ESP8266 Thing Development
Board is a relatively simple board. The
pins are broken out to two parallel,
breadboard-compatible rows. The USB
connector sits next to an optional
power supply input, and an ON/OFF
switch – controlling power to the
ESP8266 – sits next to that. And LEDs
towards the inside of the board indicate
power, charge, and status of the IC.