
Guide


1/12/2018 mbed Starter Kit Experiment Guide - learn.sparkfun.com
https://learn.sparkfun.com/tutorials/mbed-starter-kit-experiment-guide/all 6/65
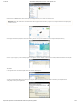
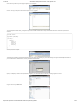
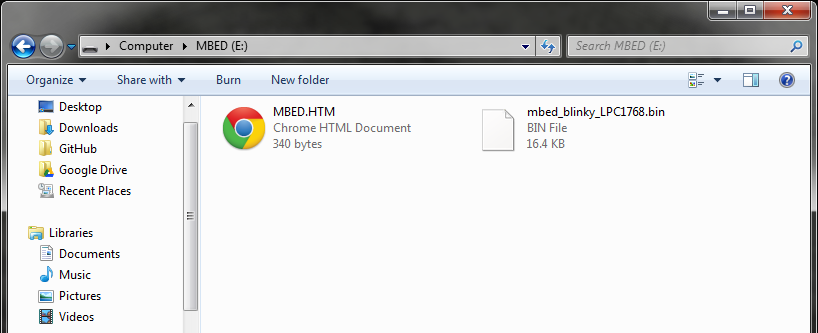
If you look in the MBED drive, you should see two files: the original MBED.HTM link and your new blinky program.
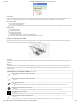
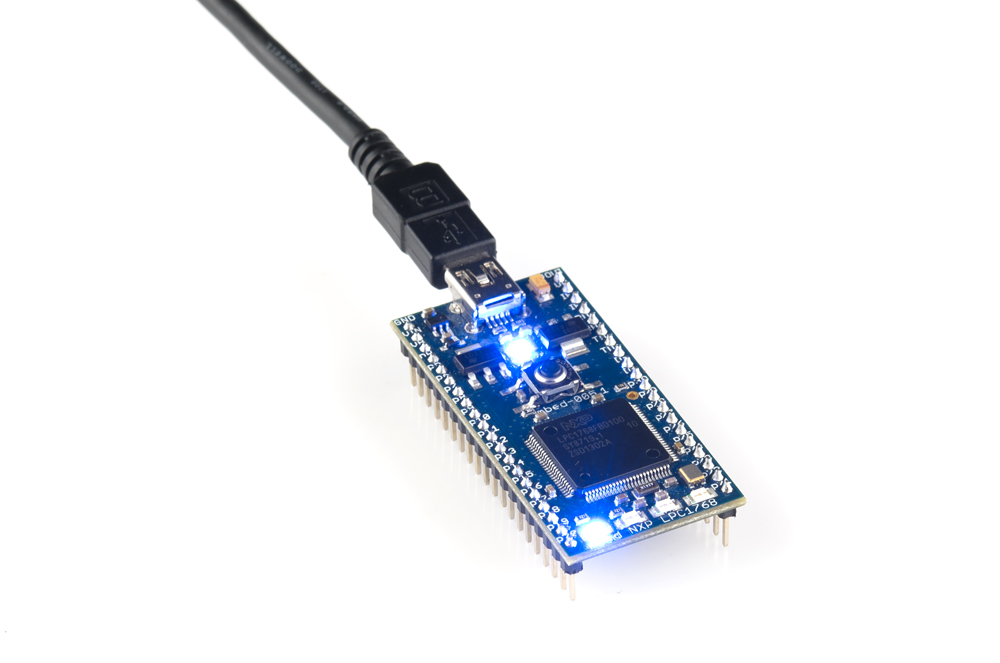
Without disconnecting the USB cable, press the button in the middle of the LPC1768. You should see the bottom left LED begin to flash off and on. The blinking
LED shows that your code is running!
Concepts
This is our first program with the mbed, so we should talk about what is going on.
Setup and Loop
If you have used Arduino in the past, it might come as a surprise that you were writing code in a language very close to C and C++. One thing you should be
aware of is that Arduino wraps up the setup and loop stages into nice functions for you. For example, you might see this in Arduino:
void setup() {
// Your setup code goes here
}
void loop() {
// Your loop code goes here
}
In Arduino, the setup code runs once, and the loop code runs forever.
In mbed (and most other embedded systems), we must create our own setup and loop sections within main(). Every C and C++ program must have a main()
function, as this is the entry point for the program (i.e. this is where the program begins execution when you run it).
Using our concepts of setup and loop, this is what the basic template looks like in mbed:
int main() {
// Your setup code goes here
while(1) {
// Your loop code goes here
}
}
Much like in the Arduino example, the program executes the setup code once (as soon as it enters the main() function) and executes the loop code forever.
Notice that we explicitly put the loop code inside of a while loop. It is possible to make the while loop exit, and the program would stop running. You would need
to reset the microcontroller to restart the program.
Header Files
The very first line in our blinky program is
#include "mbed.h"
This tells the compiler to include (i.e. copy into our program) a separate file (mbed.h in this case) when we compile. mbed.h is a header file that declares a set of
functions, constants, classes, etc. for our use. Many times, the implementation of these functions, constants, classes, etc. are defined in a separate library, and
the header file provides an interface. As long as we include the header file and the header file and library are in our search path (for our mbed programs, just
make sure that the library is copied into our project directory - shown by the little gear icon in this example), we can use the functions, constants, classes, etc.
listed in the header file.