
Guide

1/12/2018 mbed Starter Kit Experiment Guide - learn.sparkfun.com
https://learn.sparkfun.com/tutorials/mbed-starter-kit-experiment-guide/all 55/65
Concepts
Much like in our other PWM tutorial, we relied on pulse-width modulation to emulate an analog signal (sound, this time). We also connected a peripheral that
allowed us to convert electrical signals into sound: a speaker (or headphones, but these are nothing more than tiny speakers that wrap around your head).
PWM for Sound
Much like in Part 2, we used a PWM to control the a signal. In this example, we adjusted the period of the PWM (the inverse of the frequency) to control the pitch
of the musical note. We also adjusted the duty cycle of the PWM to control the volume of the note.
If you looked at the code, you’ll notice that there is also a “duration” parameter in the playNote function. This told the function how long to play the note. So, by
setting various volumes, frequencies (pitch), and durations, we can play an entire song!
To read more about PWM, see this Wikipedia article.
Speakers
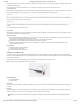
Speakers are fascinating pieces of technology, despite their seemingly simple function. An electromagnet moves an attached membrane, or cone, through a
permanent magnet. An electrical current causes the electromagnet to move at varying rates, which moves the cone in a similar fashion. The cone forces air back
and forth, which creates sound! At certain frequencies, these moving airwaves can be heard by our ears.
To learn more about how speakers work, see this article.
Going Further
Making sounds with PWM can be useful for adding feedback into your project. You could make chirps and buzzes to notify the user of important information.
That, or you could just make an R2-D2 clone.
Beyond the Tutorial
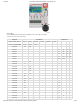
Search for sheet music from your favorite song, and using a note/frequency chart, make the mbed play your song
Try using the digital-to-analog converter (DAC) pins to play songs instead of PWM (Hint: see Jim Hamblen’s example)
Can you make the DAC play a chord instead of a single note?
Digging Deeper
As it turns out, you can use a combination of DAC and PWM to make some interesting sounds. Read about their uses in synthesizers.
In order to get louder sounds, we need to amplify our signal. Read about how amplifiers work.
Headphones have a long and interesting history. Check it out here.
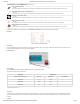
Experiment 10: Hardware Soundboard
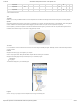
In the final tutorial of our 10-part series, we will make a hardware soundboard using our mbed. We will store some .wav files on an SD card and play one
whenever a button is pressed. You could use it to interject hilarious comments into any conversation!
Suggested Reading
Analog vs. Digital
Digital-to-Analog Converter (DAC)
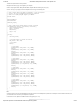
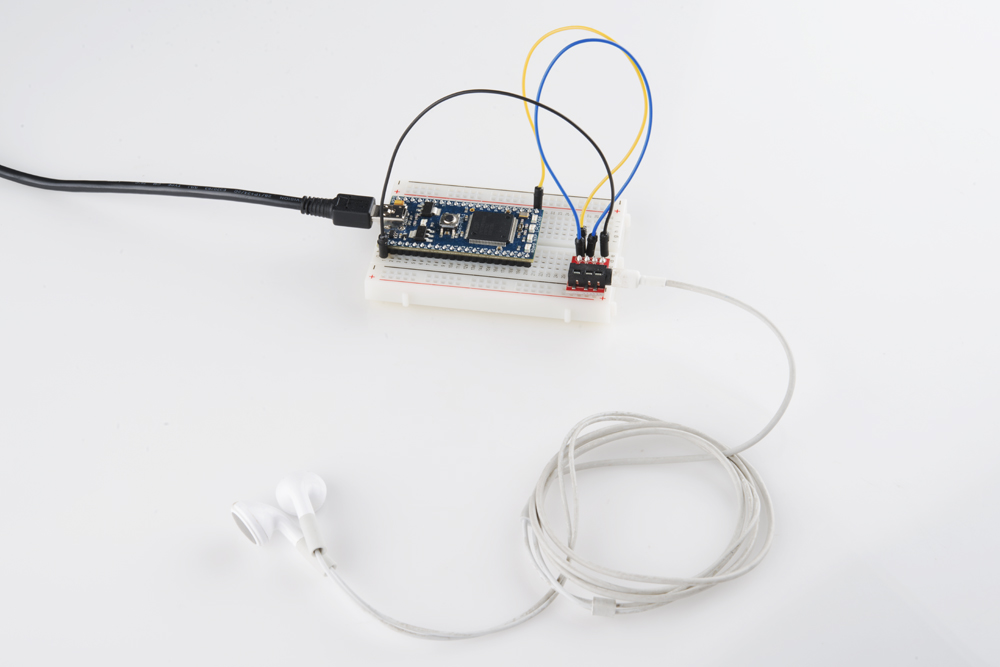
The Circuit
This circuit can be made with parts in the SparkFun mbed Starter Kit. Also, keep in mind that the LPC1768 box contains a USB mini-B cable for programming
and power.
Parts List
To follow this experiment, you would will need the following materials if you did not order the SparkFun mbed starter kit. You may not need everything though
depending on what you have. Add it to your cart, read through the guide, and adjust the cart as necessary. The experiment will be using 1x 330Ohm resistor.