
Guide


1/12/2018 mbed Starter Kit Experiment Guide - learn.sparkfun.com
https://learn.sparkfun.com/tutorials/mbed-starter-kit-experiment-guide/all 39/65
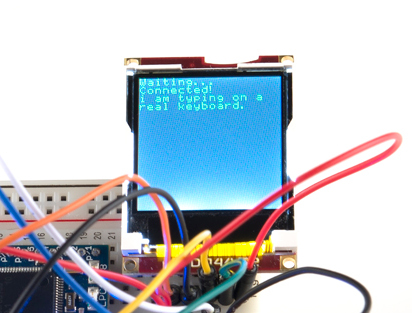
NOTE #2: The USBHost library is in beta and has some issues connecting USB devices sometimes. Not all keyboards will work with this demo.
Also, if you try typing too fast, you will see repeat keys. This is because the mbed does not process two simultaneous key presses correctly.
Concepts
We covered two important concepts in this tutorial: USB and threading. Both create a unique set of opportunities for embedded systems.
Callbacks
In our program, we define an onKey() function. This is a callback.
onKey(uint8_t key) is a function that is declared in the USBHostKeyboard library, but the definition is left to us to implement. Callbacks are executed whenever
an event occurs in another piece of code (within the USBHostKeyboard code, in this case).
We define onKey() in our code (it prints the received character to the LCD), and then we pass the onKey() function to our USBHostKeyboard object with the
following line:
keyboard.attach(onKey);
This lets the USBHostKeyboard object know where to find the onKey() callback function. After that, whenever a keystroke occurs on the connected keyboard,
the onKey() function is called.
USB Host
Universal Serial Bus (USB) has been around for many years. Created in the mid-1990s, USB has been the most popular way to connect peripherals to
computers. As a result, many embedded systems support USB communications.
While many embedded systems can support being a USB Device, having USB Host capabilities is only seen in more powerful processors. Being able to act as a
host means that we can plug in a number of devices normally reserved for computers: keyboards, mice, flash drives, etc. If you really want to get involved in
USB development, this book is a great place to start.
Threading
If you are carefully reviewing the code, you might have noticed the keyword “Thread” appear. This is a function built into the mbed library that allows us to run
multiple processes at the same time (well, not quite. The processor relies on a technique called Scheduling to determine which process gets run, since only one
can run at a time in reality). It is important to understand that our mbed is powerful enough to allow us to run multiple threads (many, smaller microcontrollers,
such as the ATmega 328p, of Arduino fame, have trouble with multiple threads).
When a Thread is created, as in our USB Host example, it calls the function given in its parameters (keyboard_task, in this case). The threaded function runs
while the rest of the program continues at the same time (in theory, the “Flash an LED forever” section runs while “keyboard_task” is executing simultaneously).
If you would like more control over threads and the scheduling, take a look at mbed’s Real Time Operating System (RTOS) library.
Going Further
Adding USB lets us connect many different peripherals to our mbed. Additionally, we learned about threading, which lets us run multiple processes at the same
time.
Beyond the Tutorial
Make the backspace key actually delete characters on the LCD
Use the graphics functions of the LCD to control a ball with the keyboard’s arrow keys
Use a mouse to control a ball around the LCD (Hint: see USBHostMouse)
Read some files on a USB flash drive (Hint: see USBHostMSD)
Digging Deeper
HowStuffWorks has a great overview of USB
If you are particularly bored (or need the real source material), take a look at the newest USB Specification
Read about Real Time Operating Systems
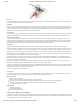
Experiment 7: USB Device
This tutorial covers USB devices with the mbed LPC1768. Using a USB mini-B breakout and some buttons, we enumerate the mbed as a USB mouse and
control the computer’s pointer with the buttons.