
Guide


1/12/2018 mbed Starter Kit Experiment Guide - learn.sparkfun.com
https://learn.sparkfun.com/tutorials/mbed-starter-kit-experiment-guide/all 36/65
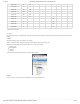
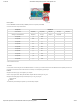
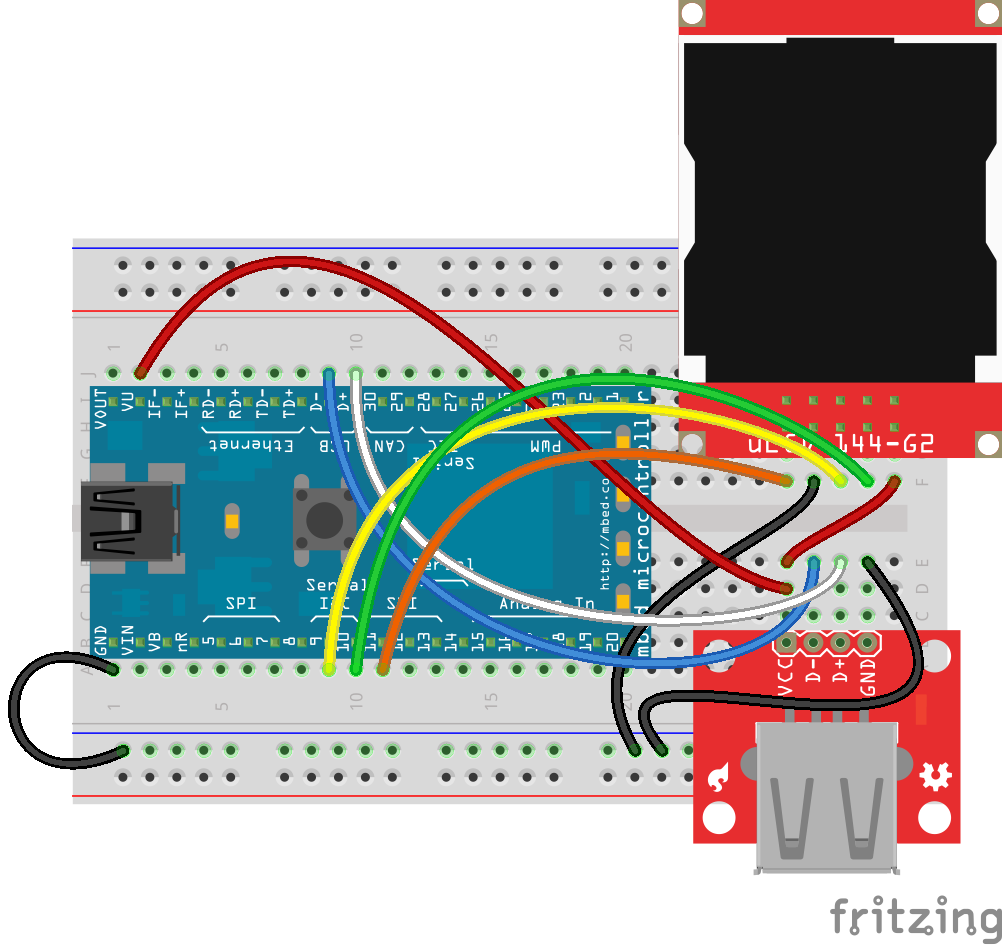
Hookup Table
Place the LPC1768 in a breadboard with pin VOUT in position i1 and pin 20 in position b20.
Connect the rest of the components as follows:
Component Breadboard
uLCD-144-G2* h26 (RES) h27 (GND) h28 (RX) h29 (TX) h30 (+5V)
USB Type A Female Breakout b26 (VCC) b27 (D-) b28 (D+) b29 (GND)
Jumper Wire j2 d26
Jumper Wire e26 f30
Jumper Wire a1 ( - )
Jumper Wire a9 f28
Jumper Wire a10 f29
Jumper Wire a11 f26
Jumper Wire ( - ) f27
Jumper Wire j9 e27
Jumper Wire j10 e28
Jumper Wire ( - ) e29
* Pins not listed are not used.
The Code
For this tutorial, we will be using the LCD and USB Host libraries. In our main.cpp, we create a thread that runs the USB Host function separately from the rest of
the program. This allows us to blink an LED and have it not interrupt or be interrupted by keyboard input.
Libraries
Navigate to the mbed.org, login, and navigate to your Compiler.
Create a new program with the “Blinky LED Hello World” template. Name it something like “usb_host.”
Navigate to the following pages and import each library into your “usb_host” program.
4DGL-uLCD-SE
USBHost
The mbed library should already be imported if you used the “Blinky” template.