
Guide


1/12/2018 mbed Starter Kit Experiment Guide - learn.sparkfun.com
https://learn.sparkfun.com/tutorials/mbed-starter-kit-experiment-guide/all 34/65
Concepts
Connecting something to the Internet opens up a whole new world. There is a lot going on to communicate to a remote server, so we recommend looking into a
few concepts to familiarize yourself with how the Internet works.
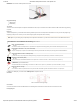
OSI Model
Ethernet is just one small component in making devices talk over the Internet. Many protocols make up Internet communications and can be thought of like an
onion. Each protocol layer corresponds to a layer within the onion, with your custom message (in this case, a request for time using NTP) in the middle. Several
other layers are stacked on top of your message in order to make the communications through the Internet work. If you would like to understand how these
protocols work, start with the 7-layer Open Systems Interconnection (OSI) model.
TCP and UDP
TCP and UDP are the two most important Transport Layer protocols. Transmission Control Protocol (TCP) is mostly used by services that require a guaranteed
delivery, such as websites and email. On the other hand, we were using the User Datagram Protocol (UDP) to send and receive time information with NTP.
Application Layer Protocols
Luckily, the mbed handles most of the protocols for us, with the help of some libraries. When we are writing applications in the mbed (or any system), we are
mostly concerned with the application layer to make devices talk to each other (as the lower levels are already implemented for us). In this tutorial, we relied on
the Network Time Protocol (NTP) to talk to a time server on the Internet. When it comes to programming embedded devices, the Dynamic Host Configuration
Protocol (DHCP), the Hypertext Transfer Protocol (HTTP), and the File Transfer Protocol (FTP) are also important.
Timekeeping
Embedded systems have several methods to keeping time. The two most popular ways are counting clock cycles and using a real-time clock (RTC).
If we know the frequency of the processor’s clock, then we can calculate how many clock cycles we need to wait if we want to delay by a certain amount of time.
For example, if we have a 100MHz clock, we know that a cycle happens every 0.01 microseconds (1 / 100MHz = 0.01 microseconds). If we want to delay 20
milliseconds, then we would have the processor do nothing for 2,000,000 cycles (0.01 microseconds x 2,000,000 = 20,000 microseconds = 20 milliseconds).
These delay functions have been wrapped up for you with mbed. To delay for a number of seconds, use wait(). The other two functions, wait_ms() and wait_us(),
allow you to delay by a number of milliseconds and microseconds, respectively.
Unfortunately, waiting by cycles is often not precise. Your clock speed may be slightly off (thanks to things like temperature), or your wait() function might be
interrupted by other code, which would throw off your ability to count exactly how much time has passed. Fortunately, there is a piece of hardware that can keep
time much more accurately: the real-time clock.
RTCs are often a separate chip with its own clock that has the sole purpose of keeping track of time. Many times (such as in the case of your computer), the
RTC will have a small battery attached so that it will remember the time even when you turn off your computer.
Luckily for us, the mbed has an RTC already built in to its circuitry. The mbed library handles talking to the RTC module so we can set and read the time. We call
set_time() to set the current time on the RTC and localtime() to read the time. Note that in the Internet Clock example, we use setTime(), a method in NTPClient,
to set the RTC time. We then use localtime() to retrieve the time.
To read more about real-time clocks, see this article.
Going Further
By connecting our mbed to the Internet, we opened up many new possibilities. We won’t continue with the Internet in this tutorial series, but feel free to try out
some of the suggested projects in “Beyond the Tutorial” to learn more about making devices talk to each other!
Beyond the Tutorial
Adjust the clock to your timezone
Display your current location using IP-based geolocation (Hint: read this article)
Using HTTP, can you download the contents of a website and display the HTML on your LCD? (Hint: see the HTTPClient library)
Make a feed on data.sparkfun.com and push some data to it (Hint: see this guide on pushing data to data.sparkfun)
Try running an HTTP Server on the mbed
Digging Deeper
The History of the Internet
The actual HTTP Specification
Read about the Internet of Things
Experiment 6: USB Host and Threading
In this tutorial, we turn the mbed LPC1768 into a USB host. For this, we will use mbed’s USBHost library and the USB Type A Female Breakout. Leave the LCD
connected, as we will use it to display characters from a USB keyboard. Additionally, we introduce the concept of threading so that we can essentially do 2 things
at once (specifically, listen for keystrokes and blink an LED).