
Guide


1/12/2018 mbed Starter Kit Experiment Guide - learn.sparkfun.com
https://learn.sparkfun.com/tutorials/mbed-starter-kit-experiment-guide/all 30/65
I2C (or “Inter-Integrated Circuit”) is a communications protocol built by Philips in the 1980s. As I2C is a bus protocol, it allows for multiple masters and multiple
devices to reside on the same bus and relies on addresses to communicate to specific devices. In our example, we used mbed’s I2C library to talk to the
accelerometer. To read more about the history of I2C, see this Wikipedia article.
Libraries
In the last tutorial, we imported an existing library. In this tutorial, we created a new library to make accessing the accelerometer easier. If you feel that you have
a solid, well documented library that you want to share with others, read through mbed’s Collaboration guide and specifically, how to write and publish a library.
Header Files
When we made our library, we created two files: a .h file and a .cpp file. The .h file is known as a header file. The header file contains declarations (variables,
functions, classes, etc.) for other files in the program to use.
In our main file (main.cpp), we include all of the declarations from the header file (MMA8452Q.h) with the statement
#include "MMA8452Q.h"
This, in effect, copies everything from the header file to the #include line.
You will also notice that we included the same header file in the MMA8452Q.cpp file. We declare all of our classes, functions, and variables in the header file and
define them in the .cpp file (read about the difference between declare and define).
When we compile our program, the compiler sees that we have declared the MMA8452Q class in the included header file, so we can use it in our main program.
It will also compile the MMA8452Q.cpp file into an object file.
During the linking phase, the object files are combined into a single executable that is downloaded to your computer as a .bin file.
Floating Point
If you are carefully reviewing the example code, you might have noticed the keyword “float.” If you have never dealt with floating point numbers, you might want
to read up on how they work. Kip Irvine provides a great floating point tutorial. If you are interested in the history of floating point, see this Wikipedia article.
Going Further
We made an accelerometer do some cool stuff on a graphical display. If you are following the tutorials in order, you will need the LCD for one more!
Beyond the Tutorial
Can you make a digital bubble level? (Hint: think about how a bubble works and adjust how we move the circle)
Can you make the ball bounce off the sides? (Hint: look at how we make the ball “sit on edges” and make it bounce instead)
Can you make a basic ball-in-a-maze game? (Hint: look at how we draw shapes with the LCD library and how to make the ball sit on edges)
Digging Deeper
Official I2C Primer
Read the actual I2C Specification (if you’re looking for a cure for insomnia)
Look into how someone else did an MMA8452 library
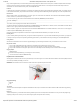
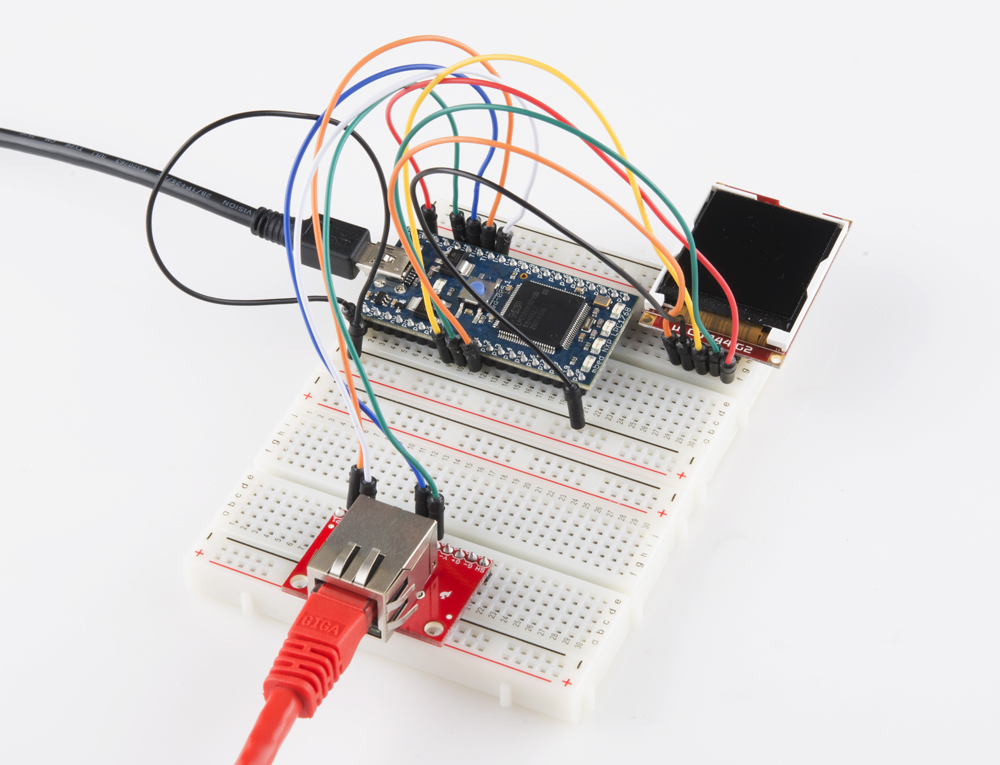
Experiment 5: Internet Clock
With the graphic LCD still connected, we hook up an Ethernet jack to our mbed to get it on the Internet. We will use the Network Time Protocol (NTP) to fetch the
current time (in UTC/GMT) and display it on the LCD.
IMPORTANT: You will need access to an Internet-connected router with an open Ethernet port for this tutorial.
Suggested Reading
Ethernet
NTP
The Circuit
This circuit can be made with parts in the SparkFun mbed Starter Kit. Also, keep in mind that the LPC1768 box contains a USB mini-B cable for programming
and power.
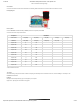
Parts List
To follow this experiment, you would will need the following materials if you did not order the SparkFun mbed starter kit. You may not need everything though
depending on what you have. Add it to your cart, read through the guide, and adjust the cart as necessary.