
Guide


1/12/2018 mbed Starter Kit Experiment Guide - learn.sparkfun.com
https://learn.sparkfun.com/tutorials/mbed-starter-kit-experiment-guide/all 29/65
// Demo for the uLCD-144-G2 and MMA8452Q 3-axis accelerometer
#include "mbed.h"
#include "MMA8452Q.h"
#include "uLCD_4DGL.h"
// Graphic LCD - TX, RX, and RES pins
uLCD_4DGL uLCD(p9,p10,p11);
// Accelerometer - SDA, SCL, and I2C address
MMA8452Q accel(p28, p27, 0x1D);
int main() {
// Initialize uLCD
uLCD.baudrate(115200);
uLCD.background_color(BLACK);
uLCD.cls();
// Initialize accelerometer
accel.init();
// Initial parameters for the circle
float x = 64;
float y = 64;
int radius = 4;
int speed = 4;
// Make a ball "fall" in direction of accelerometer
while (1) {
// Draw a red circle
uLCD.filled_circle((int)x, (int)y, radius, RED);
// Wait before erasing old circle
wait(0.02); // In seconds
// Erase old circle
uLCD.filled_circle((int)x, (int)y, radius, BLACK);
// Move circle. IMPORTANT! Notice how we adjust for sensor orientation!
x -= (speed * accel.readY());
y -= (speed * accel.readX());
// Make circle sit on edges
if ( x <= radius + 1 ) {
x = radius + 1;
} else if ( x >= 126 - radius ) {
x = 126 - radius;
}
if ( y <= radius + 1 ) {
y = radius + 1;
} else if ( y >= 126 - radius ) {
y = 126 - radius;
}
}
}
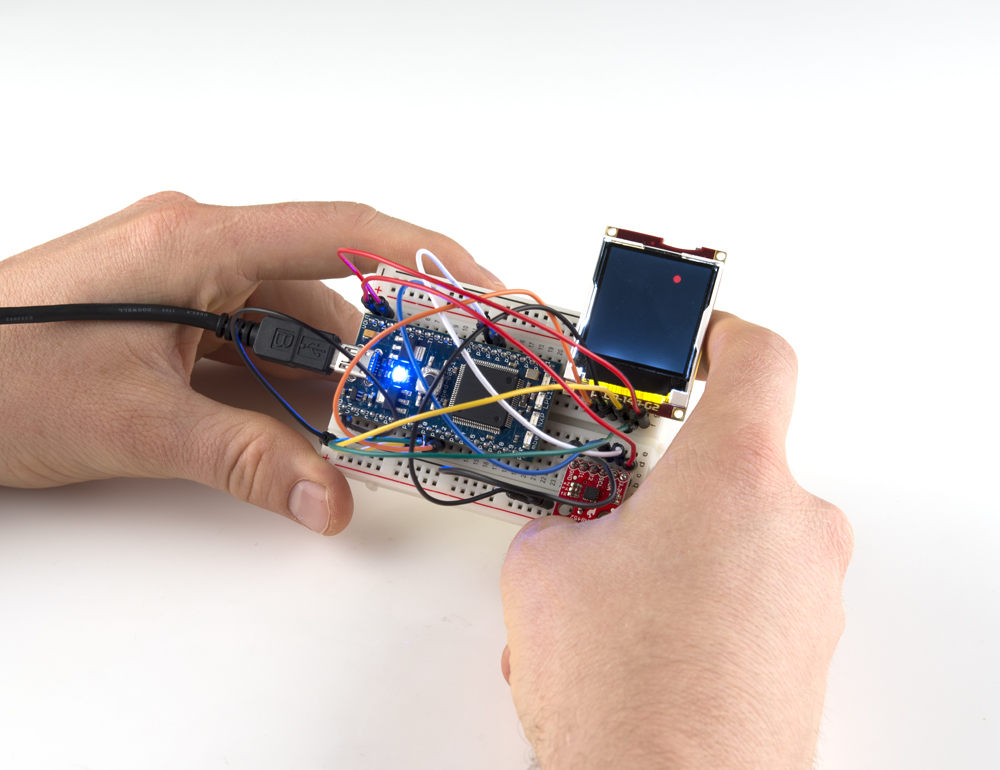
Run
Compile the program and copy the downloaded file to the mbed. Press the mbed’s restart button to see the LCD display a little red ball. Pick up the breadboard
and tilt it in different directions. You should see the ball start to move around!
Concepts
We touched on a few important concepts in this tutorial that you may want to understand.
I2C