
Guide


1/12/2018 mbed Starter Kit Experiment Guide - learn.sparkfun.com
https://learn.sparkfun.com/tutorials/mbed-starter-kit-experiment-guide/all 2/65
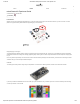
Features
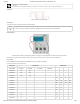
Here are the technical specifications of the LPC1768:
NXP LPC1768 MCU
ARM® Cortex™-M3 Core
96MHz
32KB RAM
512KB FLASH
Ethernet, USB Host orDevice, SPI x2, I2C x2, UART x3, CAN, PWM x6, ADC x6, GPIO
Platform form factor
54x26mm
40-pin 0.1" pitch DIP package
5V USB or 4.5-9V supply
Built-in USB drag ‘n’ drop FLASH programmer
Suggested Reading
What Is Electricity?
Voltage, Current, Resistance, and Ohm’s Law
What is a Circuit?
How to Use a Breadboard
Analog vs. Digital
Binary
Logic Levels
Digital Logic
Pulse-width Modulation
Pull-up Resistors
Light
Table of Contents
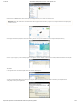
Now for the part you have been waiting for. The tutorials! This is where you get to open your mbed kit and play with all those cool parts. You should start with
Tutorial #1 in order to get familiar with mbed.org and the programming environment.
Tutorial 1 - Getting Started
We setup the mbed.org development environment and create our first program: Blinky!
Tutorial 2 - Buttons and PWM
Let’s make some light! We use some buttons to control the colors of an RGB LED
Tutorial 3 - Graphic LCD
The mbed kit includes a 1.44" LCD that we can make do cool things. We learn how to draw text and shapes on the LCD.
Tutorial 4 - Accelerometer
Now we start to pick things up. Literally. Using the accelerometer, we can interact with the mbed by tilting it in different directions.
Tutorial 5 - Internet Clock
The LPC1768 has the ability to connect to the Internet. Using an Ethernet cable, we can read the current time from an Internet server
and display the time on our LCD.
Tutorial 6 - USB Host and Threading
Our mbed board can act like a USB host. This means that we can connect things like keyboards to it.
Tutorial 7 - USB Device
In addition to acting like a USB host, the mbed can also act like a USB device! This means that we can have it control the mouse pointer
on our computer, for example.