
Guide

1/12/2018 mbed Starter Kit Experiment Guide - learn.sparkfun.com
https://learn.sparkfun.com/tutorials/mbed-starter-kit-experiment-guide/all 12/65
Concepts
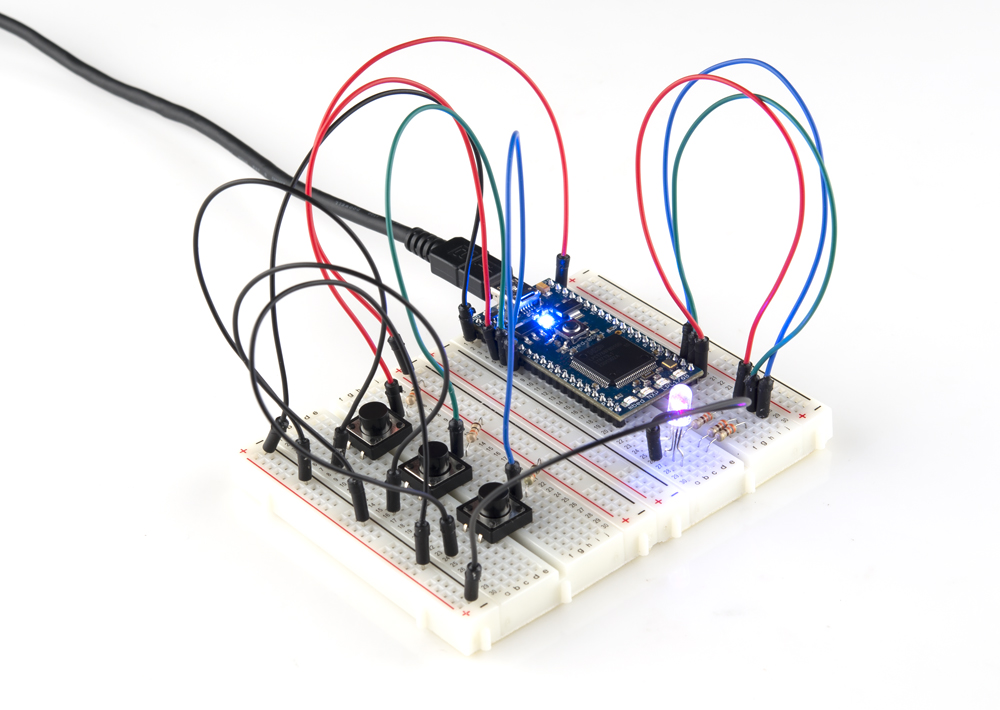
What is going on in our program? We should understand a few concepts about our seemingly simple RGB LED and button program that are crucial in embedded
systems.
Pull-up Resistors
We use 10kΩ pull-up resistors to prevent shorting 3.3V to ground whenever we push one of the buttons. Additionally, the pull-up resistors on the microcontroller
(LPC1768) pin holds the pin at 3.3V by default until the button is pushed. Once pushed, the line is pulled down to ground, so the pin goes from 3.3V to ground.
We can use that falling edge (3.3V to 0V) to trigger an interrupt within the microcontroller. To learn more about pull-up resistors, see our tutorial here.
Functions
If you are not familiar with C syntax, you might want to brush up on some of the basics.
In the above code, we created 3 functions: inc_red(), inc_green(), inc_blue(). Functions generally perform some action when called, and replace the much-
maligned GOTO statement. They also allow us to re-use code without having to copy-and-paste sections of code over and over again.
Each time we call one of the functions (e.g. inc_green()), the lines of code within that function are called, and then the function exits, returning program execution
to just after the function call.
Notice that we placed the three functions above main(). When the compiler looks at the code, it needs to have functions declared before they are used in the
code (within main() in this case).
If you put main() before the functions, you would get a compiler error. That’s because the compiler does not know what int_red(), etc. are when it sees them in
main(). Try it!
Objects
We are using C++ to write all of our programs. If you have never used C++ before, the syntax might appear a bit foreign. We recommend reading about some
basic C++ syntax first.
In the program, we create objects for each of our buttons and LEDs. For example:
InterruptIn button_red(p5);
and
PwmOut led_red(p21);
button_red is an instance of class InterruptIn. Think of a class as a “blueprint” that lets us create any number of instances (i.e. objects). Each instance is tied to a
variable (e.g. button_red). In this case, button_red is an InterruptIn object.
Objects have special properties that let us call functions within that object (called “member functions”) and manipulate data stored in the object (data in objects is
stored as “data members”). For example, we create a PwmOut object named led_red. Later in the code, we call the member function led_red.write(0.0f), which
tells the led_red object to perform some action (change the PWM of the associated pin in this case - see PWM below!).
We pass in the parameter p5 (a special variable known to the mbed compiler - it points to the location of pin 5 in software) when we create an InterruptIn object.
This tells the mbed which pin to bind the interrupt to.
Now that we have created an InterruptIn object, we can call member fucntions within that object. The InterruptIn class defines a fall() member function, which
allows us to set a function to be called whenever a HIGH-to-LOW transition occurs on the pin (pin 5 in this case).
button_red.fall(&inc_red);
Note that the ‘&’ symbol is used to indicate the address of the inc_red function.
Interrupts
Interrupts are an integral part of embedded systems and microcontrollers. Most programs that you might be used to run sequentially, meaning that the program
executes each line in order (and jumps or loops where necessary). In contrast, many microcontrollers rely on subroutines known as “Interrupt Service Routines”
to handle external and internal events.
In our mbed program, we “attach” an interrupt to our button pins and tie this interrupt to a function call (e.g. inc_red()). The line
button_red.fall(&inc_red);
says that whenever we see a falling digital signal (i.e. from 3.3V to 0V), we must stop whatever we were doing and execute the function inc_red(). This is similar
to callbacks often found in programming but can be tied to external (i.e. outside the microcontroller) events.
YouTube user Patrick Hood-Daniel offers a great explanation of interrupts and some example code in a different microcontroller (Atmel AVR ATmega32):