
Guide

3/7/2018 SparkFun Inventor's Kit for micro:bit Experiment Guide - learn.sparkfun.com
https://learn.sparkfun.com/tutorials/sparkfun-inventors-kit-for-microbit-experiment-guide/all#introduction-to-microsoft-makecode 27/63
Troubleshooting
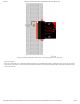
LED Remains Dark or Shows Incorrect Color
With the four pins of the LED so close together, it’s sometimes easy to misplace one. Double check that each pin is where it
should be.
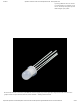
Seeing Red
The red diode within the RGB LED may be a bit brighter than the other two. To make your colors more balanced, use a higher
ohm resistor.
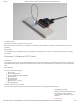
Experiment 5: Reading an SPDT Switch
Introduction
In this experiment you will use your first digital input: a switch. The SPDT (Single-Pole, Double-Throw) switch is a simple way to
select between two options, especially when paired with an if state. You will use that switch to select which of the two LEDs will
blink.
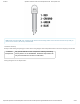
Parts Needed
You will need the following parts:
1x micro:bit
1x Micro B USB Cable
1x micro:bit Breakout (with Headers)
1x Breadboard
8x Jumper Wires
1x SPDT Switch
2x LED (1 Red, 1 Yellow)
2x 100Ω Resistors
Didn’t Get the SIK for micro:bit?
If you are conducting this experiment and didn’t get the Inventor’s Kit, we suggest using these parts:
Suggested Reading
Before continuing with this tutorial, we
recommend you be somewhat
familiar with the concepts in these
tutorials:
Switch Basics