
Guide

3/7/2018 SparkFun Inventor's Kit for micro:bit Experiment Guide - learn.sparkfun.com
https://learn.sparkfun.com/tutorials/sparkfun-inventors-kit-for-microbit-experiment-guide/all#introduction-to-microsoft-makecode 26/63
Note: You may need to disable your ad/pop-up blocker to interact with the MakeCode programming environment and
simulated circuit!
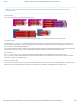
Code to Note
Let’s take a look at the code blocks in this experiment.
If you are having a hard time viewing this code, click on the image above to get a better look!
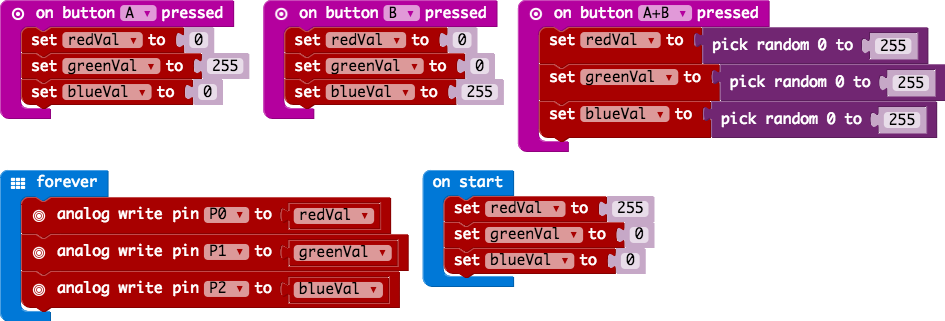
On Button Press
You will find the on Button Press block under the input block section. It is a different type of block than you are used to. It is
what is called an event block — code that is triggered when something happens, and only when that happens. In this case it is
when one of the onboard buttons is pressed.
You can select between button A, button B and when both buttons (A+B) are pressed. Note that there is also a pin event function
that works the same way, and you can use it with external buttons to build your own external hardware events.
Pick Random
In the on Buttons A+B pressed block you will notice that we set the color pin variables to random numbers using
the pick random block. You give this block a range of values between 0 and another value. In this case we use 255, which is
peak of the analog write block’s output.
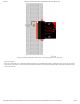
What You Should See
You should see your LED turn on red. If you press the A button on the micro:bit, the color will change to green; if you press the B
button, the color will change to blue; and finally, if you press the A and B button, the RGB will turn a random color.