
Guide

3/7/2018 SparkFun Inventor's Kit for micro:bit Experiment Guide - learn.sparkfun.com
https://learn.sparkfun.com/tutorials/sparkfun-inventors-kit-for-microbit-experiment-guide/all#introduction-to-microsoft-makecode 22/63
Troubleshooting
LED Remains Dark
You may have been leaning over the light sensor when the code started. Make sure the light sensor is reading the normal light in
the room at startup. Try resetting the micro:bit.
Still Not Quite Working
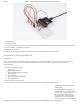
Double-check your wiring of the signal pin; sometimes you miss a breadboard connection by a row.
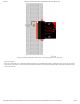
Experiment 4: Driving an RGB LED
Introduction
You know what’s even more fun than a blinking LED? Changing colors with one LED. In this circuit, you’ll learn how to use an
RGB LED to create unique color combinations. Depending on how bright each diode is, nearly any color is possible!
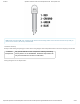
Parts Needed
You will need the following parts:
1x micro:bit
1x Micro B USB Cable
1x micro:bit Breakout (with Headers)
1x Breadboard
1x Jumper Wire
1x Common Cathode RGB LED
3x 100Ω Resistors
Didn’t Get the SIK for micro:bit?
If you are conducting this experiment and didn’t get the Inventor’s Kit, we suggest using these parts:
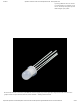
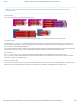
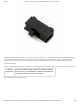
Introducing the Red/Green/Blue
(RGB) LED
The Red/Green/Blue (RGB) LED is
three LEDs in one. The RGB has four
pins with each of the three shorter
pins controlling an individual color:
red, green or blue. The longer pin of
the RGB is the common ground pin.
You can create a custom-colored LED