
Guide

3/7/2018 SparkFun Inventor's Kit for micro:bit Experiment Guide - learn.sparkfun.com
https://learn.sparkfun.com/tutorials/sparkfun-inventors-kit-for-microbit-experiment-guide/all#introduction-to-microsoft-makecode 11/63
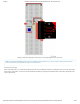
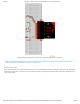
Note: You may need to disable your ad/pop-up blocker to interact with the MakeCode programming environment and
simulated circuit!
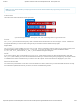
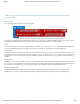
Code to Note
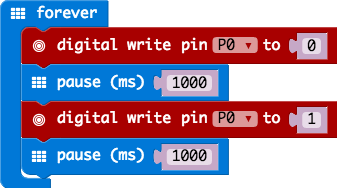
Let’s take a look at the code blocks in this experiment.
If you are having a hard time viewing this code, click on the image above to get a better look!
Forever
The forever block is a block that loops any other command blocks inserted into it over and over again…forever. It starts from
the top and executes your code in order working its way to the bottom and then starts at the top again.
Digital Write
The DigitalWrite block enables you to turn a pin on or off. There is a dropdown option for which pin you want to control, and it
accepts a variable as the pins state. You use 1 as on and 0 as off. If you prefer, you can also use Boolean states
of true and false , but we will use 0 and 1 as our standard throughout this guide.
Pause
If you were to just turn pins on and off with the digital write block without a pause, the LED would blink really, really fast.
The pause block enables you to slow the micro:bit down and lets you control the timing of things happening. It accepts a number
or variable as the number of milliseconds you want the micro:bit to pause. Think of this block as a stoplight for your code!
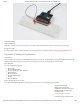
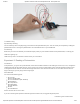
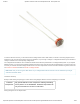
What You Should See
You should see your LED blink on and off at 1-second intervals. If it doesn’t, make sure you have assembled the circuit correctly
and verified and uploaded the code to your board, or see the Troubleshooting section.