
Getting Started Guide

3/7/2018 Getting Started with the micro:bit - learn.sparkfun.com
https://learn.sparkfun.com/tutorials/getting-started-with-the-microbit?_ga=2.181651687.1167766512.1520447360-204410570.1509632255 2/13
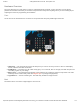
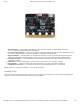
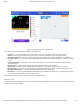
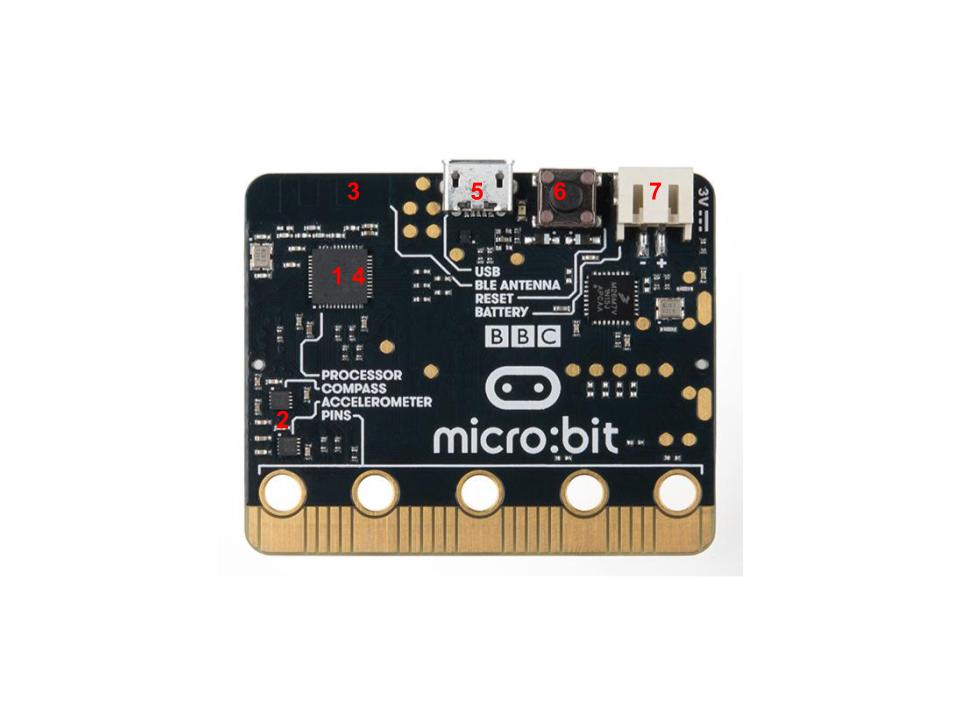
1. Microcontroller — The brains of the outfit. The micro:bit is powered by a 16MHz ARM Cortex-M0
microcontroller with 256KB Flash and 16KB RAM.
2. Accelerometer/Compass — The micro:bit has an onboard accelerometer that measures gravitational force,
as well as a compass that can detect its orientation using Earth’s magnetic field.
3. Bluetooth/Radio — Communication is huge with the micro:bit. You can communicate with your phone or
tablet using Bluetooth Low Energy (BLE) or between two or more micro:bits using the standard “radio”
4. Temperature Sensor — No, the drawing is not numbered incorrectly! The microcontroller doubles as a
temperature sensor!
5. USB Port — used to upload code to your micro:bit or power from your computer or laptop.
6. Reset Button — A button to reset your micro:bit and start your code over from the beginning.
7. JST Battery Connector — A connector to hook up an external battery pack to your micro:bit.
Phew! That is a lot of bells and whistles…a true Swiss army knife!
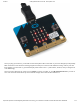
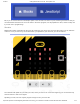
Hooking It Up
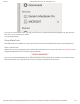
The micro:bit uses a microUSB cable to hook up to your computer or Chromebook. It is as simple as plugging the
cable into your micro:bit and the other end into an open USB port.