
Getting Started Guide

3/7/2018 Getting Started with the micro:bit - learn.sparkfun.com
https://learn.sparkfun.com/tutorials/getting-started-with-the-microbit?_ga=2.181651687.1167766512.1520447360-204410570.1509632255 1/13
Hardware Overview
The micro:bit has a lot to offer when it comes to onboard inputs and outputs. In fact, there are so many things
packed onto this little board that you would be hard pressed to really need anything else if you were looking at just
exploring the basics of programming and hardware.
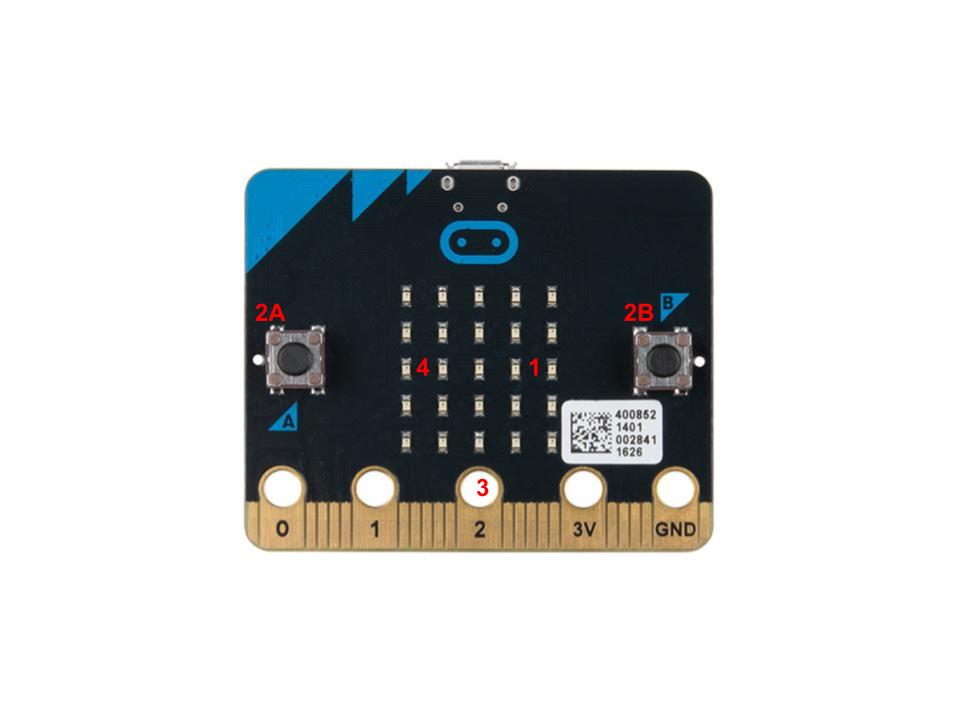
Front
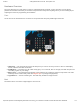
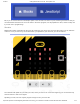
On the front of the board there are a number of components that are pretty visible right off the bat!
1. LED Array — The micro:bit has a 5x5 LED array that you can use as a tiny screen to draw on and display
words, numbers and other information.
2. A/B Buttons — Two buttons in all of their clicky glory: A is on the left, B is on the right, and both are prime for
controlling a game of your design.
3. Edge “Pins” — The gold tabs at the bottom of the board are for hooking up external components. The tabs
with larger holes can be easily used with alligator clips to prototype things quickly!
4. Light Sensor — A bit of a hidden gem. The LED array doubles as a light sensor!
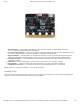
Back
The back is where a lot of the magic happens. Check it out…