
Data Sheet


57 : circuit 3a
PROGRAM OVERVIEW
Read the value of the potentiometer.
Convert the potentiometer value (0–1023) to an angle (20–160).
Tell the servo to go to this angle.
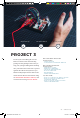
WHAT YOU
SHOULD SEE
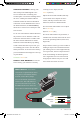
Turning the potentiometer will
cause the servo arm to turn. The
servo will mimic the movement
of the potentiometer, twisting in
the same clockwise or counter-
clockwise direction. If you’ve
attached a servo mount to the arm
as shown, this movement will be
easier to see.
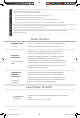
Open the Arduino IDE
Connect the RedBoard to a USB port on your computer.
Open the Sketch:
File > Examples >SIK_Guide_Code-V_4 > SIK_CIRCUIT_A-SERVO
Select UPLOAD to program the sketch on the RedBoard.
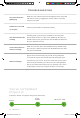
CODE TO NOTE
INCLUDING LIBRARIES:
#include <Servo.h>
The #include command adds a library to your
Arduino program. After you include a library,
you can use the commands in the library in your
program. This line adds the built-in Servo Library.
CREATING SERVO OBJECTS:
Servo myServo;
The Servo command creates a new servo object
and assigns a name to it, myServo in this case. If
you make more than one servo object, you will
need to give them different names.
SIK v4 Book Oct 13.indb 57 10/18/17 10:00 AM