
Getting Started Guide


11/16/2017 Getting Started with the micro:bit - learn.sparkfun.com
https://learn.sparkfun.com/tutorials/getting-started-with-the-microbit?_ga=2.220747408.983033930.1510848989-204410570.1509632255 2/8
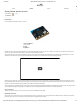
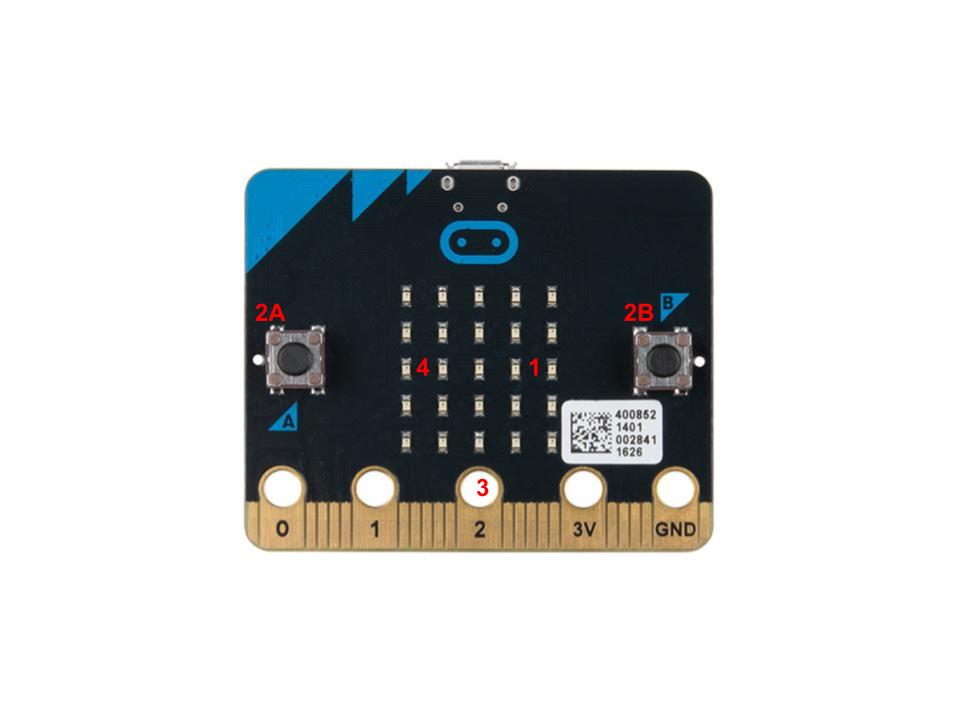
Front
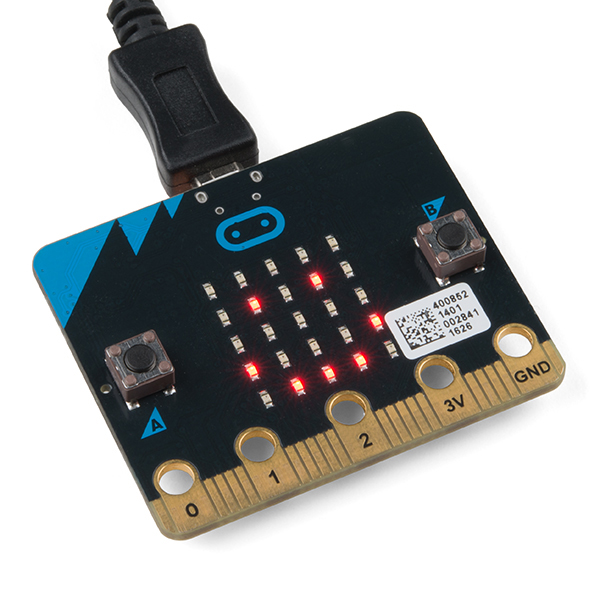
On the front of the board there are a number of components that are pretty visible right off the bat!
1. LED Array — The micro:bit has a 5x5 LED array that you can use as a tiny screen to draw on and display words, numbers and other information.
2. A/B Buttons — Two buttons in all of their clicky glory: A is on the left, B is on the right, and both are prime for controlling a game of your design.
3. Edge “Pins” — The gold tabs at the bottom of the board are for hooking up external components. The tabs with larger holes can be easily used with alligator clips to
prototype things quickly!
4. Light Sensor — A bit of a hidden gem. The LED array doubles as a light sensor!
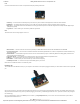
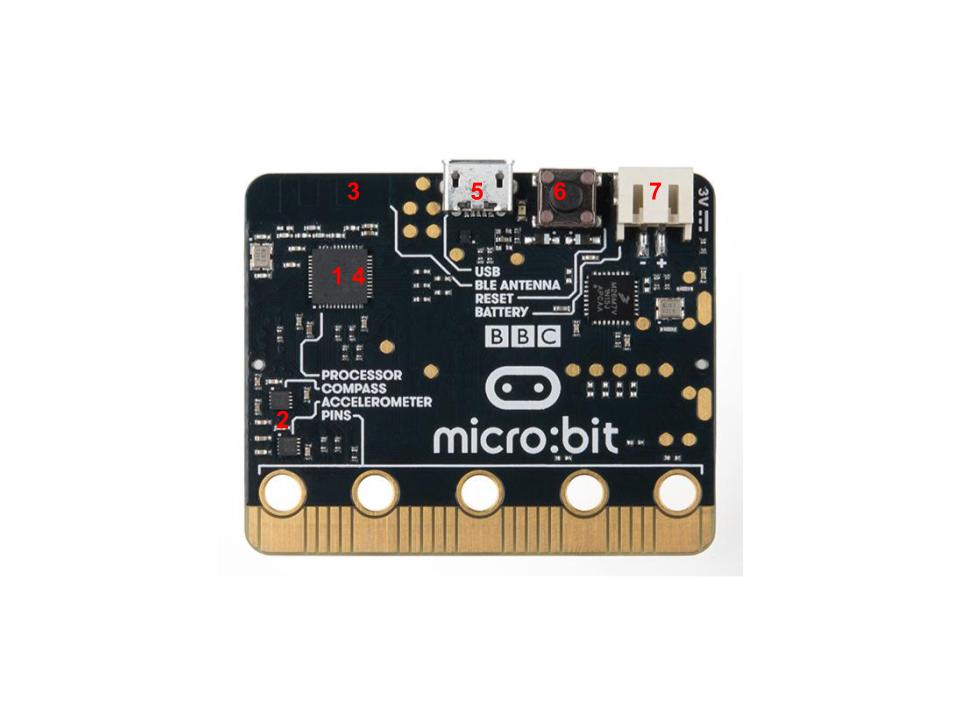
Back
The back is where a lot of the magic happens. Check it out…
1. Microcontroller — The brains of the outfit. The micro:bit is powered by a 16MHz ARM Cortex-M0 microcontroller with 256KB Flash and 16KB RAM.
2. Accelerometer/Compass — The micro:bit has an onboard accelerometer that measures gravitational force, as well as a compass that can detect its orientation using
Earth’s magnetic field.
3. Bluetooth/Radio — Communication is huge with the micro:bit. You can communicate with your phone or tablet using Bluetooth Low Energy (BLE) or between two or
more micro:bits using the standard “radio”
4. Temperature Sensor — No, the drawing is not numbered incorrectly! The microcontroller doubles as a temperature sensor!
5. USB Port — used to upload code to your micro:bit or power from your computer or laptop.
6. Reset Button — A button to reset your micro:bit and start your code over from the beginning.
7. JST Battery Connector — A connector to hook up an external battery pack to your micro:bit.
Phew! That is a lot of bells and whistles…a true Swiss army knife!
Hooking It Up
The micro:bit uses a microUSB cable to hook up to your computer or Chromebook. It is as simple as plugging the cable into your micro:bit and the other end into an open USB
port.
Once you plug your board in, you should see the small yellow LED on the back of your micro:bit light up and possibly blink a few times. Then whatever existing program that
was put on the micro:bit will start running. If this is your first time plugging your micro:bit in, go ahead and play around with it a bit — push buttons, shake it, and you will get a
bit of an Easter egg.
Once your micro:bit boots up, check out your Finder if you are on a Mac, or your My Computer Drives if you are on a PC. The micro:bit should show up as an external
storage device with two files stored in it.